How to Record Audio in Vegas Pro?

For digital creators today, outstanding audio quality matters just as much as visually appealing content. Whether you’re producing a music track, podcast, voiceover, or adding narration to your video, capturing clear audio is crucial. Vegas Pro, a popular video editing software, offers powerful tools not only for video editing but also for audio recording and editing. This article will walk you through how to record audio in Vegas Pro, how to select and change audio sources, along with an overview of its strengths and weaknesses as an audio recording tool.
1. What is Vegas Pro?
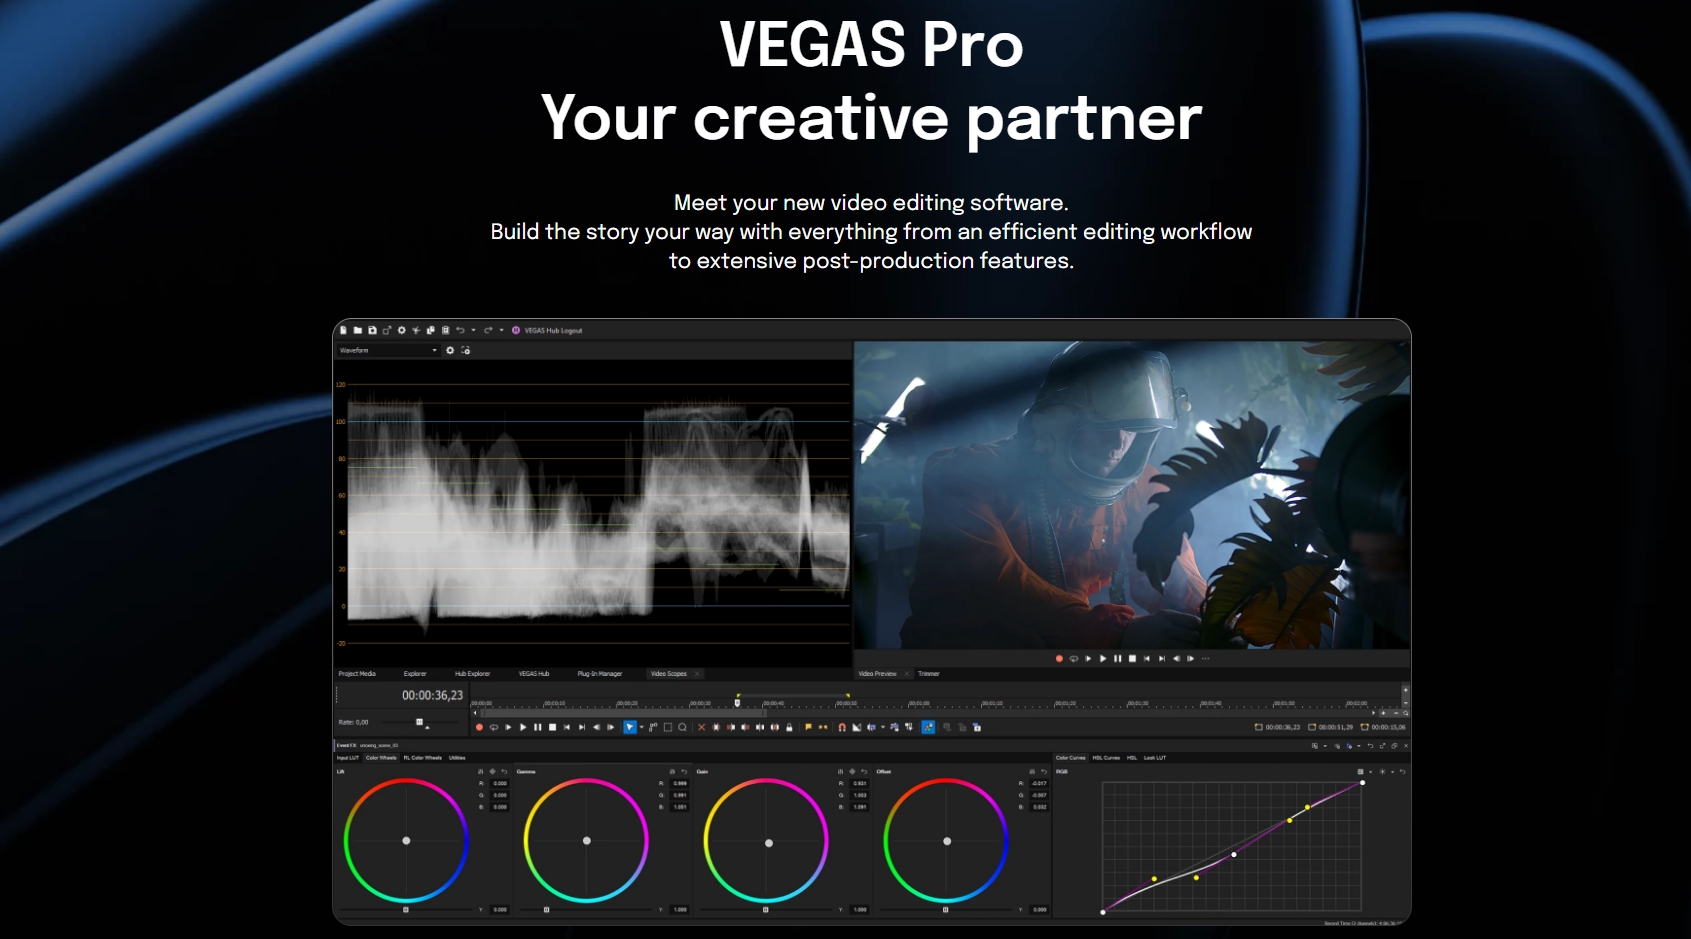
Vegas Pro is a professional video and audio editing software developed by MAGIX Software GmbH (originally by Sony Creative Software). It is widely used by filmmakers, YouTubers, podcasters, and multimedia professionals for its robust timeline-based editing interface. Vegas Pro supports a broad range of video and audio formats and offers a rich set of tools for editing, color grading, special effects, and audio mastering.
Key features of Vegas Pro include:
- Multi-track video and audio editing.
- Real-time effects and transitions.
- Advanced audio tools like noise reduction, EQ, and mixing.
- Support for 4K and HDR videos.
- Integrated recording capabilities for audio and video.
- Intuitive drag-and-drop timeline interface.
While primarily recognized for its video editing power, Vegas Pro also enables users to record audio directly within the program, making it a handy all-in-one tool for multimedia creators.
2. Step-by-Step Guide on How to Record Audio in Vegas Pro?
Recording audio in Vegas Pro is straightforward by following these simple steps:
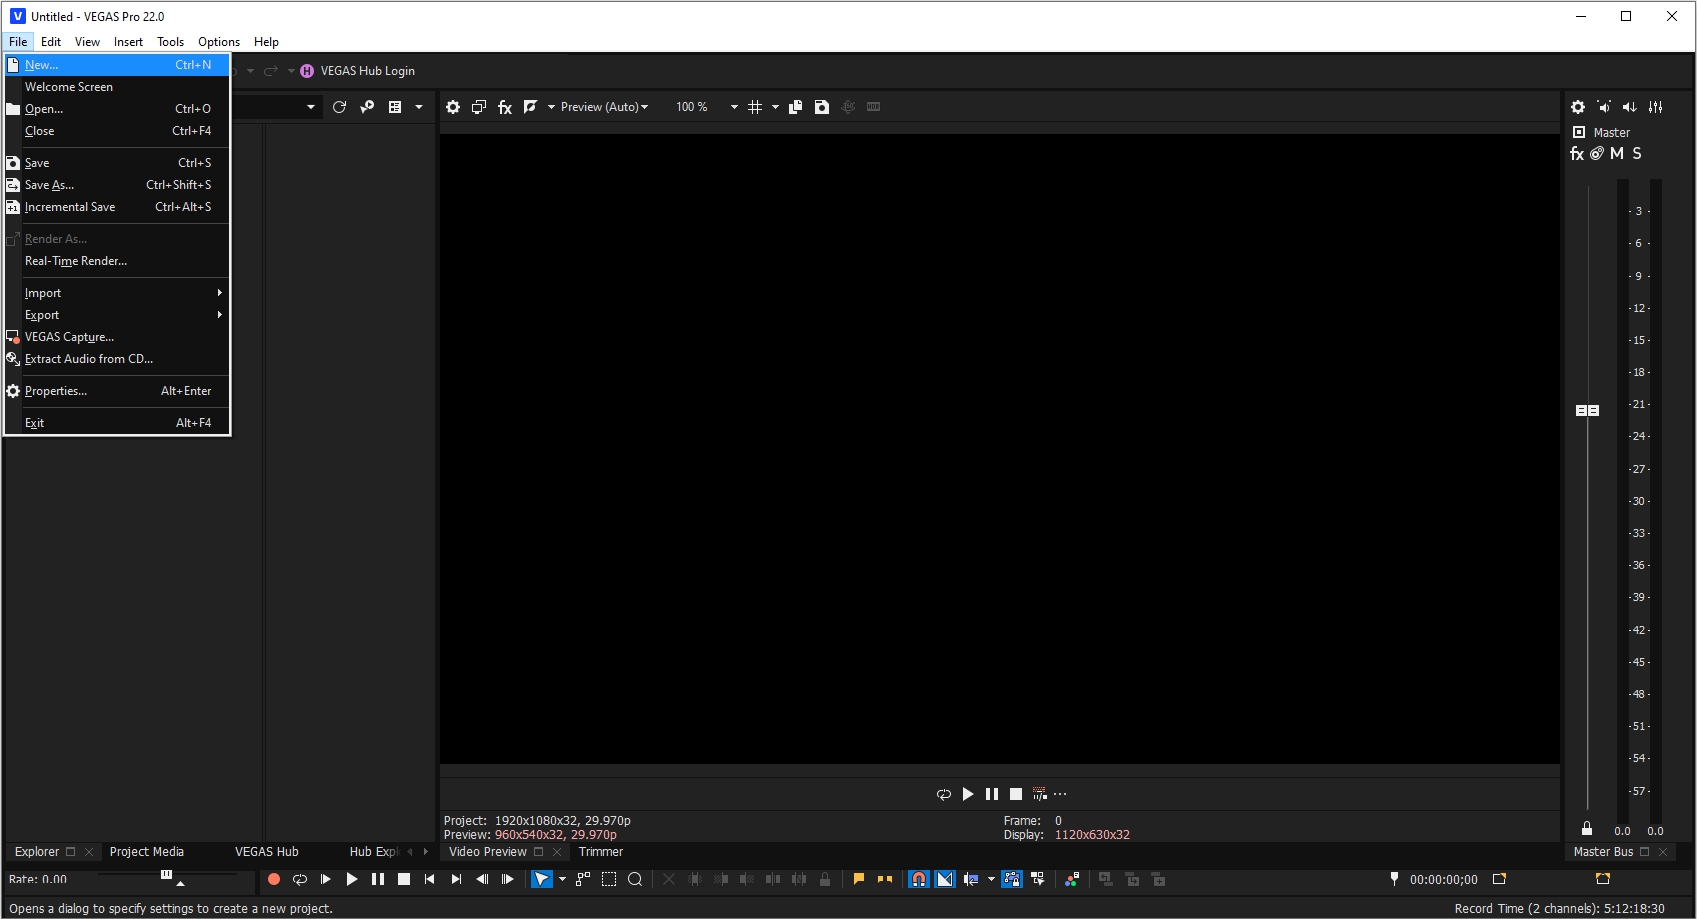
Step 1: Create a New Project within Vegas Pro
Download, install and launch Vegas Pro on your computer and create a new project by going to File > New. Set your project parameters as desired (resolution, frame rate, etc.), then proceed to the timeline.
Step 2: Add an Audio Track
To record audio, simply right-click the timeline area, choose “Insert Audio Track,” and a dedicated track for your recording will be added.

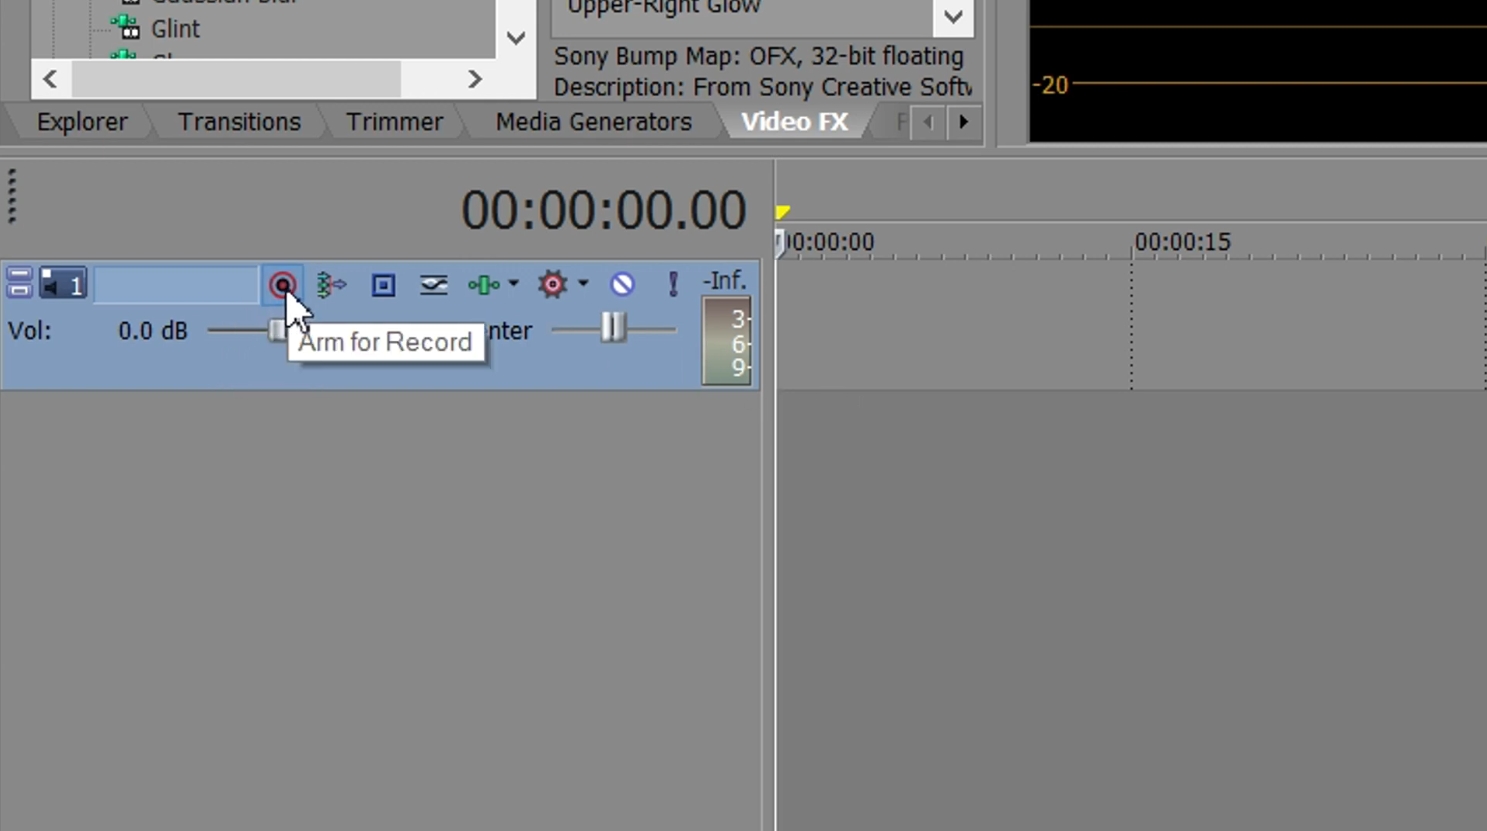
Step 3: Set Up the Recording Controls
Look for the Track Header on your audio track, where you’ll find controls such as Arm for Record (a red circle), click the button to enable recording on this track.
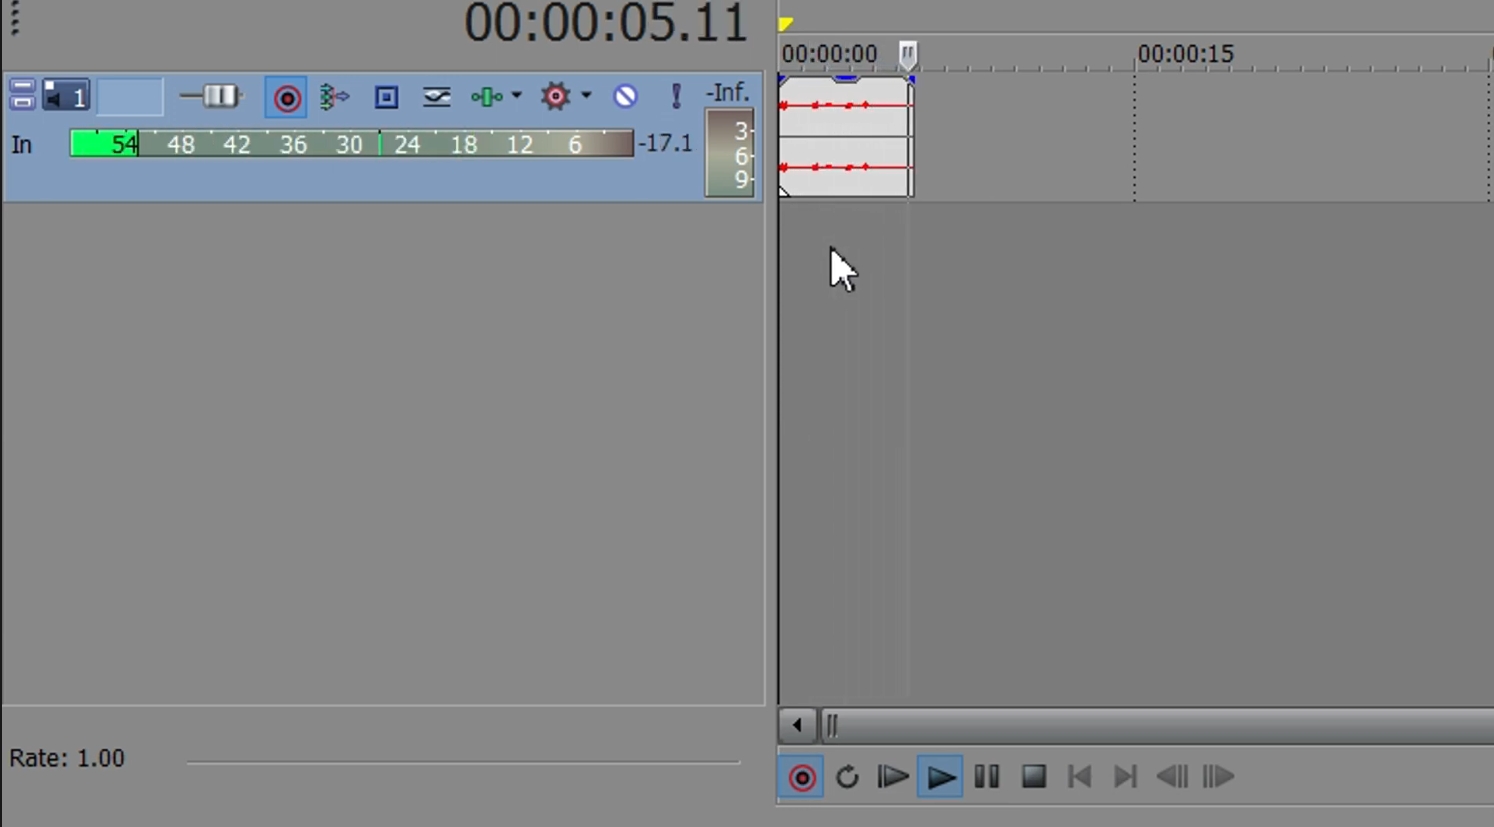
Step 4: Start Recording
Once your track is armed and your input device is selected, move the playhead to the point where you want to start recording.
- Click the Record button on the transport controls and Vegas Pro will start recording audio onto the armed track.
- When you’re done, click the Stop button and make any needed edits to the audio.
3. Step-by-Step Guide on How to Change Audio Source in Vegas Pro?
If you want to switch the microphone or input device during your session, here’s how:
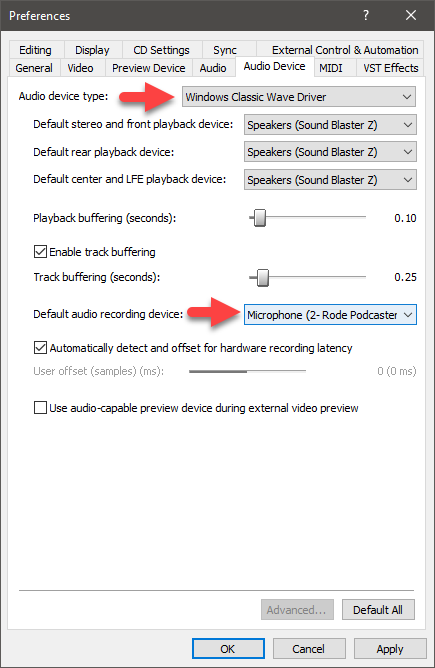
- From the top menu of Vegas Pro, select Options, then Preferences, and click on the Audio Device tab.
- Under Audio device type and Default audio recording device, you will see a dropdown list of available audio input devices.
- Select the new device (e.g., USB microphone, built-in mic, audio interface), then click Apply and then OK.
Vegas Pro will now record from the newly selected audio input. Keep in mind that changing audio devices mid-project may cause some inconsistencies, so it’s best to finalize your device choice before recording.
4. Pros and Cons of Using Vegas Pro to Record Audio
Pros:
- Integrated audio recording within video editing workflow
- Supports multi-track recording
- Powerful audio editing and effects tools
- Perfect synchronization with video timeline
- Customizable input settings
Cons:
- Steep learning curve for beginners
- Resource-heavy software
- Need to create account even for free trial
- Premium cost may be too high for simple audio tasks
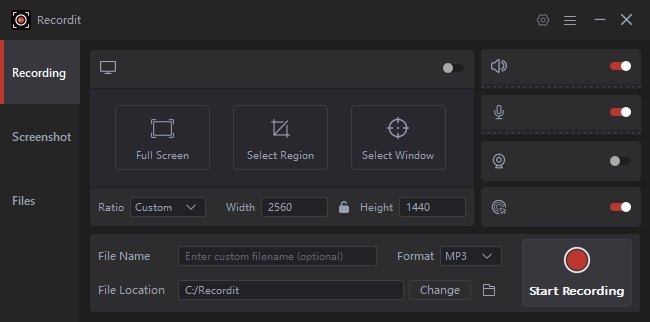
5. Record Audio With Swyshare Recordit Instead of Vegas Pro
If you find Vegas Pro’s audio recording capabilities a bit complex or if you’re looking for a simpler, more streamlined tool to capture audio (and video), Swyshare Recordit is a fantastic alternative.
Built for speed and ease, Swyshare Recordit enables effortless audio and video recording on Windows and Mac. It is perfect for content creators, educators, or anyone needing an easy way to record system audio, microphone input, or screen activity.
Why Choose Swyshare Recordit?
- Start recording fast with an intuitive, easy-to-use interface.
- Support multiple audio sources, ensuring clear and crisp sound.
- Record your screen alongside audio for tutorials, presentations, or gameplay.
- Record audio with high quality and export within a few seconds.
- Runs smoothly even on lower-end machines without lag.
- Provide excellent value with straightforward pricing.
How to use Recordit to record audio:
- Download the proper Recordit installer and finish installing the software.
- Open Recordit and pick the recording type: audio only or screen plus audio.
- Select your audio source (either microphone or system audio) on Recordit’s main interface.
- Start capturing audio with a click, then stop recording when complete.
6. Conclusion
Vegas Pro is a powerful all-in-one editor but can be complex for simple audio recording. For an easy, reliable, and high-quality audio recorder, Swyshare Recordit is the best choice. Its user-friendly design and smooth performance make recording audio quick and hassle-free for all skill levels. If you want simple, effective audio recording without the steep learning curve, give Recordit a try.