How to Add a Transparent Image to OBS?

Transparent images play an essential role in modern video production and live streaming. Whether you’re a gamer adding a logo watermark, a content creator designing a webcam frame, or a business streamer displaying branded overlays, transparent images allow you to layer visuals without blocking the underlying video. OBS Studio (Open Broadcaster Software) is one of the most popular free tools for streaming and recording, and it fully supports transparent images such as PNGs, WebPs, and even videos with alpha channels. In this guide, you’ll learn how to add a transparent image to OBS step by step, and how to troubleshoot common problems.
1. How to Add a Transparent Image to OBS?
OBS supports transparency natively, but the key is using the correct file format and source settings. Below are the most reliable methods.
1.1 Prepare a Transparent Image
Before opening OBS, make sure your image meets these requirements:
- File format: PNG or WebP (JPG does NOT support transparency)
- Background: Truly transparent (alpha channel enabled)
- Resolution: Ideally close to your OBS canvas size to avoid scaling blur
You can create transparent images using tools like Photoshop, GIMP, Canva (export as PNG with transparency), or online background removers.
1.2 Add a Transparent Image Source in OBS
This is the most common and beginner-friendly method.
Steps:
- Open OBS Studio > In the Sources panel, click the “+” button > Select Image
- Name the source (e.g., “Logo Overlay”) and click OK > Click Browse and select your transparent PNG image > Click OK
Once added, OBS will automatically respect the transparent areas of the image. Anything transparent in the PNG will show what’s behind it on the canvas.
1.3 Resize, Crop, and Position the Image
After adding the image, you can customize its placement:
- Resize: Drag the red bounding box corners
- Crop: Hold Alt (Windows) or Option (Mac) and drag the edges
- Precise positioning:
Right-click the image → Transform → Edit Transform
You can also lock the source once positioned to prevent accidental movement.
1.4 Improve Image Quality in OBS
If your transparent image looks blurry or jagged:
- Right-click the image source > Go to Scale Filtering > Select Lanczos (36 samples) for best quality
Also ensure your Base (Canvas) Resolution and Output Resolution in OBS settings are appropriate for your recording or stream.
1.5 Add Transparent Animated Images or Videos
OBS also supports animated transparent overlays, which are commonly used for alerts and motion graphics.
Supported formats with transparency:
- WebM (VP8/VP9 with alpha)
- MOV (ProRes 4444)
- APNG (Animated PNG)
Steps:
- Click “+” in Sources > Choose Media Source > Browse and select the transparent video file > Enable Loop if needed > Click OK
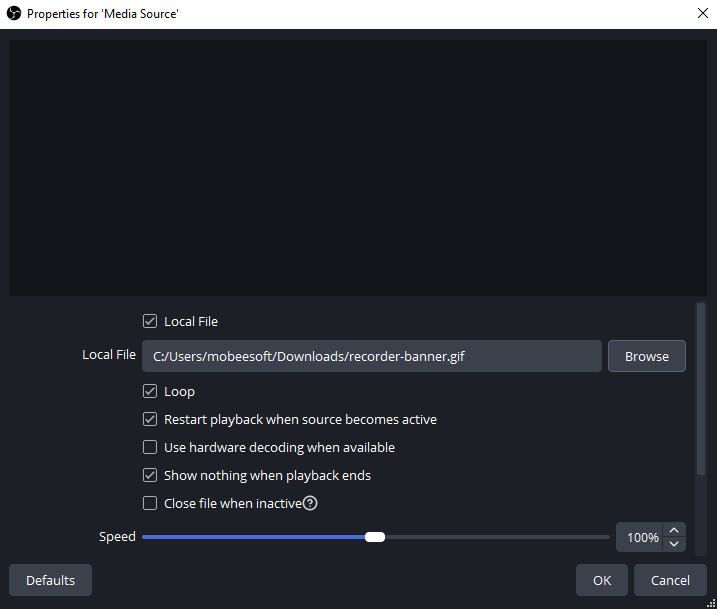
This is ideal for animated logos, stinger elements, or alert animations.
1.6 Remove Background Using Color Key (Optional)
If your image does not have transparency (for example, a logo on a white or green background), you can fake transparency using filters.
Steps:
- Add the image as a normal Image Source > Right-click the image → Filters
- Under Effect Filters, click “+” > Select Color Key
- Choose the background color (Green, Blue, or Custom)
- Adjust Similarity, Smoothness, and Spill Reduction
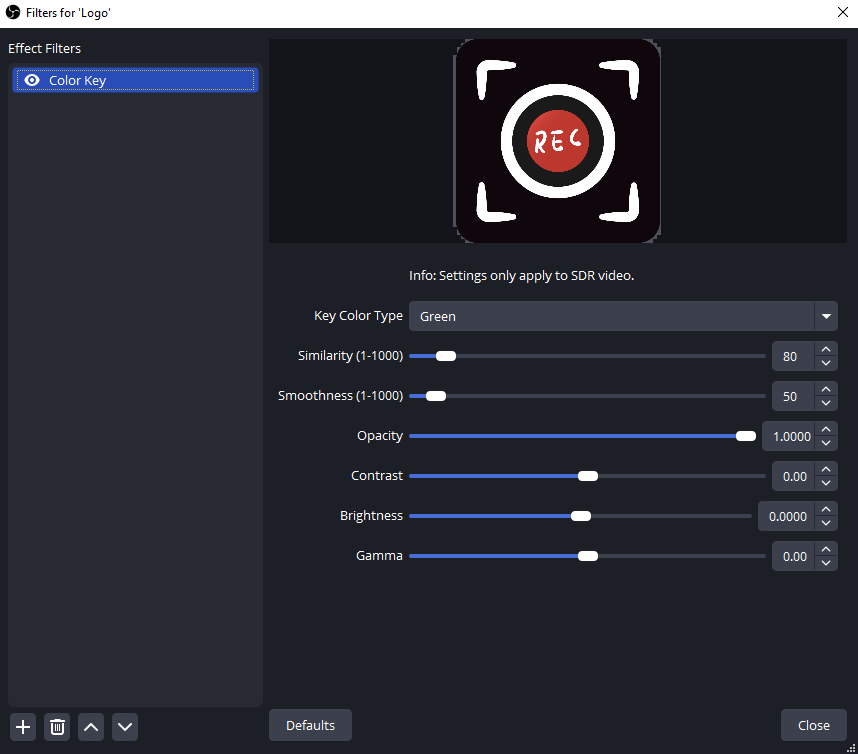
This works best with solid backgrounds but is less clean than true PNG transparency.
2. Try the Simple OBS Alternative to Add Transparent Image in Recording – Swyshare Recordit
While OBS is powerful, it can feel overwhelming if you only want to record your screen with a logo, watermark, or overlay. That’s where Swyshare Recordit comes in.
Swyshare Recordit is a lightweight screen recorder designed for simplicity and efficiency. Unlike OBS, which is built around scenes, sources, and encoders, Recordit focuses on quick recording with visual overlays, making it ideal for tutorials, demos, and casual content creation.
Key Benefits of Using Recordit:
- Capture full screen, a specific window, or a custom region with ease.
- Record system sound, microphone audio, or both simultaneously.
- Add webcam video on top of your recording (picture-in-picture).
- Draw, highlight, and show mouse effects while recording.
- Add logo/watermark, resize video/canvas after recording.
- Take high-quality screenshots during or outside recording sessions.
- Export recordings as MP4, GIF, MP3, AVI, and more for versatile use.
How to Add a Transparent Image in Swyshare Recordit:
- Install and launch Swyshare Recordit, select your recording mode and set more parameters for your recording.
- Start recording and begin your screen activity playback; Stop recording when finished.
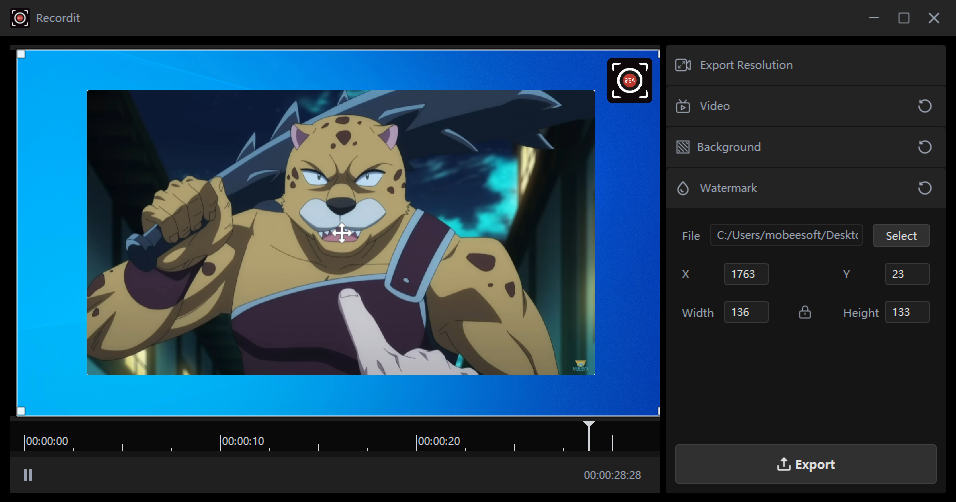
- Find your recording in the “Files” tab, then click to open the built-in video editor.
- Import your transparent PNG image as logo or bg image, then preview and export the recording.
3. Conclusion
Adding a transparent image to OBS is straightforward once you understand how image sources, file formats, and scaling work. With proper PNG files and a few quality tweaks, OBS allows you to create professional-looking overlays for streams and recordings.
However, not everyone needs OBS’s complexity. If your goal is fast, high-quality screen recording with transparent images, Swyshare Recordit offers a cleaner and more efficient workflow. It removes the technical barriers, lets you focus on content creation, and delivers polished results with minimal effort.
For creators who value simplicity, speed, and visual clarity, Swyshare Recordit is a highly recommended alternative to OBS.