How to Add Twitch Chat to OBS: A Step-by-Step Guide

Streaming on Twitch has become increasingly popular, and one of the essential elements for an engaging stream is interacting with your viewers in real-time. Seeing chat messages on your stream or while monitoring your gameplay allows you to respond instantly, create community engagement, and provide a more immersive experience for your audience. OBS Studio, being one of the most powerful and versatile free streaming tools, allows you to integrate Twitch chat directly into your stream. In this guide, we’ll walk you through how to add Twitch chat to OBS, step by step, and also introduce a simpler alternative for recording Twitch streams with chat overlay.
1. How to Add Twitch Chat to OBS?
There are a few methods to display Twitch chat in OBS, depending on whether you want it on your stream for viewers or just visible for yourself while streaming.
Method 1: Using Twitch Popout Chat as a Browser Source
One of the easiest ways to show Twitch chat on your OBS stream is by using the popout chat feature. Here’s how add a twitch chat overlay in OBS:
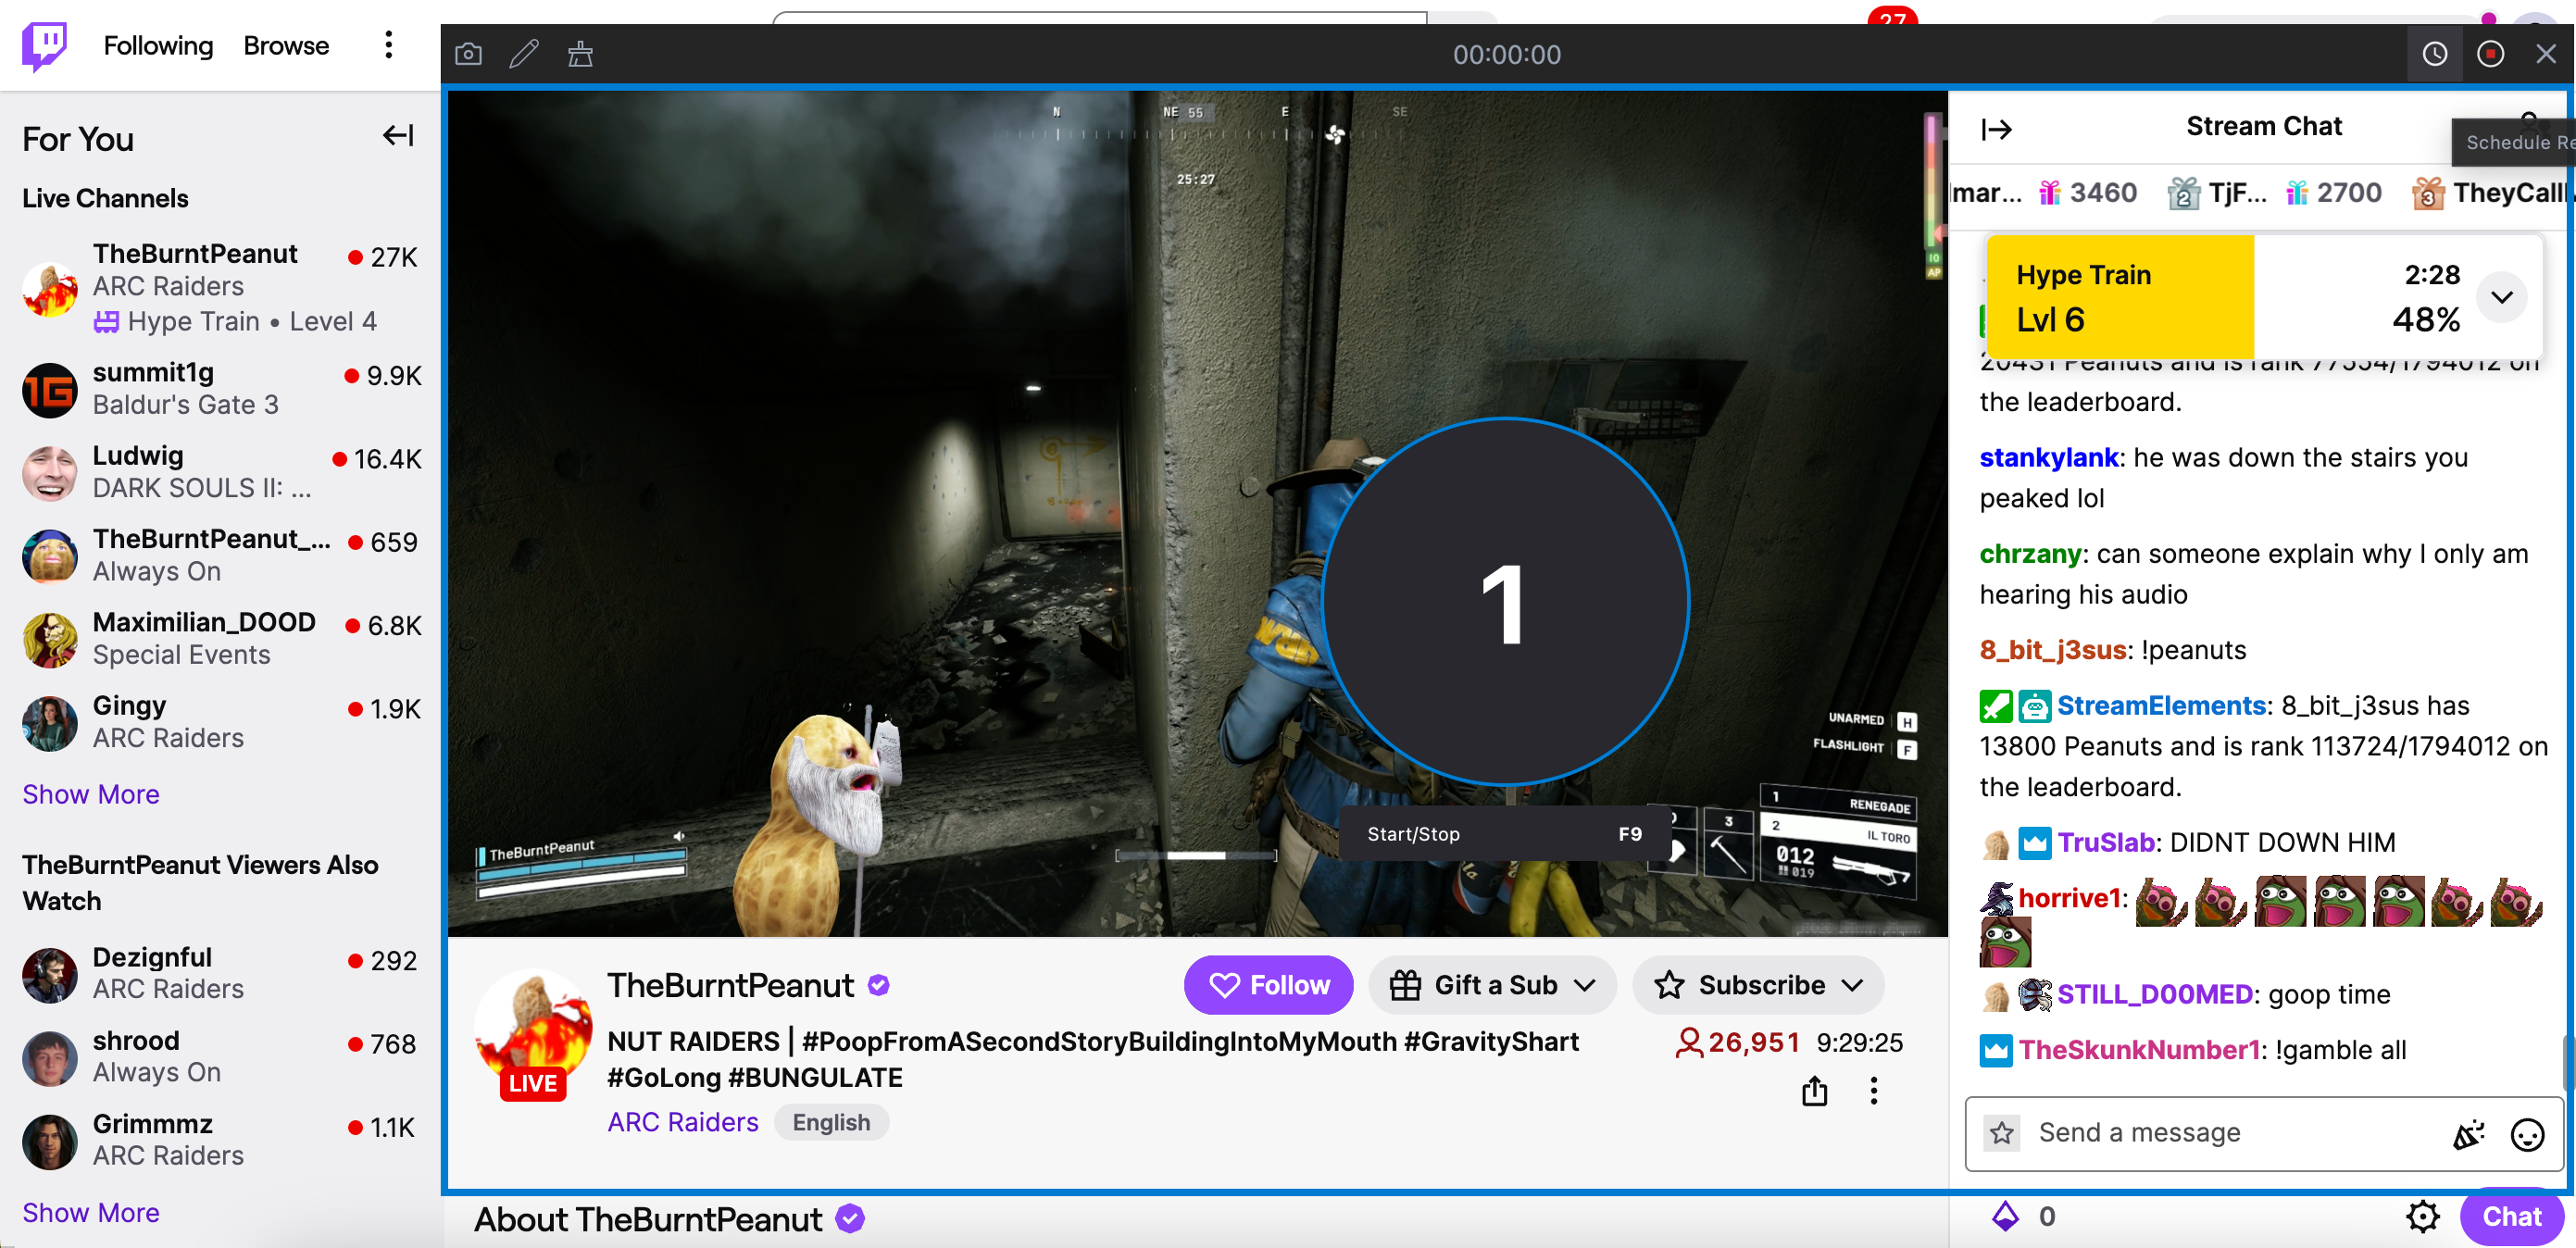
Step 1: Open the Pop Out Chat
Navigate to your Twitch channel in your browser, click the chat settings icon and select “Popout Chat” from the menu, then A new browser window will appear containing only your chat.
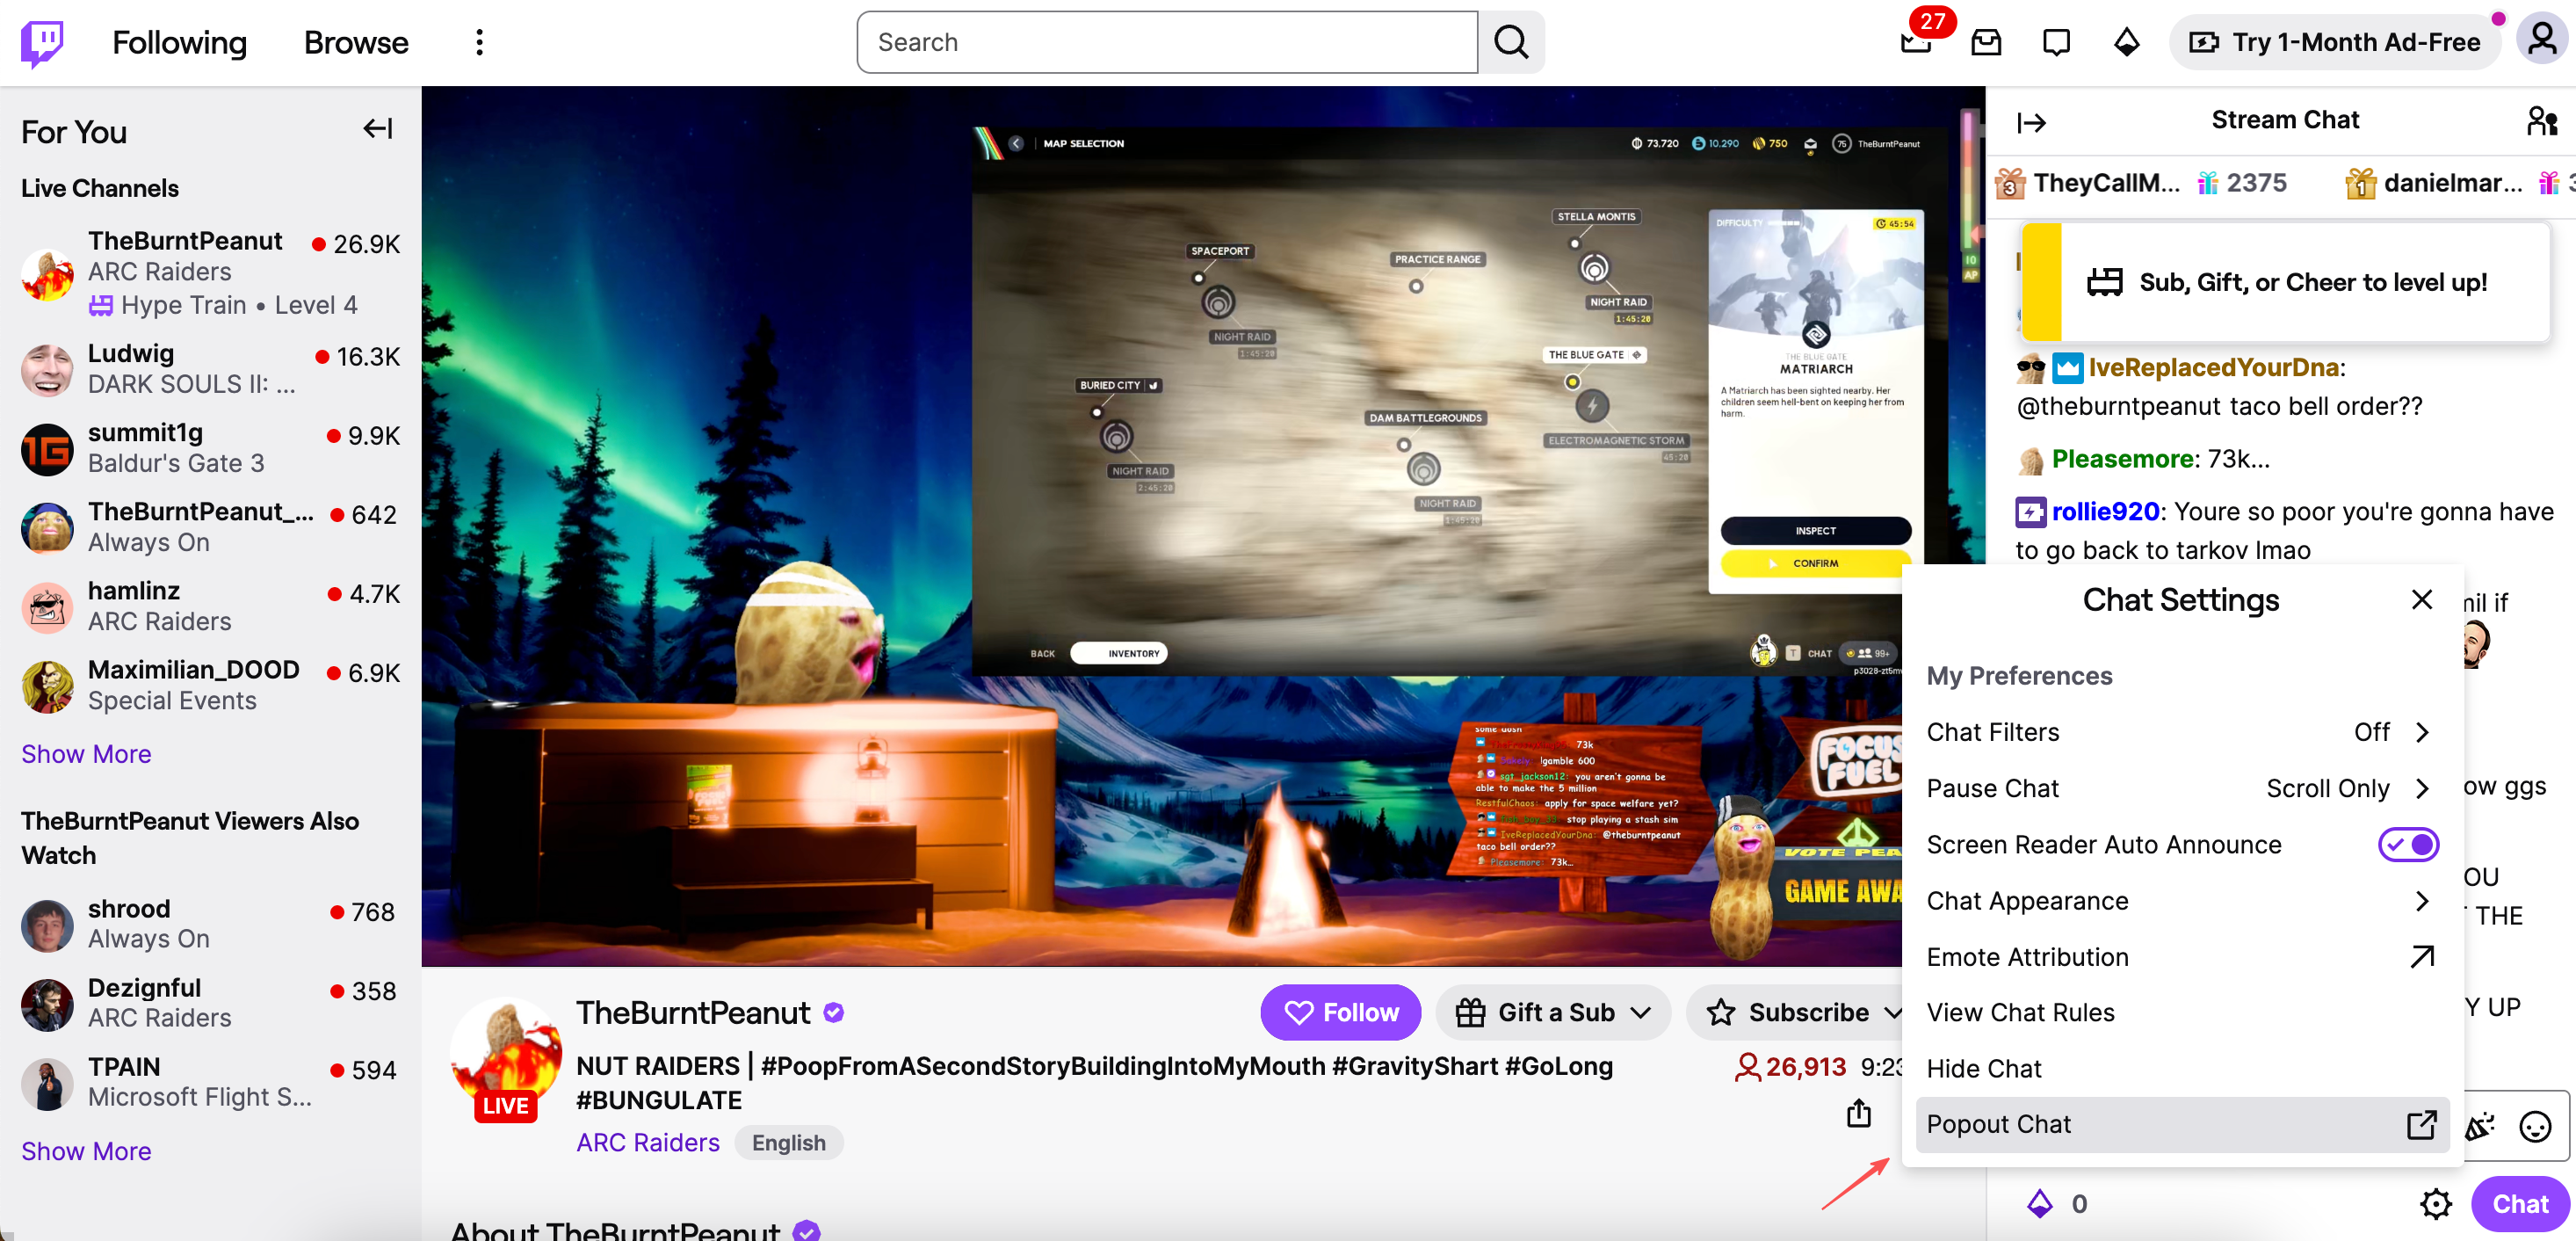
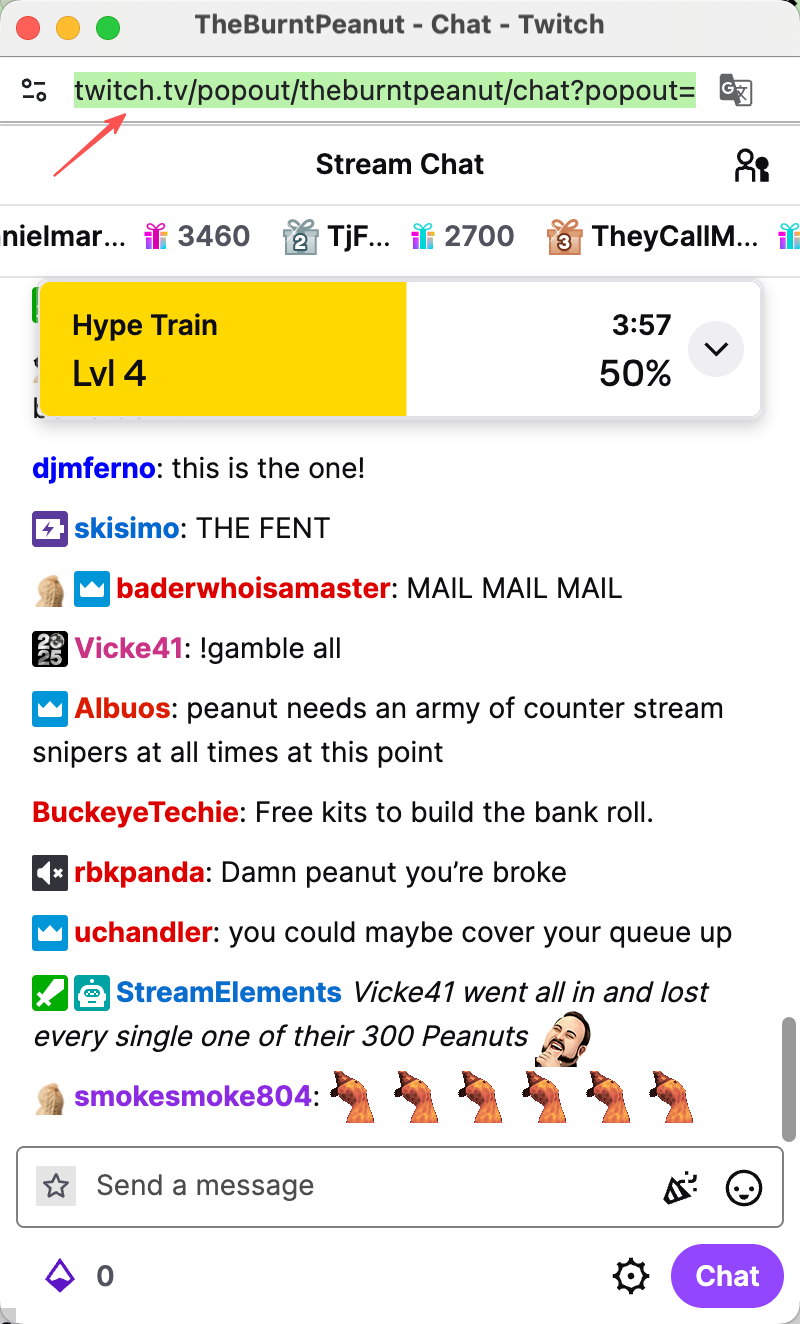
Step 2: Copy the URL
Copy the URL from the popout chat window. This URL is what you’ll use in OBS.
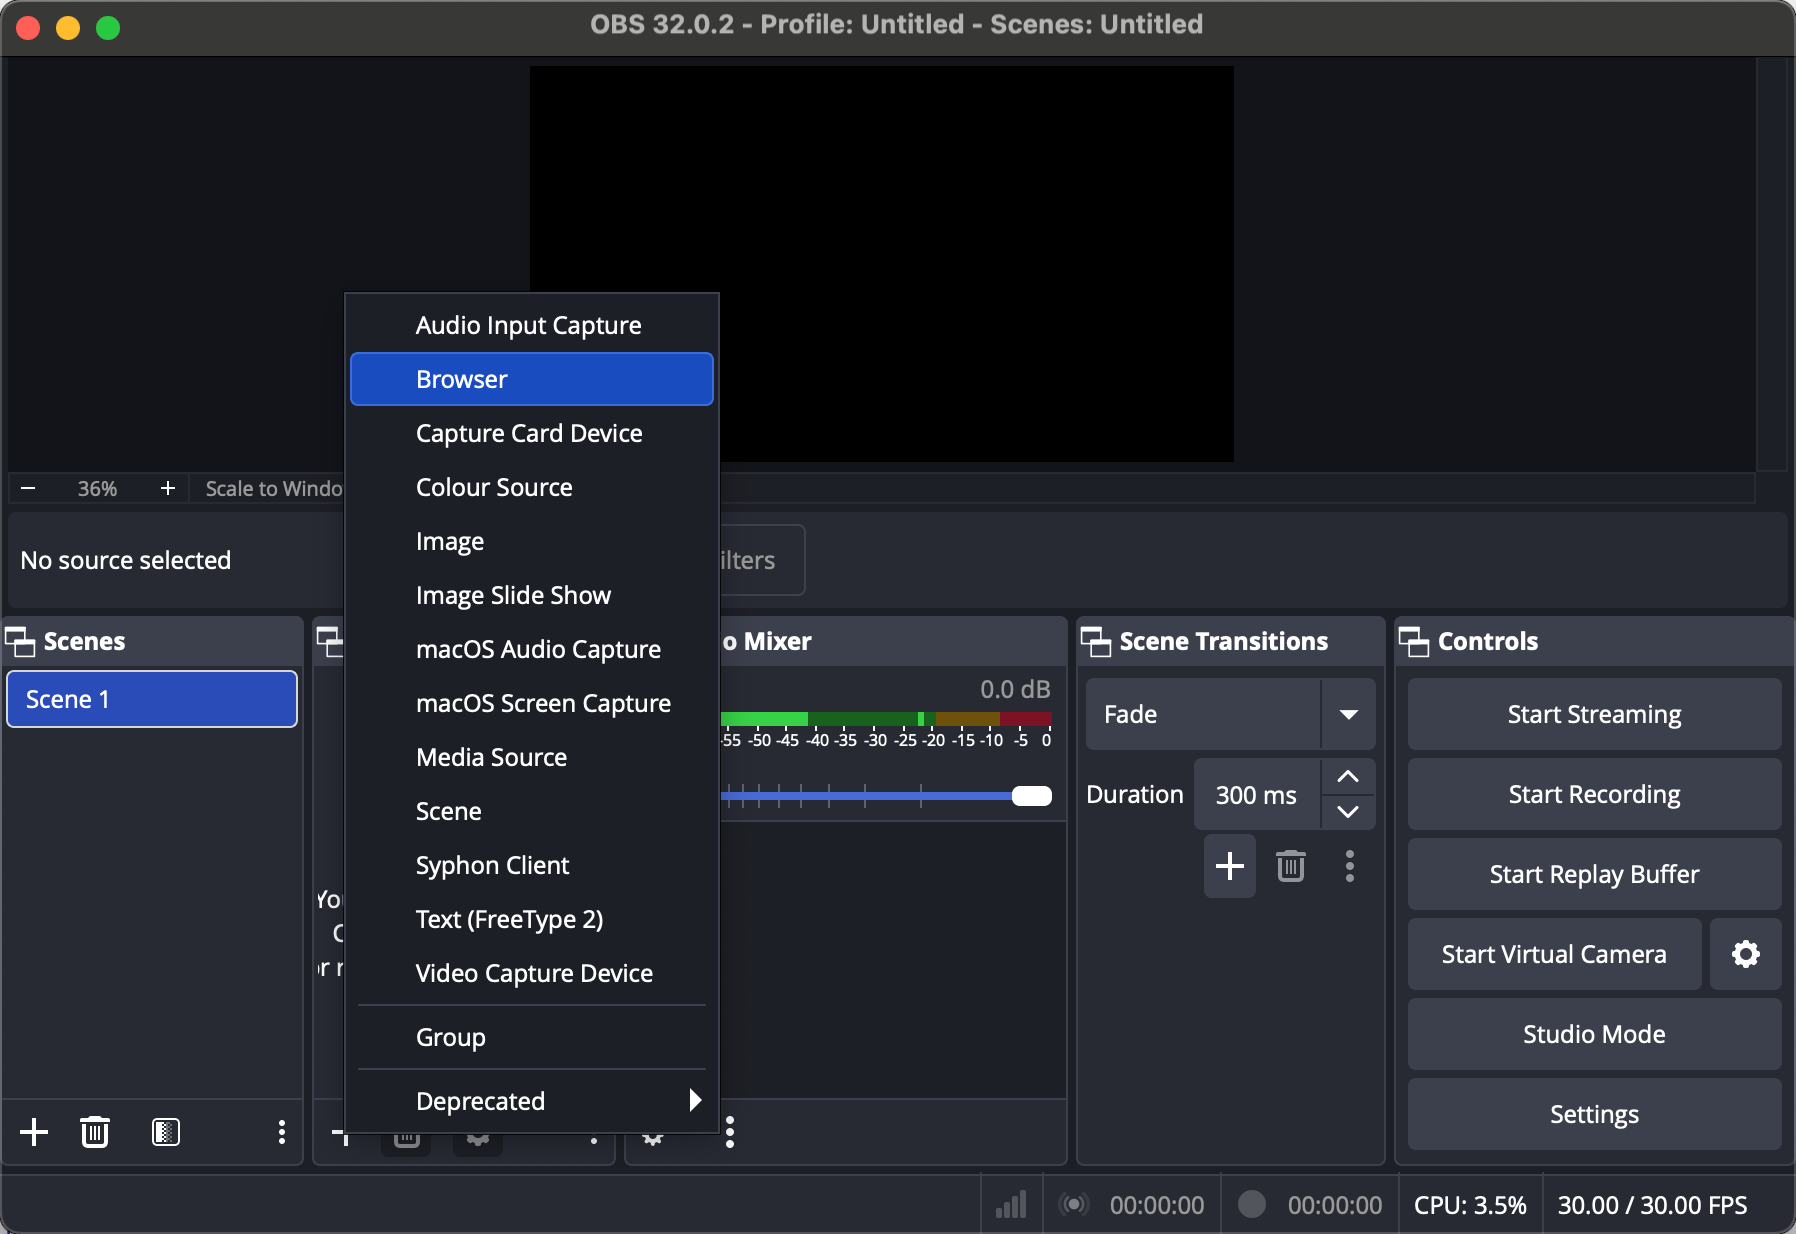
Step 3: Open OBS Studio
Open OBS Studio and select the scene where you want to add Twitch chat, then click the + button and select “Browser” in the Sources panel.
Step 4: Add the Popout URL
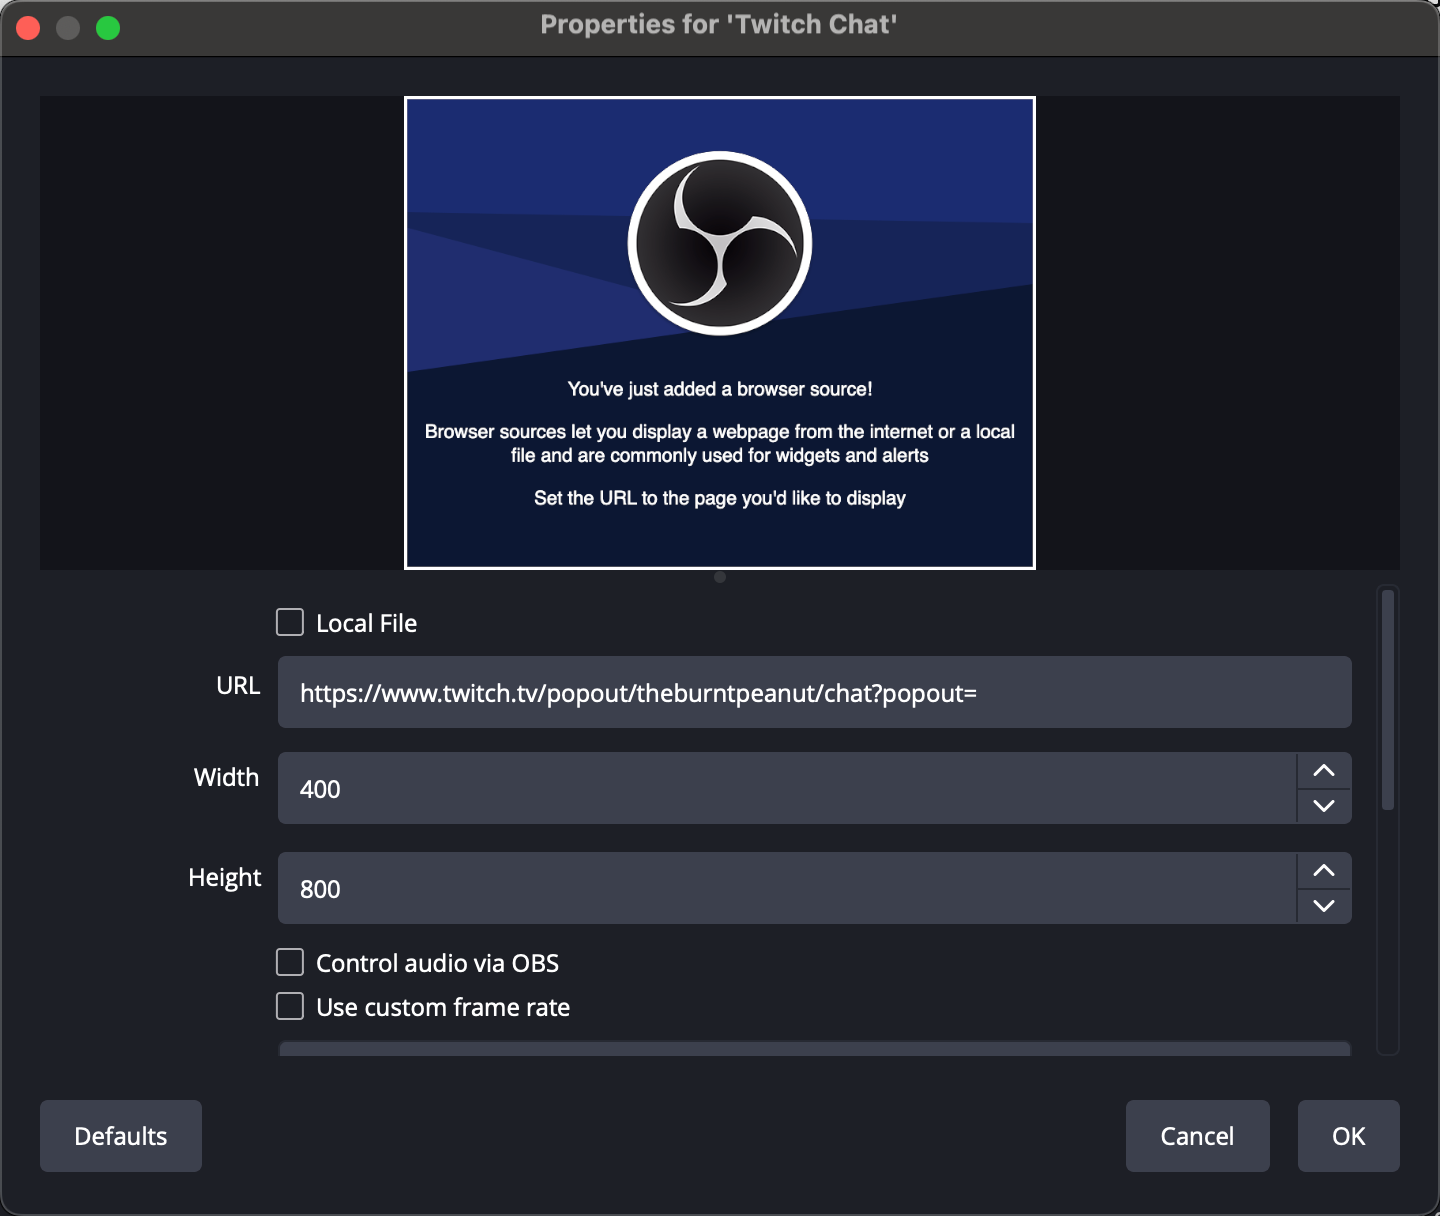
Enter a name for the browser source—“Twitch Chat” works well—and press OK.
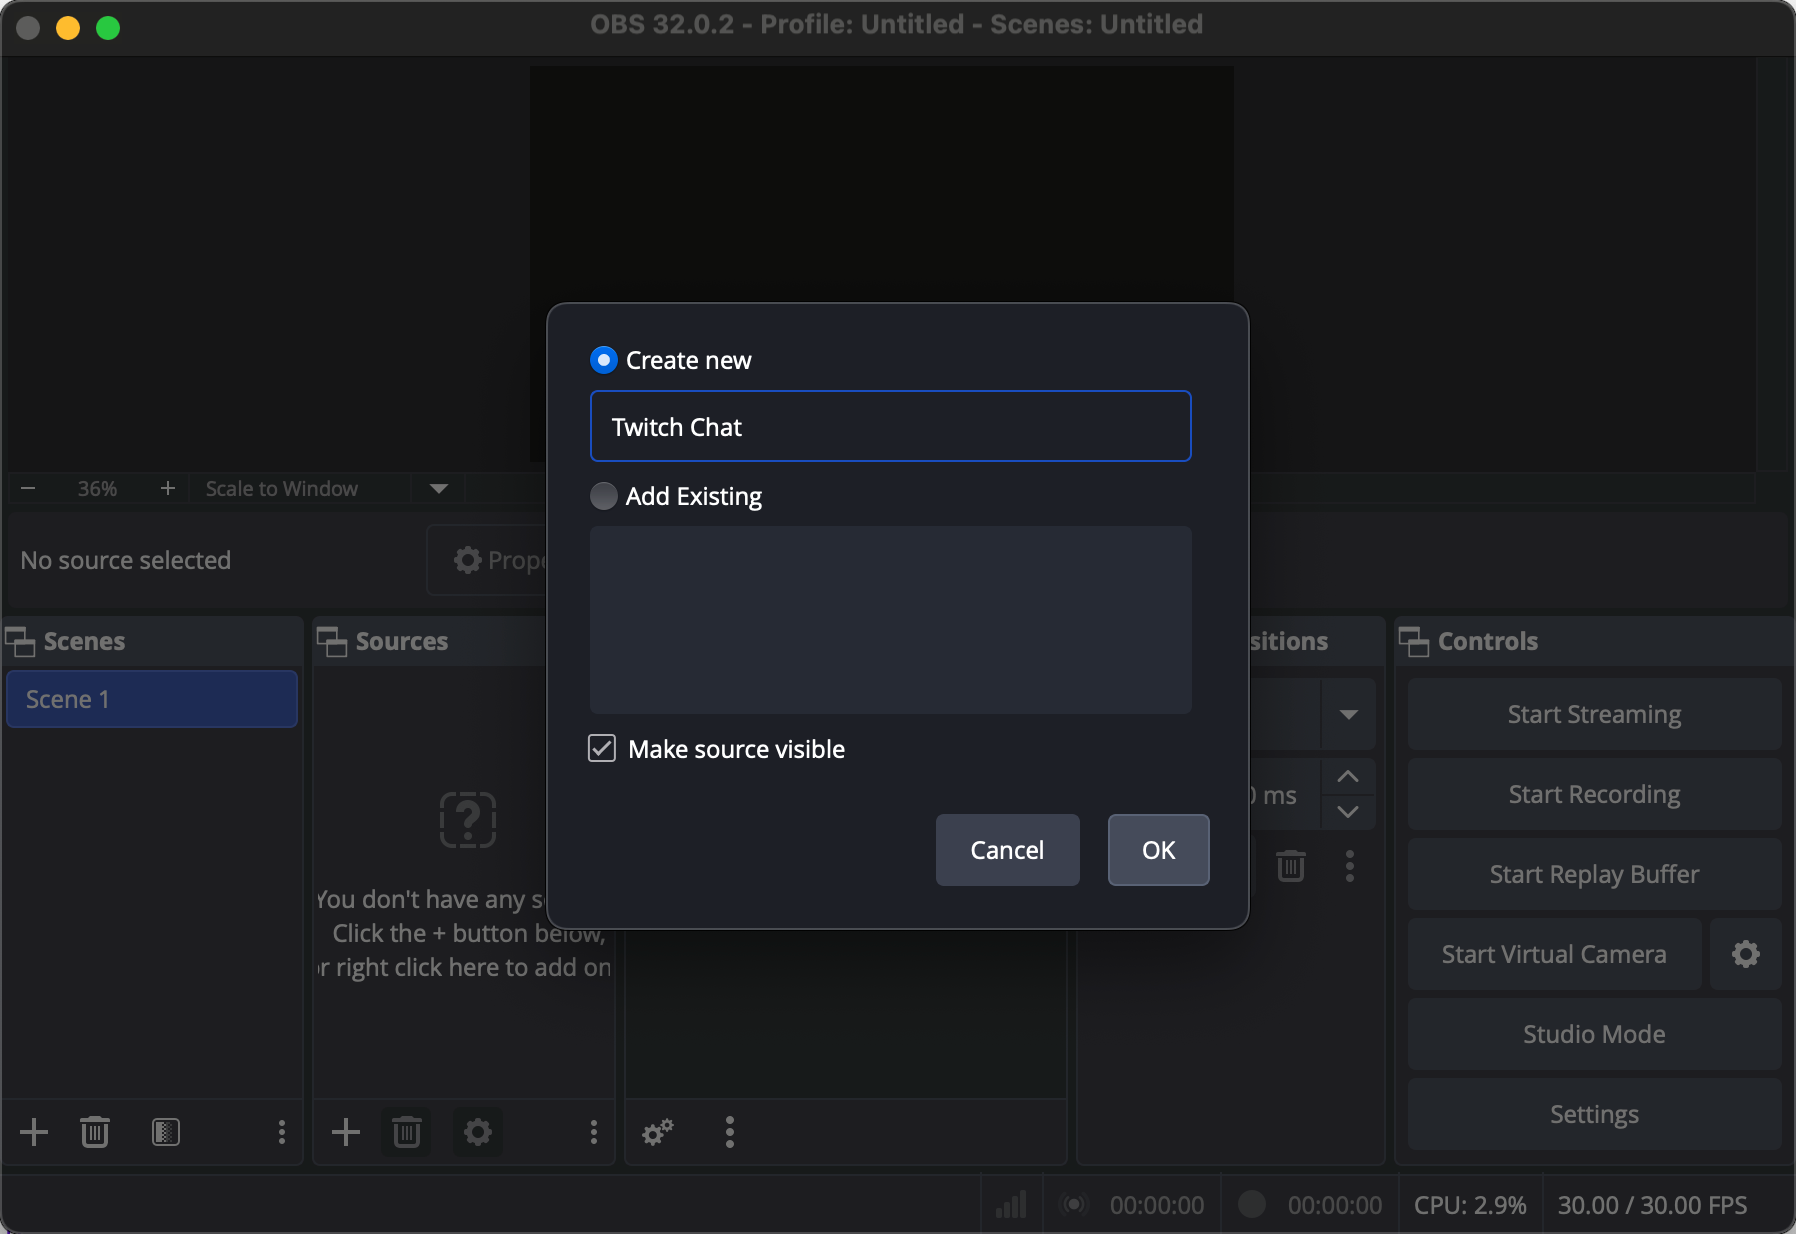
Paste the copied URL into the URL field. Set a width and height for your chat box, such as 400×800 pixels, depending on your stream layout. Click OK.
Step 5: Start Recording
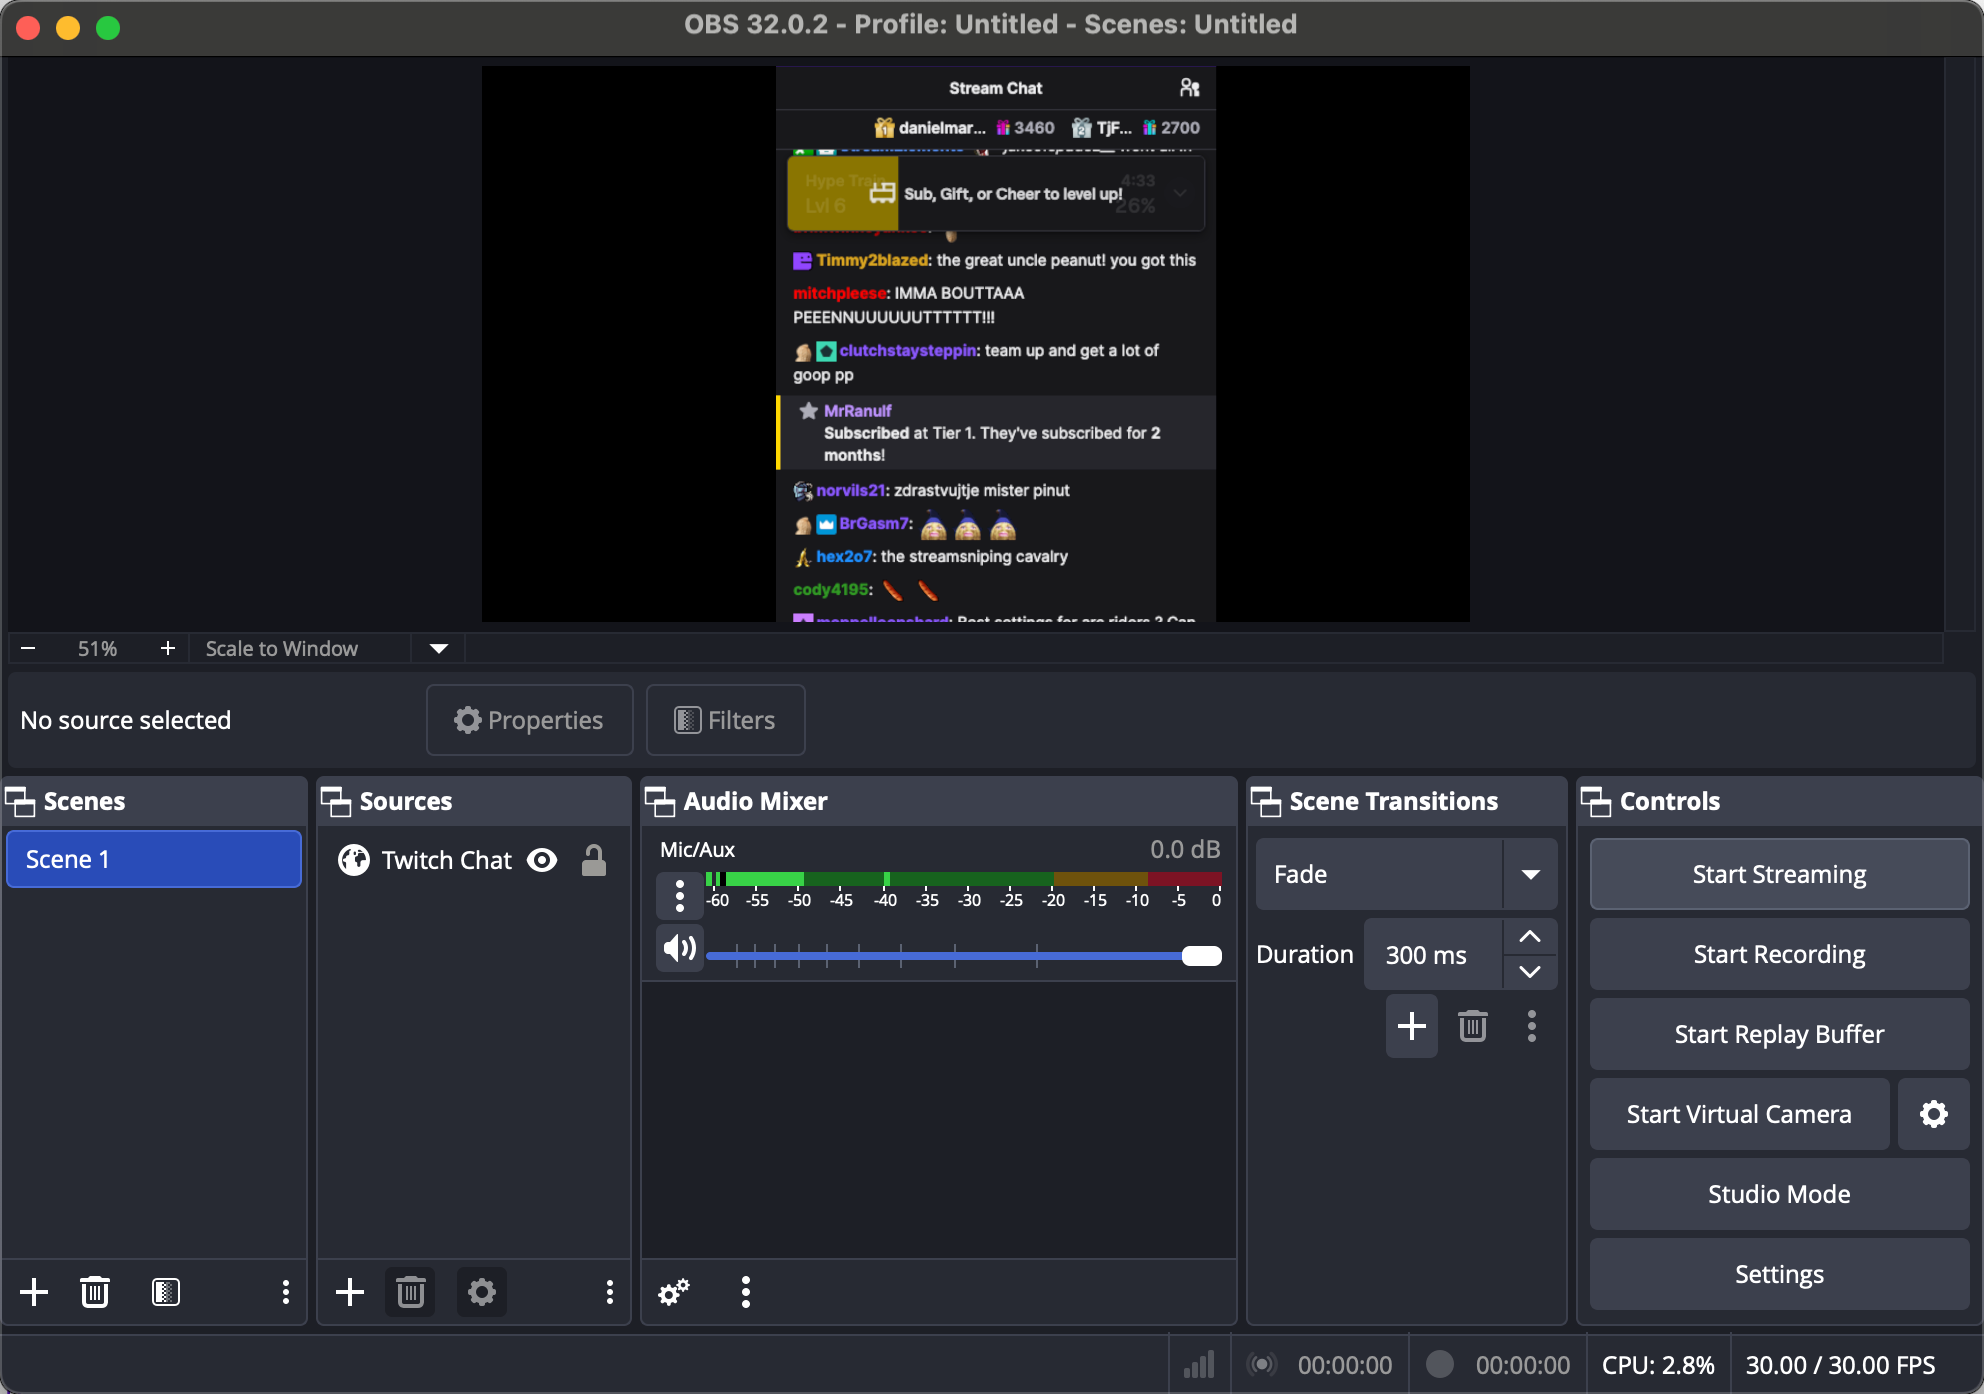
You can now move and resize the chat overlay on your canvas to fit your stream design, the click the Start Recording button.
Method 2: Using Streamlabs or OBS.Live Integration
If you prefer a more integrated approach, tools like Streamlabs OBS or OBS.Live by StreamElements allow you to add Twitch chat directly as a docked panel.
- Install the Plugin
If using OBS Studio, install the OBS.Live plugin by StreamElements. Streamlabs OBS has the feature built-in. - Log Into Your Twitch Account
Once installed, log into your Twitch account through the plugin. OBS will automatically fetch your chat. - Dock or Add Chat to Scene
You can choose to dock the chat inside OBS for monitoring or add it as a browser source to display it on stream. - Customization Options
You can also customize the chat appearance, font size, and colors within the plugin. This makes it easy to maintain your branding while keeping chat visible.
Method 3: Using Third-Party Chat Overlay Tools
There are third-party services like StreamElements, Streamlabs, or Muxy that provide advanced chat overlays. These platforms allow you to:
- Use animated chat messages
- Highlight subscriptions, bits, or donations
- Customize fonts, colors, and background transparency
You can add these overlays to OBS via Browser Source, just like the popout chat method.
2. Bonus: Try a Simpler Alternative to OBS for Recording Twitch – Swyshare Recordit
While OBS Studio is extremely powerful, it can be a bit overwhelming for beginners. If you’re looking for a simpler alternative to record your Twitch streams along with chat, Swyshare Recordit is an excellent option.
Key features of Recordit:
- One-Click Recording – Start recording your Twitch stream instantly.
- Chat Capture – Include Twitch chat in your recordings.
- Record Last Seconds – Capture recent gameplay highlights automatically.
- Scheduled Recording – Record at specific times without manual intervention.
- High-Quality Output – Record streams in clear, smooth video.
- User-Friendly Interface – Simple setup, no complex OBS scenes needed.
How to record Twitch with chat using Recordit:
- Download & Install Recordit – Get it from the official site and open the app.
- Open Your Twitch Stream – Navigate to the stream you want to record.
- Selest Recording Area – Use Recordit to select the stream window or customize area that contains chat.
- Set Other Options – Enable audio or webcam, set export format, quality and folder.
- Start Recording – Click Start Recording to capture the stream along with chat.
- Stop & Save – When you’re finished recording, click Stop Recording and locate your Twitch video in the Files tab.
3. Conclusion
Adding Twitch chat to your stream is key for real-time interaction and creating an engaging experience for your viewers. OBS Studio offers multiple ways to integrate chat, from using the popout browser source to advanced plugins like OBS.Live or third-party overlay tools, giving you full control over how chat appears.
For those seeking a simpler, more streamlined approach, Swyshare Recordit provides an easy way to record Twitch streams along with chat, without the complexity of OBS. With one-click recording, crisp high-quality exports, and built-in scheduling, Recordit ensures a smooth and effortless experience for both novice and experienced streamers.