How to Download Teams Recording?

Microsoft Teams has become one of the most widely used collaboration platforms for online meetings, remote learning, and corporate communication. Whether it’s a brainstorming session, a client presentation, or an online class, Teams’ built-in recording feature ensures you never miss important details. However, many users still struggle to find or download their Teams recordings after the meeting ends.
In this guide, we’ll explain everything you need to know — from how to record a Teams meeting, where to find your recordings, how to download them as MP4.
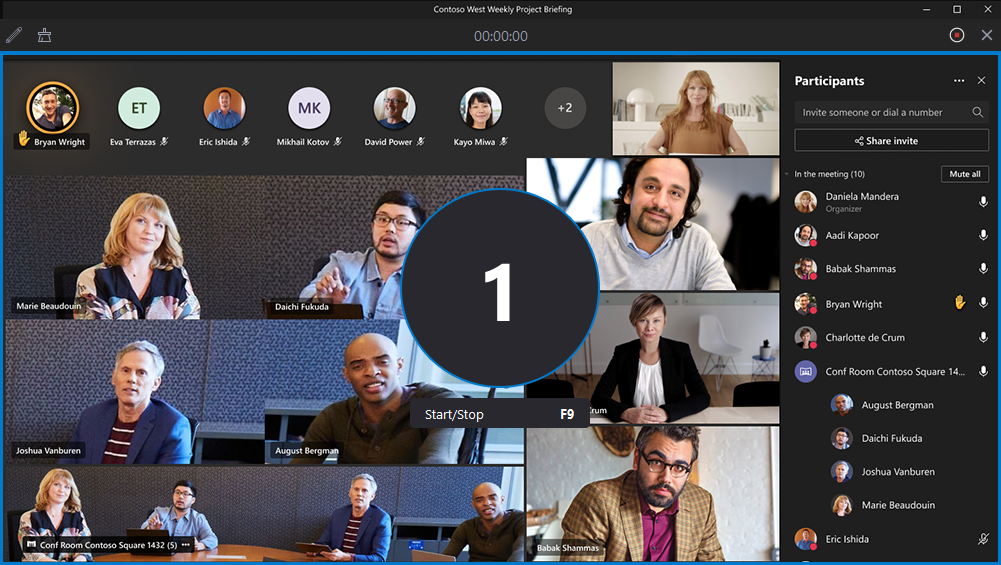
1. How to Record a Teams Meeting?
Recording a meeting in Microsoft Teams is simple, but it’s available only to people who have permission to record (usually meeting organizers or participants from the same organization).
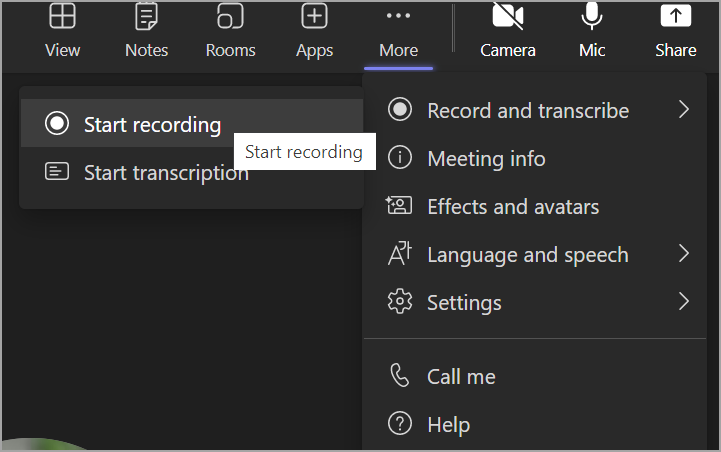
Here’s how you can start recording:
- Open Microsoft Teams and either host a new meeting or join an existing one.
- On the meeting control bar, click the three dots to open additional options.
- Once you start recording, all participants are notified that the meeting is being recorded. Teams also begins automatically saving the session to the cloud.
- When the meeting ends or you manually select “Stop Recording”, Teams processes and uploads the file to the appropriate storage location.
2. Where to Find Teams Recordings?
Once the meeting is recorded, Teams automatically stores it in a Microsoft 365 cloud location. Where exactly it goes depends on the type of meeting:
2.1 OneDrive (for private or scheduled meetings)
If you had a private meeting (not within a Team channel), the recording is saved in the meeting organizer’s OneDrive account.
To locate it:
- Go to OneDrive → My Files → Recordings.
- You’ll find the recording saved as an MP4 file, automatically titled with the meeting name and date.
- The recording link also appears in the meeting chat for quick access.
2.2 SharePoint (for channel meetings)
If the meeting took place in a specific Team channel, the recording is stored in that channel’s SharePoint site.
To find it:
- Open the Teams app → navigate to the channel where the meeting occurred.
- Click the Files tab → open the Recordings folder.
- Locate your video file, which will be saved as an MP4.
Anyone with access to the channel can view or download the recording, depending on the organization’s sharing permissions.
2.3 Microsoft Stream (Classic)
Before Microsoft moved recordings to OneDrive and SharePoint, Teams used Microsoft Stream (Classic) for video storage. If your organization still uses Stream, you’ll find older recordings there.
To find them:
- Open Stream (Classic) (stream.microsoft.com).
- Go to My Content → Videos.
- You’ll see your meeting recordings listed there.
The link to your Stream video also appears in your Teams chat history after each meeting.
3. How to Download Teams Recordings?
Downloading a Teams recording lets you store it locally, share it outside Microsoft 365, or back it up for offline viewing. Here’s how to do it from each location:
3.1 Download a Recording from OneDrive
- Go to the Teams chat where the recording was shared.
- Click the recording link — it will open in OneDrive.
- In OneDrive, click the three dots (⋯) next to the video.
- Select Download and your recording will be saved to your computer as an MP4 file.

Tip: You can also visit your OneDrive → Recordings folder directly to download it anytime.
3.2 Download a Recording from SharePoint
- Open Teams → Channel → Files → Recordings.
- Hover over the video file and click the three dots (⋯).
- Choose Download from the menu to save the video as an MP4 to your device.
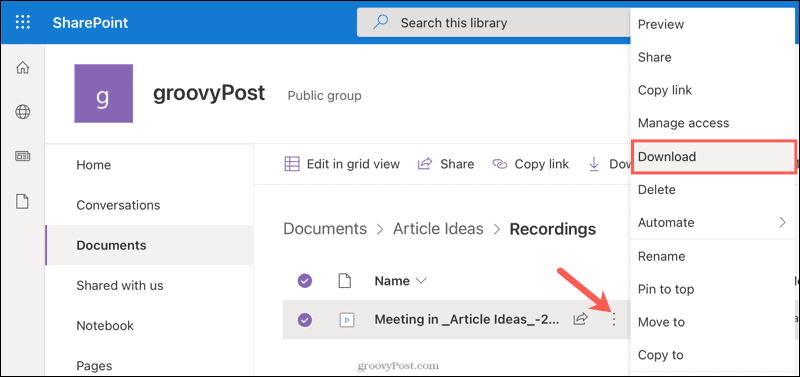
Note: If you don’t see the download option, you may not have permission. Ask the channel owner or admin to grant you access or share a downloadable link.
3.3 Download a Recording from Microsoft Stream
If your recording is stored in Stream (Classic):
- Open the video page in Microsoft Stream.
- Click the three dots (⋯) below the video player.
- Open the video in Microsoft Stream and select Download video.\
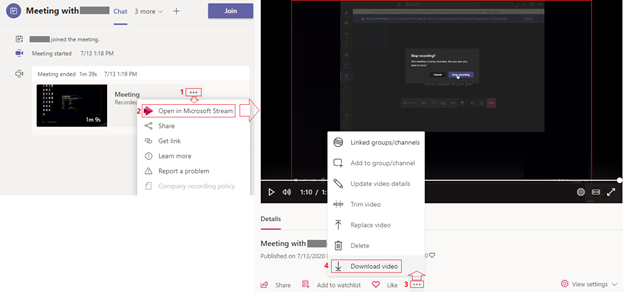
If the button doesn’t appear, it means you don’t have ownership rights — only the person who started the recording can download it.
4. Bonus: Record Teams Meetings with Recordit
While Teams’ built-in recording feature is convenient, it comes with limitations. You may not have recording permission, or your company’s policy might restrict access. Additionally, cloud-based recordings can expire or require extra steps to download. That’s where Recordit becomes the perfect solution.
Recordit is a professional screen recording software that lets you record any Teams meeting directly to your computer — without depending on Microsoft’s built-in tools. It captures your screen, system audio, and microphone input in HD quality, and automatically saves your video as an MP4 file on your local drive.
How to Record Teams Meeting with Recordit:
- Get Recordit from its official website and install it on your PC or Mac.
- Open Microsoft Teams and start or join the meeting you want to capture.
- Launch Recordit and choose to record full screen, a window or custom area.
- Turn on System Sound to record other participants’ voices and Microphone Audio if you want to include your own.
- Click Start Recording and Recordit will begin recording instantly in real-time.
- When finished, stop recording and Recordit automatically saves your file as an MP4, ready to play or edit.
5. Conclusion
Downloading Microsoft Teams recordings can be confusing due to different storage locations and access permissions. While OneDrive, SharePoint, and Stream each allow you to save meetings as MP4 files, the process isn’t always convenient — especially if you lack permission or the link expires.
That’s why Recordit is the smarter choice. It lets you record any Teams meeting directly to your computer in MP4 format, without depending on Microsoft’s cloud or admin settings. Simple, fast, and reliable — Recordit gives you full control over your Teams recordings anytime you need them.