How to Record Internal Audio on Mac?

Recording internal audio on macOS (especially on macOS 11 or 12) can be tricky due to Apple’s restrictions on direct audio routing. Fortunately, BlackHole, a free and open-source virtual audio driver for macOS, makes it possible to capture your Mac’s internal sound using apps like QuickTime, Audacity, or Recordit.
This step-by-step guide will show you exactly how to record internal audio on your Mac with BlackHole.
Step 1: Download & install BlackHole
Download the BlackHole 2ch installer and follow the on-screen instructions.
Step 2: Restart your Mac
Restart your Mac if prompted. After installation, BlackHole 2ch will be available as a virtual audio device in your system.

Step 3: Open Audio MIDI Setup
Go to Finder > Applications > Utilities > Audio MIDI Setup.

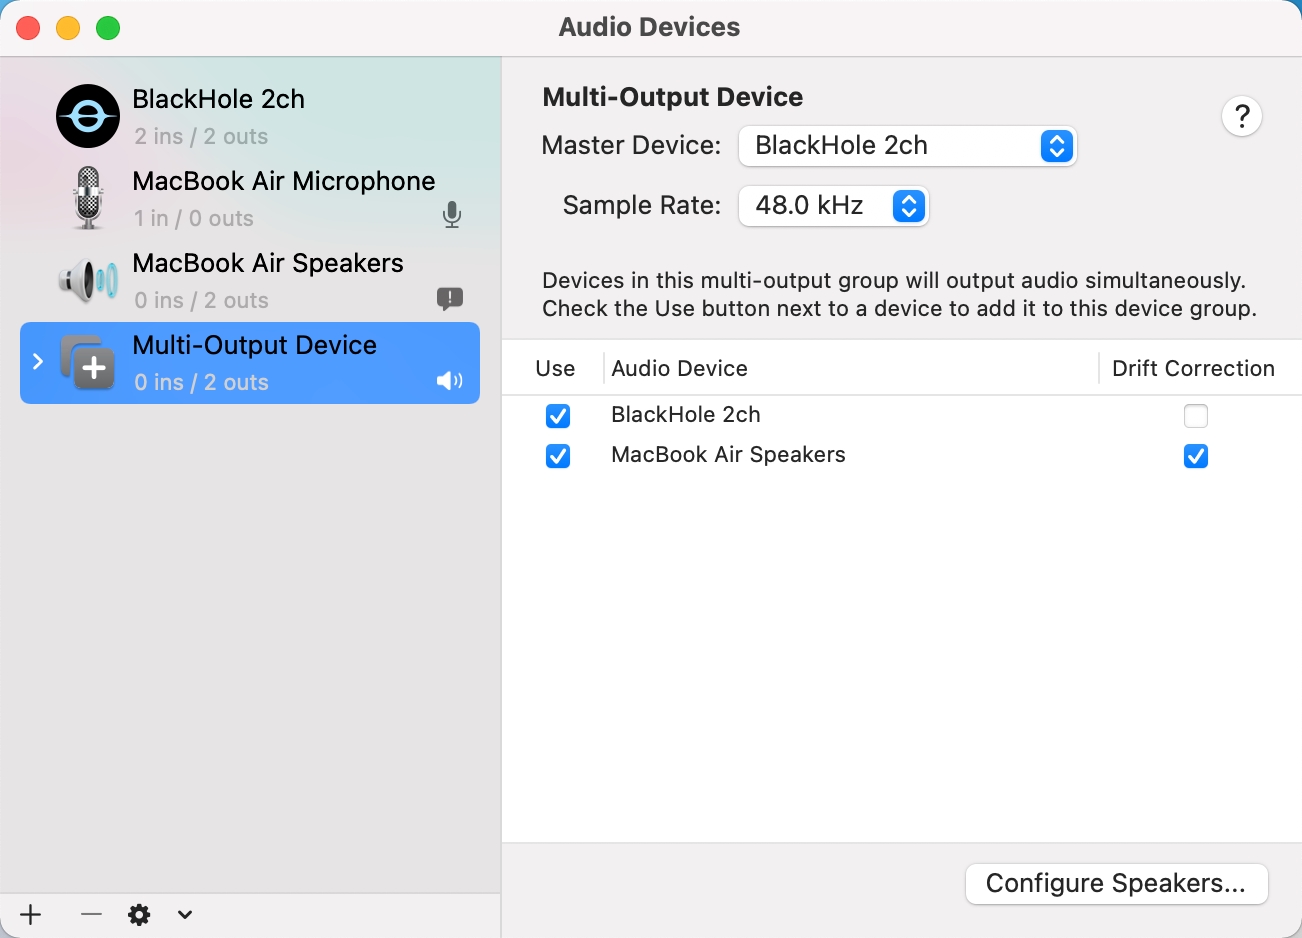
Step 4: Create a Multi-Output Device
Click the + button at the bottom-left corner and select Create Multi-Output Device.

In the right panel, check the boxes for:
- Built-in Output (Mac speakers or headphones)
- BlackHole 2ch
Step 5: Set Multi-Output Device as System Audio Output
Open System Settings > Sound > Output > Select the Multi-Output Device you just created.
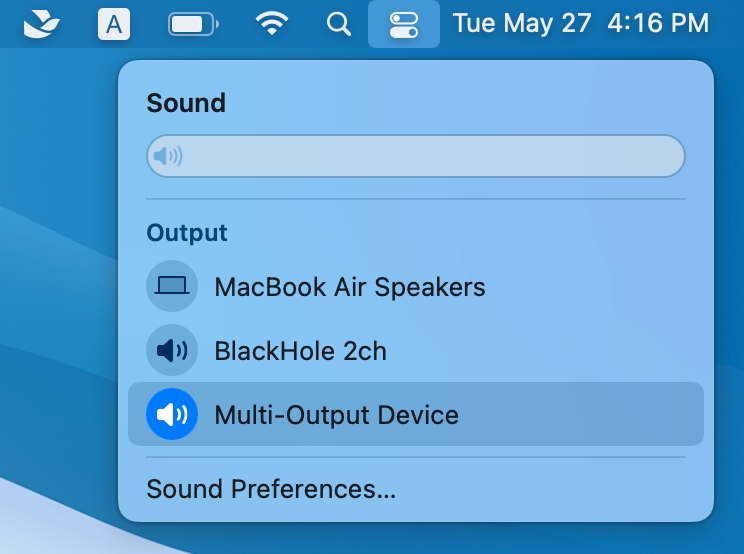
From now on, your Mac will send audio to both your regular speakers and the BlackHole virtual device. You can play any internal audio and start recording in your chosen app (e.g. Recordit).
Video Guide
For more details, check the video walkthrough of the process: