How to Resolve “OBS Starting the Output Failed”?

Recording your screen or streaming content is essential for content creators, gamers, and educators alike. OBS Studio (Open Broadcaster Software) is one of the most popular tools for these purposes, thanks to its versatility, open-source nature, and powerful features. However, like any software, OBS can sometimes encounter technical issues. One of the most frustrating problems is the dreaded “Starting the output failed” error, which prevents you from recording or streaming properly. This article will guide you through why this error occurs, how to resolve it, and introduce a simpler alternative for recording your screen.
1. How to Resolve “OBS Starting the Output Failed”?
When OBS Studio displays the “Starting the output failed” message, it means the software cannot begin recording or streaming. This problem can stem from various sources, including configuration errors, driver conflicts, or system limitations. Here’s a step-by-step guide to troubleshoot and fix it.
1.1 Check Your Encoder Settings
OBS uses either software or hardware encoders to record and stream video. If your encoder is misconfigured or not supported by your system, OBS may fail to start the output. To fix this:
- Open OBS Studio → Go to Settings → Output → Streaming/Recording.
- Under Encoder, switch between x264 (software) and your GPU’s hardware encoder (e.g., NVENC for NVIDIA or AMF for AMD).
- Apply the changes and restart OBS.
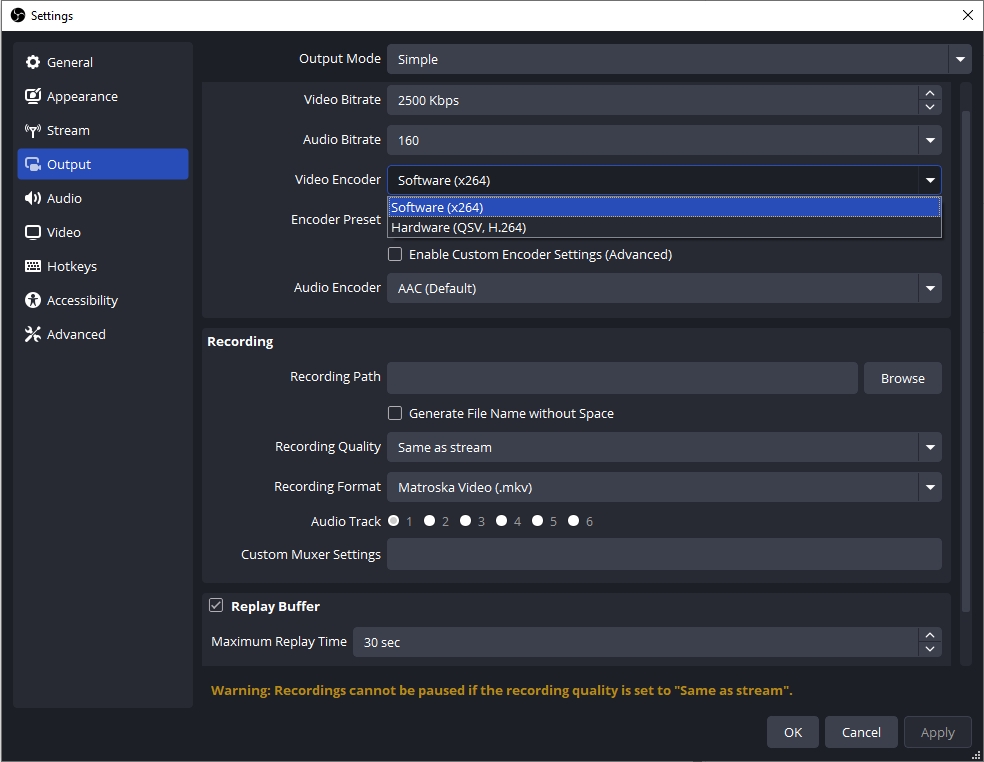
Switching encoders often resolves conflicts that cause the starting output error.
1.2 Run OBS as Administrator
Sometimes, OBS lacks the necessary permissions to access system resources, leading to this error. Running OBS with elevated privileges can help:
- Close OBS Studio → Right-click the OBS shortcut → Select Run as administrator → Try starting the output again.

This simple step can resolve permission-related issues.
1.3 Check Video Capture Device Settings
If you are recording from a webcam, game capture, or other input devices, OBS may fail to initialize the output if the device is in use by another program. To fix this:
- Close all applications that may use the device (e.g., Zoom, Discord, Skype).
- Open OBS and navigate to Sources.
- Right-click your video capture device and select Properties.
- Ensure the resolution, FPS, and format are compatible with your system.
- Restart OBS and try recording.

1.4 Disable Hardware Acceleration in Other Programs
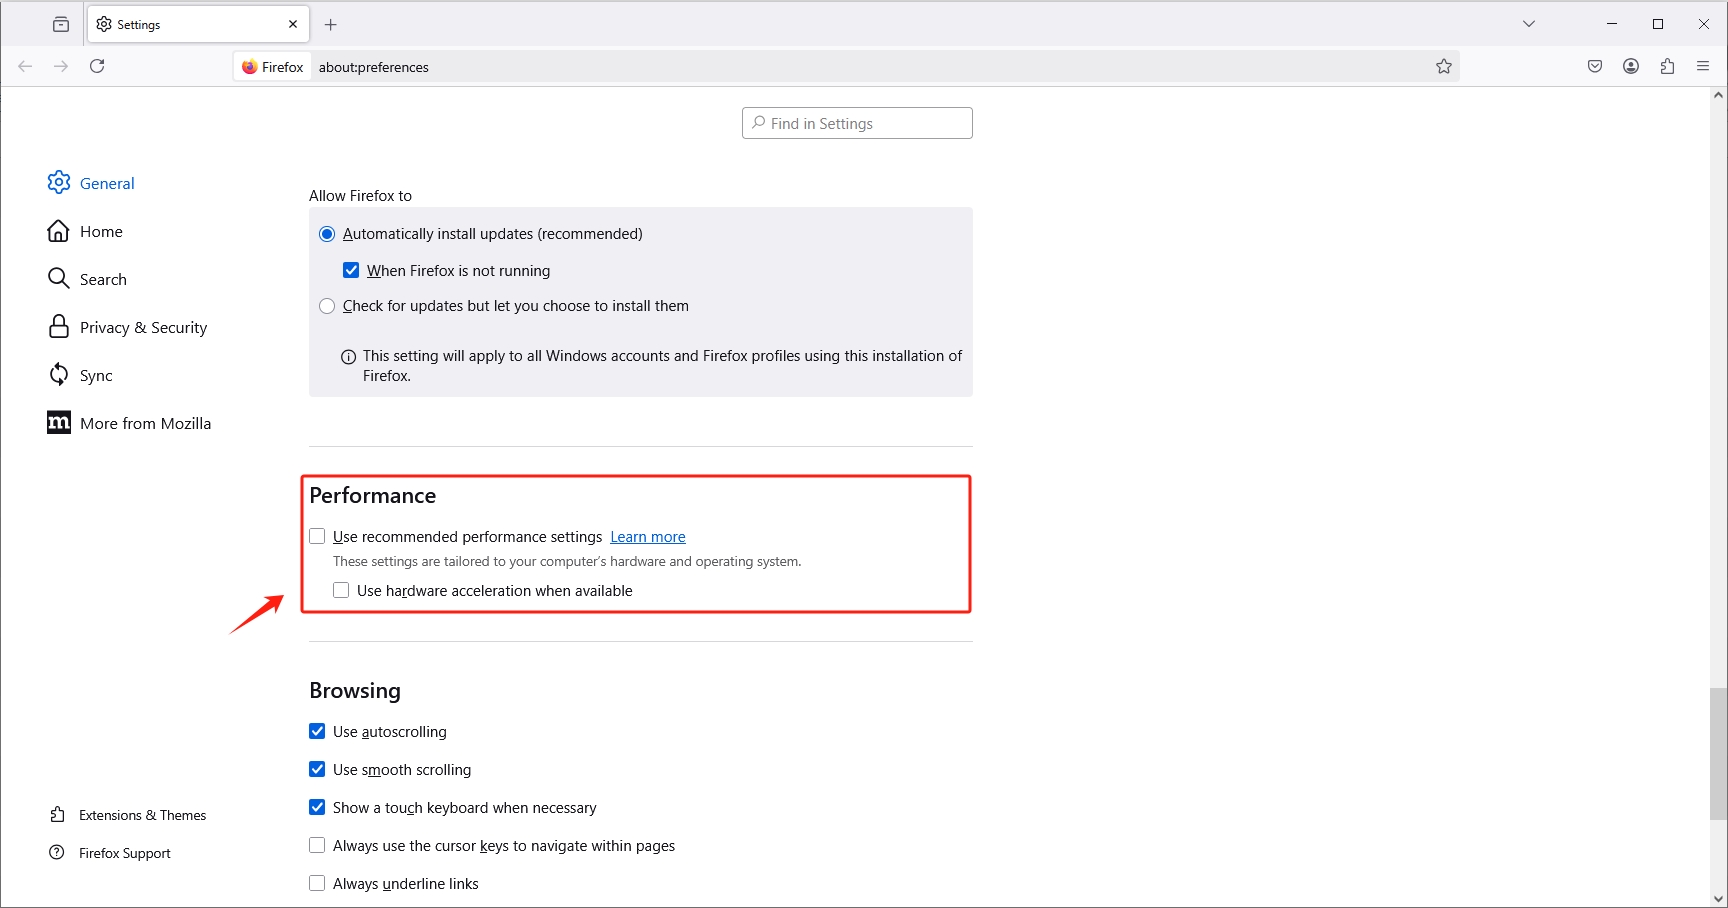
Hardware acceleration in other apps can conflict with OBS’s encoding process. Browsers like Chrome, Discord, or streaming apps may trigger the error. Disable hardware acceleration:
- Open Chrome or your application.
- Go to Settings → Advanced → System.
- Toggle off Use hardware acceleration when available.
- Restart the app and OBS.
1.5 Update Your Graphics Drivers
Outdated GPU drivers often cause OBS to fail when initializing recording. Ensure your graphics card drivers are up-to-date:
- NVIDIA users: Open GeForce Experience → Check for updates.
- AMD users: Open Radeon Software → Check for updates.
- Intel users: Visit Intel Driver & Support Assistant.
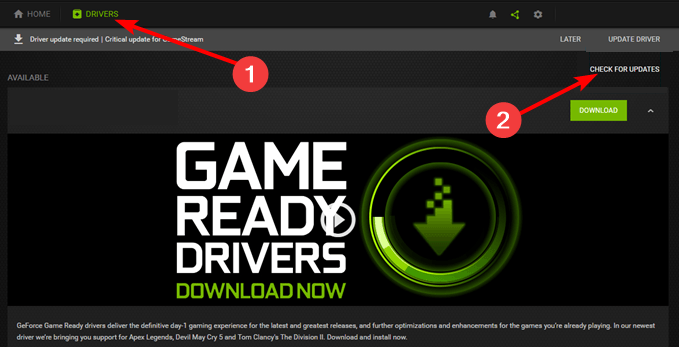
After updating, restart your PC and try OBS again.
1.6 Check Disk Space and Output Path
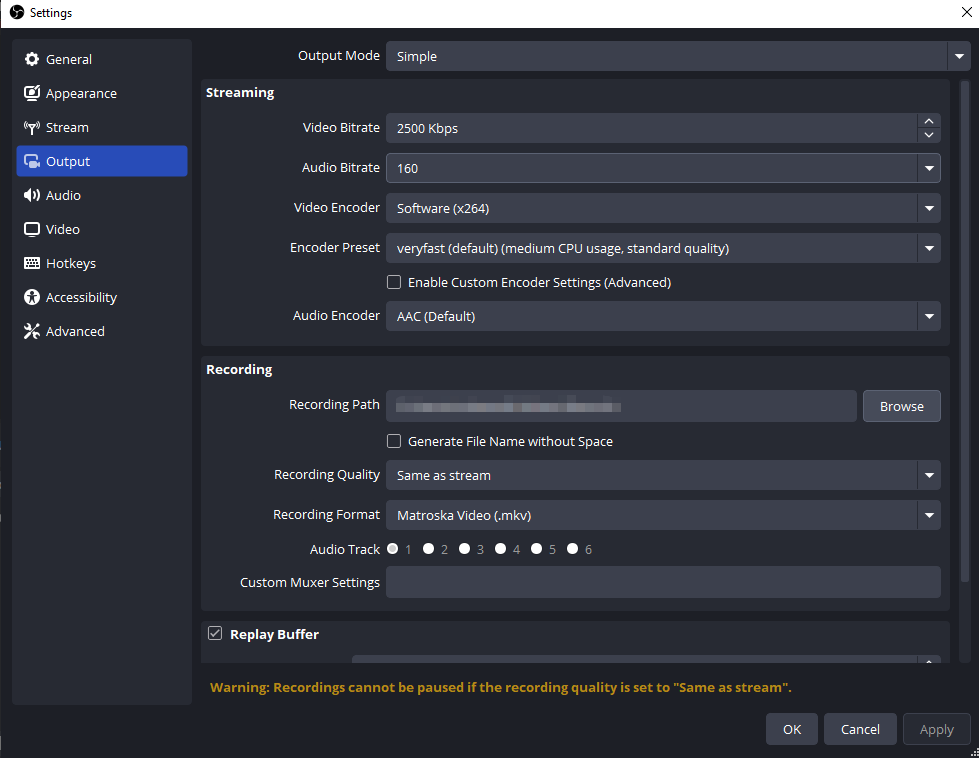
If the drive you are recording to has insufficient space or the output path is invalid, OBS may fail to start the output:
- Open Settings → Output → Recording.
- Verify the Recording Path points to a valid folder.
- Ensure the drive has enough free space for your recording.
1.7 Reinstall OBS Studio
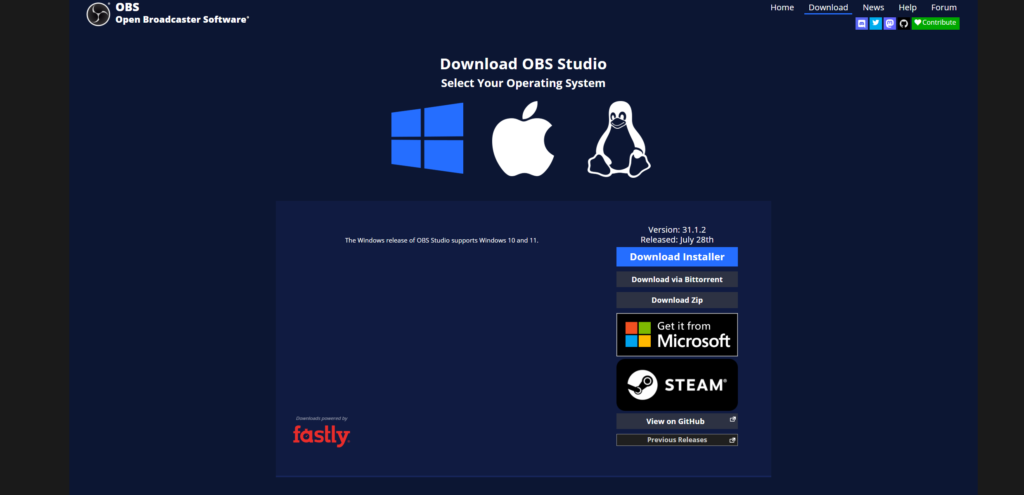
If none of the above methods work, your OBS installation might be corrupted. Reinstall OBS:
- Uninstall OBS from your system.
- Download the latest version from the official OBS website.
- Install OBS and reconfigure your settings.
This often resolves persistent errors caused by corrupted files.
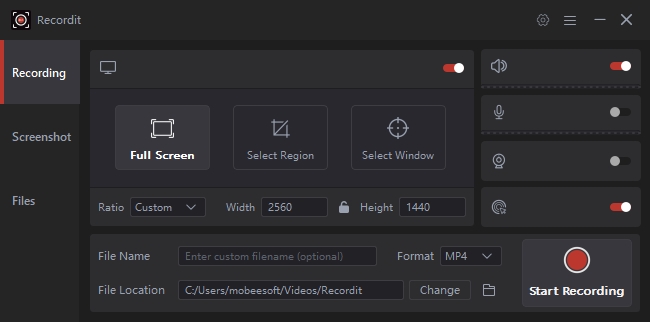
2. Try Swyshare Recordit Instead of OBS
While OBS Studio is powerful, its complexity can sometimes make troubleshooting frustrating, especially for users who just want a simple, reliable recording tool. Swyshare Recordit is an excellent alternative for those seeking simplicity without sacrificing quality.
Main Features of Swyshare Recordit:
- Record your screen effortlessly without complicated setup.
- Customize area (full screen, browser tab or specific area) and input resources (system audio, microphone or webcam) to record.
- Save recordings in multiple formats (MP4, GIF) directly.
- Minimal system resource usage compared to OBS, reducing the risk of crashes.
- Add annotations, edit after recording and export without third-party software.
Recording with Swyshare Recordit is straightforward with these steps:
- Download and install Recordit Mac or Windows version from the official website.
- Open Recordit to choose record settings: input resources, output format, file location, etc.
- Drag to select your screen area, then start recording your screen.
- Stop recording when done, then save or edit your recording as needed.
3. Conclusion
The “Starting the output failed” error in OBS Studio can be frustrating, but most cases can be resolved by checking encoder settings, running OBS as administrator, ensuring device availability, updating drivers, and verifying disk space. For more stubborn or recurrent issues, reinstalling OBS may help.
However, if you want a simpler, more reliable alternative to avoid these technical headaches, Swyshare Recordit is an excellent choice. Its lightweight interface, one-click recording, and automatic encoding make it ideal for anyone seeking a stress-free recording experience. Whether you’re a beginner or a busy content creator, Recordit lets you focus on creating rather than troubleshooting.
Stop wrestling with OBS errors and start recording effortlessly with Swyshare Recordit. It’s simple, efficient, and designed to just work—so you can capture your screen without interruption or frustration.