A Step-by-Step Guide on How to Screen Record Videos in 4K on Mac

In an age where video content is king, screen recording has become an essential tool for educators, gamers, software demonstrators, and content creators alike. But if you want to ensure your recordings look crisp and professional, 4K resolution is the way to go. With four times the pixels of Full HD, 4K screen recordings offer superior clarity and detail—perfect for today’s high-resolution displays. If you’re a Mac user wondering how to record your screen in 4K, this step-by-step guide will walk you through everything you need to know.
1. Can macOS Record in 4K Natively?
Yes, macOS can screen record in 4K, but with a catch: the resolution of your screen matters. If your Mac display (or external monitor) supports 4K or higher, the native recording will match that resolution.
2. Prerequisites for 4K Screen Recording on Mac
To ensure you’re actually recording in 4K, a few technical requirements must be met:
- ✅ A 4K or Retina display (iMac, MacBook Pro, or external 4K monitor)
- ✅ Sufficient disk space (4K videos are large)
- ✅ A high-performance Mac (M1/M2/M3 chips recommended)
- ✅ A 4K-capable screen recorder
To take advantage of 4K, your screen must support 3840×2160 resolution or higher. Most recent iMacs, MacBook Pros with Retina displays, or Macs connected to a 4K external monitor qualify.
3. Record Mac 4K Screen Using Built-in Tools
3.1 Record Mac 4K Screen Using QuickTime Player
QuickTime Player is Apple’s native media tool that includes basic screen recording features.
Steps:
- Set your display to 3840×2160 (4K), then open QuickTime Player from Applications.
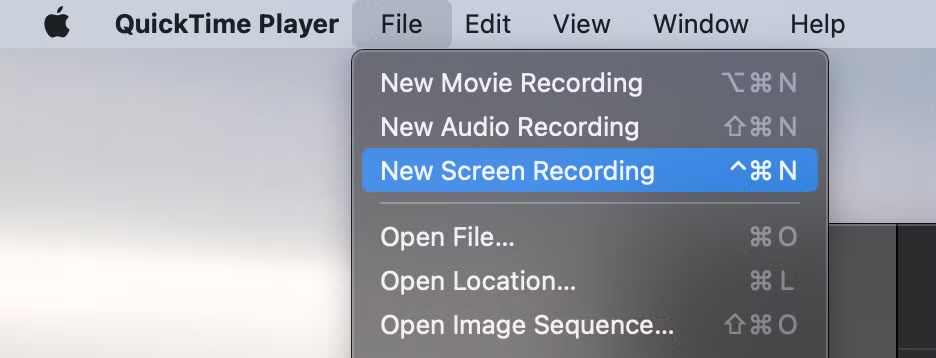
- Go to File > New Screen Recording > Click the dropdown to select a microphone (if needed)
- Click Record to capture the full screen or a selected portion
- Click Stop from the menu bar when done.
3.2 Record Mac 4K Screen Using Screenshot Toolbar
You can also use macOS’s native screenshot toolbar:
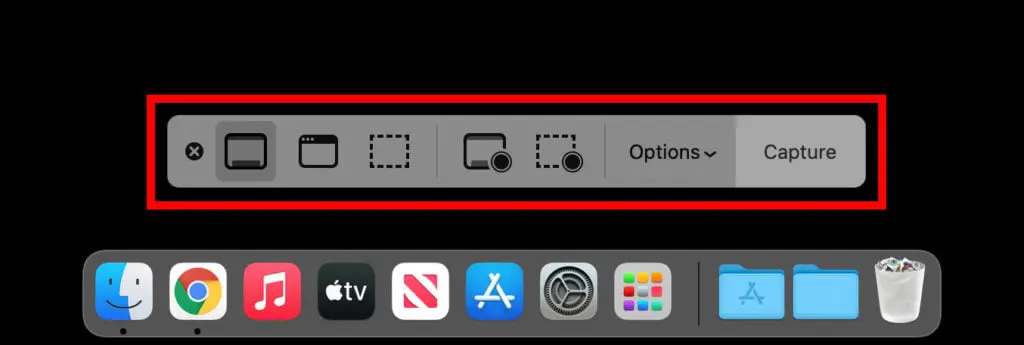
- Make sure your display is 4K, and press Cmd + Shift + 5
- Choose whether to “Record Entire Screen” or “Record Selected Portion”
- Click Options to select input devices and save location
- Click Record to begin, and use the stop icon in the menu bar to finish.
3.3 Limitations of Native Tools
While free and easy to use, macOS’s built-in tools have several limitations for professional 4K recordings:
- ❌ No explicit resolution control
- ❌ No webcam overlay
- ❌ Limited audio input settings
- ❌ No annotation or editing tools
- ❌ No ability to compress or convert formats easily
If you need better control and more features, third-party apps are the way to go.
4. Record Mac 4K Screen Using OBS Studio
OBS Studio is a popular free option for gamers and streamers, with full control over resolution, bitrate, and audio.
Steps:
- Get OBS Studio from obsproject.com and install on your Mac.
- Click “+” under Sources > select Display Capture > choose your display.
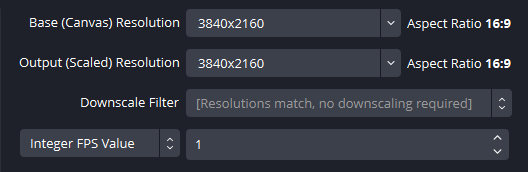
- Go to Settings > Video, set: Base (Canvas) Resolution: 3840×2160; Output (Scaled) Resolution: 3840×2160; Set FPS to 30 or 60.
- Go to Settings > Output to set a high Bitrate (around 20,000–40,000 Kbps) for crisp 4K quality at 30–60 FPS.
- Once your display and settings are ready, simply click Start Recording, perform your screen activity, then click Stop Recording when finished—the 4K video will be automatically saved to your chosen location.
Pros:
- Records in 4K at up to 60fps
- Advanced scene and source management
- Supports overlays, transitions, and live streaming
Cons:
- Steeper learning curve
- Complex UI for casual users
5. Effortlessly Record Mac 4K Screen Using Recordit
For those who want the best balance of simplicity and quality, Recordit is a top choice. It’s a clean, intuitive screen recording app for Mac that supports true 4K video capture, webcam overlays, and microphone input—all without requiring a steep learning curve.
Key Features of Recordit:
- One-click 4K screen recording
- Capture full screen or custom region
- Supports microphone and system audio
- Webcam overlay (optional)
- Fast export in common video/audio formats (MP4, MOV, MP3)
- Capture high quality screenshots
- Clean interface, minimal CPU use
Steps to Record 4K Screen on Mac with Recordit:
- Download and install Recordit Mac version from its official website, and set up the software.
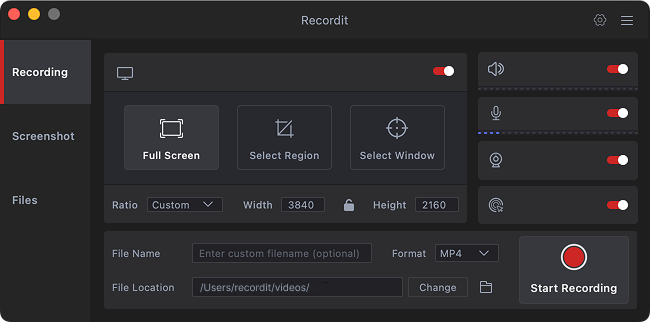
- Launch Recordit, set resolution to 3840×2160 (4K), then customize more recording options such as audio, output format, mouse effect, etc.
- Select the recording region and click Start Recording, perform your screen activity and Recordit will capture your screen on real time.
- Click Stop Recroding, then navigate to the software “Files” tab to preview your video.
6. Conclusion
Recording your Mac screen in 4K doesn’t have to be complicated. Whether you’re using macOS’s built-in tools for quick captures or more advanced software like OBS Studio for professional-grade videos, achieving crystal-clear 4K recordings is entirely within reach—as long as you have the right setup and screen resolution.
However, if you’re looking for a perfect balance of power and ease of use, Recordit stands out as the best option. With its intuitive interface, one-click 4K capture, webcam and audio support, and fast export options, Recordit makes high-quality screen recording accessible to everyone—no steep learning curve, no technical hassle. If you want to produce sharp, polished 4K videos on your Mac without the overwhelm, Recordit is the go-to tool you can rely on.