How to Use the Flathub GPU Screen Recorder?

Screen recording is an essential task in the digital age, whether you’re a gamer looking to capture your best moments, a professional creating tutorials, or a student recording lectures. Linux users often face limited choices when it comes to efficient screen recording tools that deliver both high performance and ease of use. That’s where the Flathub GPU Screen Recorder shines, utilizing your GPU to deliver seamless and high-performance screen capture.
But while the Flathub GPU Screen Recorder serves its purpose for many, it might not be the perfect fit for everyone. In this article, we’ll explore what Flathub GPU Screen Recorder is, how to use it effectively and campare its pros and cons.
1. What Is Flathub GPU Screen Recorder?
Flathub GPU Screen Recorder is a screen recording tool available on Flathub, a popular app store for Linux applications. This tool is designed to capture your screen using your computer’s GPU (Graphics Processing Unit) rather than the CPU, resulting in better performance, less system load, and higher quality recordings, especially at higher resolutions or frame rates.
Built for Linux users, the GPU Screen Recorder is often used by gamers and professionals who need real-time, efficient screen capture without compromising system performance. It supports multiple output formats and integrates well with popular desktop environments like GNOME and KDE.
2. How to Use Flathub GPU Screen Recorder
For those familiar with Linux, operating the Flathub GPU Screen Recorder is straightforward by following these steps:
Step 1: Install Flatpak and Add Flathub
Before you can use the Flathub GPU Screen Recorder, you need to have Flatpak and Flathub configured on your Linux system:
sudo apt install flatpak
Then add the Flathub repository:
flatpak remote-add –if-not-exists flathub https://flathub.org/repo/flathub.flatpakrepo
Step 2: Install GPU Screen Recorder
Now install the GPU Screen Recorder using the Flatpak command:
flatpak install flathub com.dec05eba.gpu_screen_recorder
Once installed, you can launch it via your applications menu or command line.

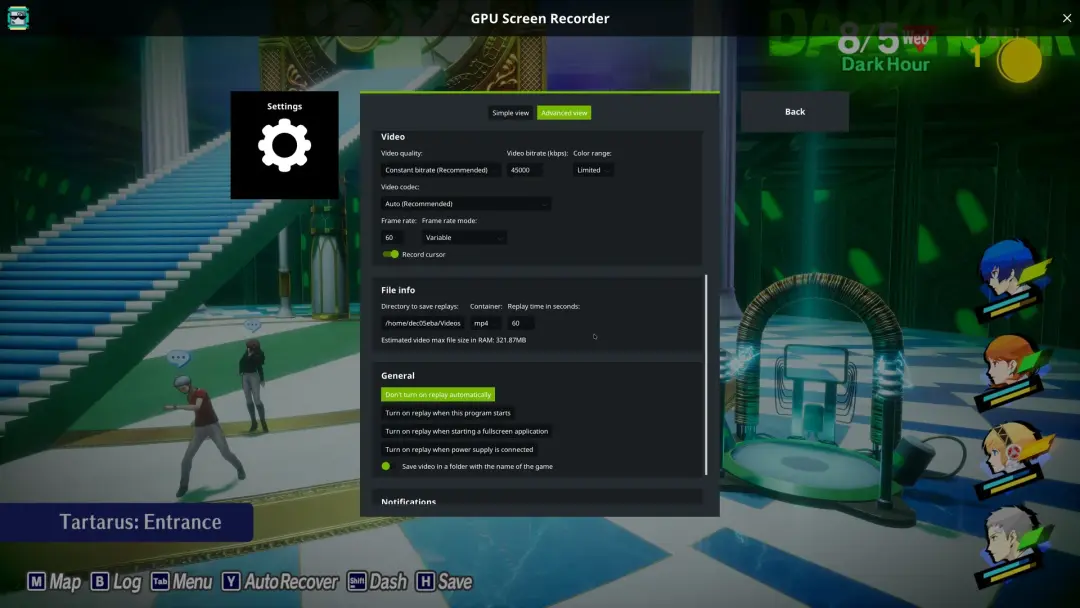
Step 3: Set Up Recording Parameters
When the application launches, you’ll be presented with options to customize your recording. You can:
- Choose screen resolution and frame rate (e.g., 1080p @ 60fps)
- Select audio input (microphone or system audio)
- Decide the output format (MP4, MKV, etc.)
- Enable GPU acceleration for smoother recordings
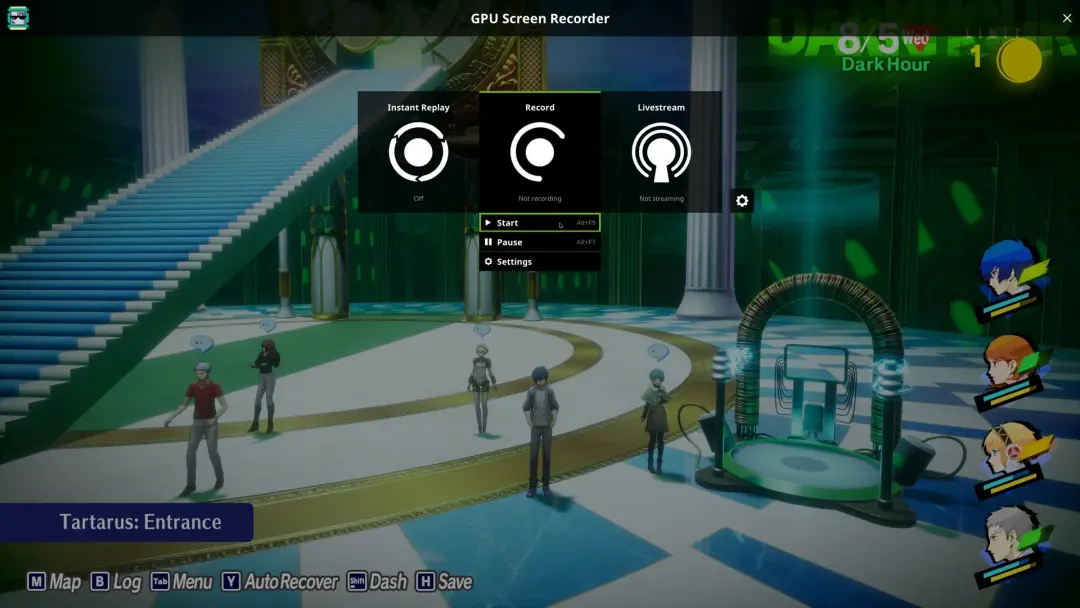
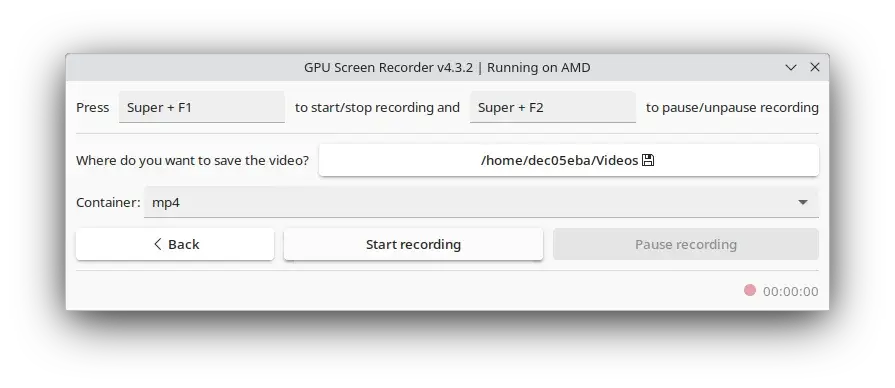
Step 4: Start and Stop Recording
Click “Start Recording” to begin, and the GPU screen recorder will capture everything on your screen. You can also set hotkeys for quick start/stop.
When you’re done, click “Pause Recording”, and the output file will be saved to your designated directory.
3. Pros and Cons of Flathub GPU Screen Recorder
Pros:
- GPU Acceleration: Offloads recording tasks to the GPU, reducing CPU usage and improving performance.
- Open-Source: It’s free and community-driven, with no ads or premium versions.
- High-Quality Output: Supports high-resolution and high-frame-rate recordings.
- Linux Native: Works seamlessly with most Linux distributions.
- Low System Resource Usage: Ideal for lower-end systems or multitasking environments.
Cons:
- Linux Exclusive: Not compatible with Windows or macOS platforms.
- Basic Interface: The user interface is functional but lacks modern polish.
- Limited Editing Features: No built-in video editor or annotation tools.
- No Cloud Integration: Doesn’t offer cloud upload or sharing capabilities.
- Not Beginner-Friendly: Requires terminal usage for installation and configuration, which might intimidate new users.
4. Try the Best Alternative: Recordit
While Flathub GPU Screen Recorder works well in many Linux scenarios, it falls short in flexibility, cross-platform support, and ease of use. If you’re looking for a more powerful and accessible solution, Recordit is the best alternative.
Recordit is a lightweight, cross-platform screen recording tool designed to capture high-quality screen videos and convert them into popular formats such as GIFs or MP4s. It supports Windows and macOS, making it ideal for users who switch between platforms.
Here’s why Recordit stands out:
- One-Click Recording: Instantly start capturing your screen without configuring complex parameters.
- GIF & MP4 Support: Perfect for demos, tutorials, and bug reports.
- Screenshots: Easily take high quality screenshots with one-click.
- No Issues: Capture your screen without losing frames or capturing a black screen.
- Beginner Friendly: No technical setup required—ideal for both novice and advanced users.
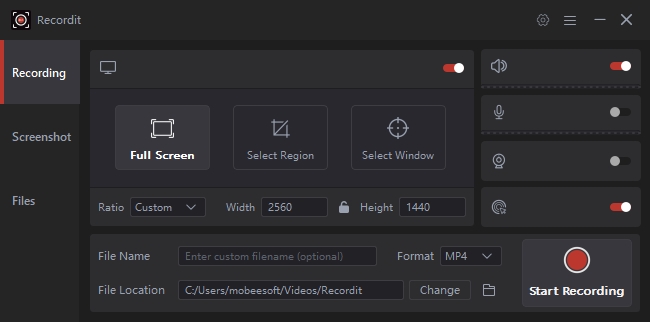
How to Use Recordit:
- Download the Recordit installer file for your OS from the official site, then set up the software.
- Open Recordit, select the area of the screen you want to capture and set other recording options.
- Click the Start Recording button to let Recordit begin capturing your screen activity.
- When finished, click Stop Recording and the captured video will be saved under the software “Files” tab.
5. Conclusion
Built for Linux enthusiasts, Flathub GPU Screen Recorder delivers smooth, high-performance screen recording by leveraging GPU acceleration. It’s reliable, efficient, and open-source—ideal for those who are technically inclined and working within the Linux ecosystem.
However, it’s not the most user-friendly option and lacks features like cross-platform support, high-quality capture and advanced dditong tools. For users who value simplicity and flexibility, Recordit is the superior alternative. Whether you’re a content creator, professional, or casual user, Recordit streamlines the screen recording process into a few simple clicks – no configuration required, no steep learning curve.
Try Recordit today and experience effortless, high-quality screen recording across platform.