How to Use Windows Snipping Tool for Video Recording?

The Windows Snipping Tool has long been a go-to utility for capturing screenshots in Windows. It provides a simple way to record a portion of your screen, with options to save or annotate the capture. But many users are unaware that recent versions of Windows have expanded the functionality of this tool to include basic video recording capabilities. Whether you’re trying to record a quick tutorial, a bug demonstration, or a software walkthrough, the Snipping Tool now provides a built-in way to do that without needing third-party software.
But how effective is it really? And are there better alternatives for more advanced screen recording tasks? In this article, we’ll explore how to use the Windows Snipping Tool for video recording, as well as look at its pros and cons.
1. Can Snipping Tool Record Video?
Yes. Starting with Windows 11 version 22H2, the Snipping Tool now includes screen recording capabilities in addition to its screenshot features. This was a long-awaited feature, as Windows users previously had to rely on apps like Xbox Game Bar, OBS Studio, or third-party screen recorders to capture videos.
The screen recording feature in the Windows Snipping Tool is fairly straightforward, providing basic functionality to capture any selected area of your screen. It doesn’t come with advanced settings like webcam overlay, microphone input control, or real-time annotation—but for quick tasks, it gets the job done.
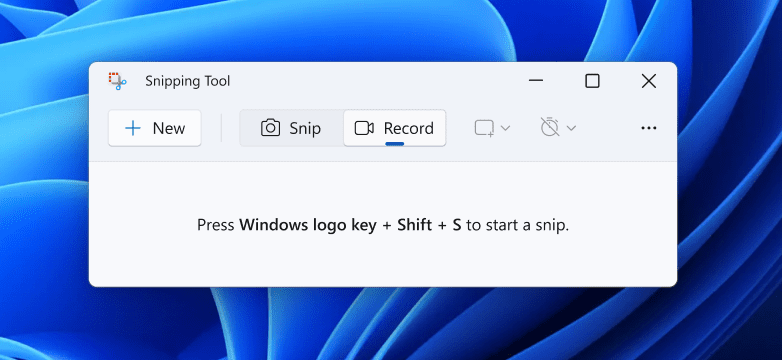
2. How to Record with Windows 11 Snipping Tool?
Recording video with the Snipping Tool is easy – just follow these steps:
- Hit the Windows key, find “Snipping Tool,” and launch it on your device.
- Inside the Snipping Tool, you’ll see two tabs at the top: Snip and Record; Click on the Record tab (video camera icon).
- Click on Windows snipping tool shortcut (Win + Shift + S) to start recording and perform the actions you want to capture on-screen.
- When you’re done, click Snipping tool’s Stop button and the recording will be automatically opened in the Snipping Tool window.
- Click on the Save icon or use Ctrl + S to save the video in .mp4 format by default.
3. Pros and Cons of Using Snipping Tool to Record Video
Pros:
- Built-in and Free
No need to install third-party software—comes pre-installed with Windows 11. - Simple Interface
Clean and minimal UI makes it easy for non-technical users to operate. - Custom Area Selection
Ability to record only part of the screen is useful for focusing on specific tasks. - Quick Sharing
Saves in MP4 format, making it easy to share or upload.
Cons:
- No Audio Recording
As of now, the Snipping Tool does not support audio recording—neither system sound nor microphone input. - No Webcam Overlay
You cannot include your webcam footage, which is a downside for tutorials or presentations. - No Annotation Tools
You can’t annotate, highlight, or draw on the screen while recording. - Limited Editing Options
You can’t trim or edit the recording inside the tool. - Only Available in Windows 11
Video recording is not supported in Windows 10 or earlier.
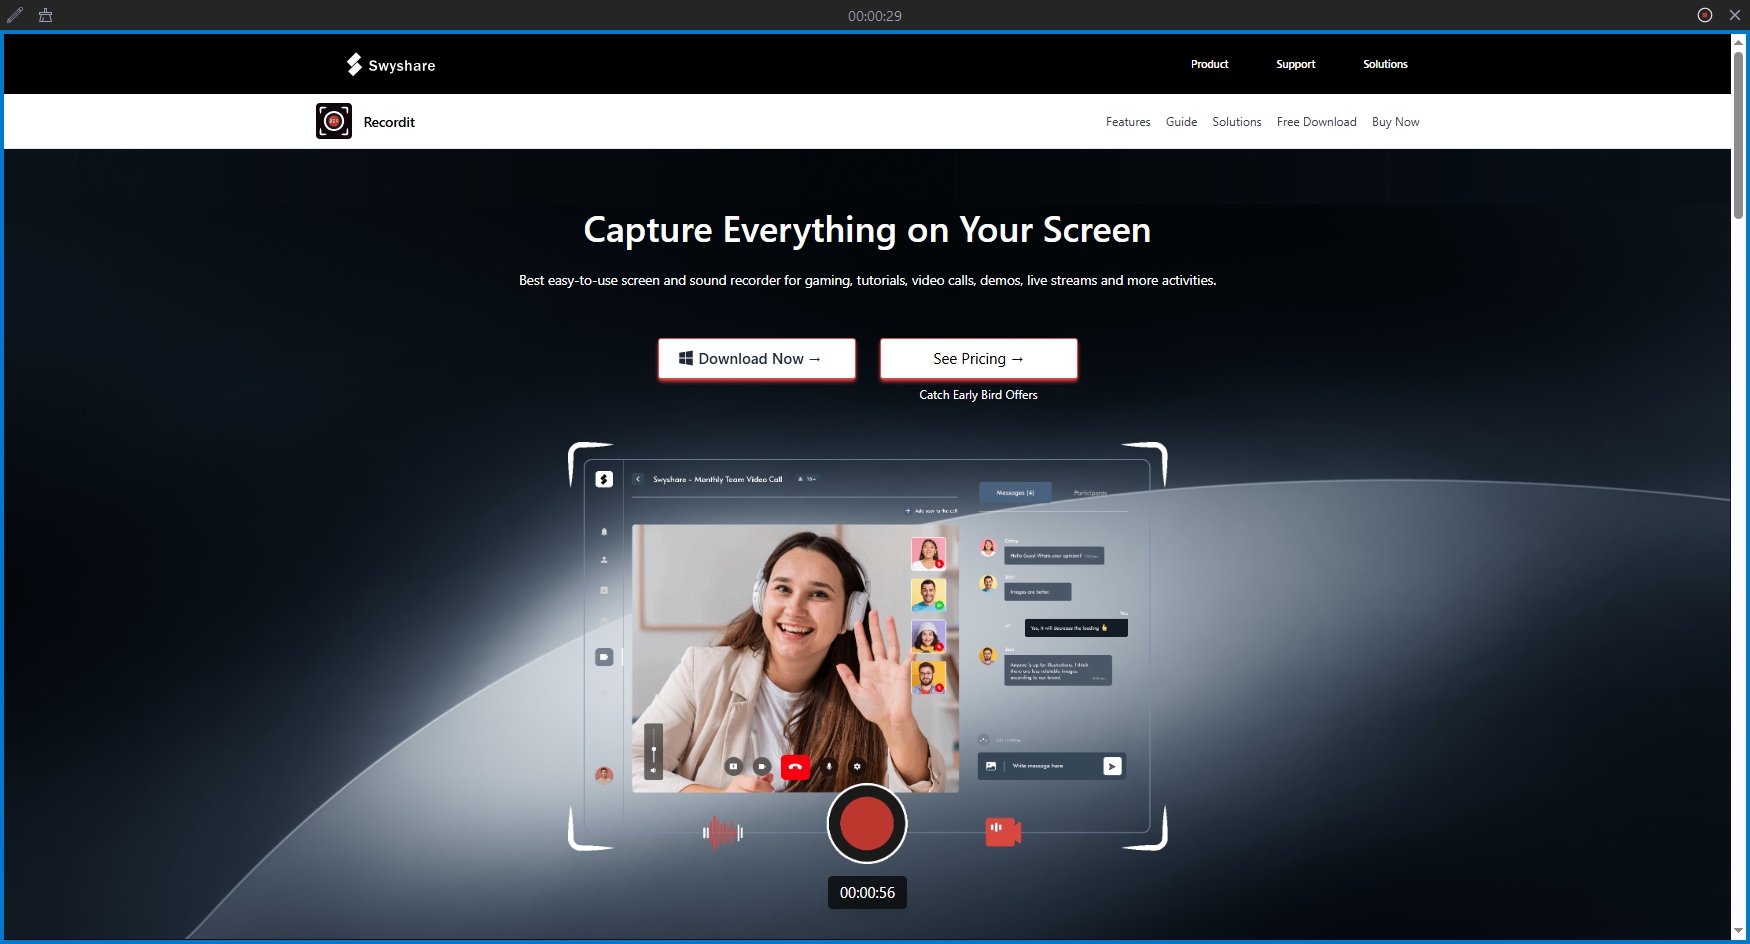
4. Use Recordit Instead of Snipping Tool
If the Snipping Tool’s limited feature set isn’t cutting it for you, you’re not alone. For those who want more flexibility, Recordit is a fantastic alternative.
Recordit is a lightweight screen recording tool designed for fast, shareable screencasts. It allows you to grab any part of your screen with sound in no time and save it as a GIF or video.
Key Features of Recordit:
- Record screen and audio without losing quality or frames.
- Allow to customize record settings, including recording mode, area, resolution, mouse cursor and more.
- Instantly convert and save your recording into popular fromats.
- Control your recordings effortlessly with customizable hotkeys.
- Works on both Windows and macOS.
How to Use Recordit instead of Windows Snipping Tool:
- Download and Install Recordit from the official site and set it up.
- Launch the app and choose the mode, area and resolution you want to record.
- Click to start recording, and perform your on-screen task.
- Once you click the stop recording button, Recordit automatically saves the video and displays it under the “Files” tab.
5. Conclusion
The Snipping Tool’s new video recording feature is a welcome addition to Windows 11, giving users a fast and easy way to record their screens without third-party software. It’s great for capturing simple screen activity – like software bugs or UI demonstrations – but it’s also limited in key areas like audio, editing, and sharing.
For users who need more robust screen recording capabilities, Recordit is a much better choice. With support for audio recording, easy GIF export, fast sharing, and more professional features, it fills in the gaps left by the Snipping Tool. Whether you’re creating tutorials, reporting bugs, or simply need to capture a more dynamic visual, Recordit offers the tools you need – without the complexity of full-fledged video editing software.