How to Fix Desktop Audio Not Working in OBS?

OBS Studio is a powerful tool for screen recording, streaming, and content creation, but its many settings can sometimes cause audio issues. A common problem is OBS recording video without desktop audio, even when your computer sound works normally.
Fortunately, there are several simple ways to troubleshoot the issue. In this guide, we’ll explain why desktop audio may not be working in OBS and provide several quick solutions.

1. Why Is Desktop Audio Not Working in OBS?
There are several possible reasons why OBS isn’t recording desktop audio. The most common ones include:
- Incorrect audio device: OBS may be listening to a different speaker, headphone, or output device.
- Muted desktop audio: The Desktop Audio source may have been muted in the OBS Audio Mixer.
- Wrong system output: Your computer may be playing sound through a device that OBS isn’t configured to capture.
- Audio track settings: Desktop audio may not be assigned to the recording track you’re playing back.
- Audio driver problems: Outdated or malfunctioning drivers can prevent OBS from accessing your audio device correctly.
- Application conflicts: Other programs or virtual audio devices may interfere with desktop audio capture.
- OBS configuration issues: Incorrect audio settings can prevent system sound from being captured even when everything else appears normal.
Identifying the exact cause can take some trial and error, so it’s best to work through the following fixes one at a time.
2. How to Fix Desktop Audio Not Working in OBS?
2.1 Check the Desktop Audio Device
First, make sure OBS is using the correct playback device.
Open OBS Studio > Settings > Audio and find Desktop Audio under Global Audio Devices. Select the speakers, headphones, or other output device that your computer is currently using.
Click Apply and OK, then play some audio. Watch the Desktop Audio meter in OBS to see whether it responds.
2.2 Make Sure Desktop Audio Is Not Muted
The Desktop Audio source may simply be muted.
Look at the Audio Mixer in OBS and find Desktop Audio. If the speaker icon shows that it is muted, click it to enable the source again.
Also check the volume slider. If it has been turned all the way down, increase it to an appropriate level.
2.3 Check Your Computer’s Output Device
Your operating system may be sending sound to a different device than the one selected in OBS.
On Windows, open Settings > System > Sound and check the current output device. Make sure it matches the device selected for Desktop Audio in OBS.
2.4 Re-select the Audio Device in OBS
Sometimes an audio device can become disconnected or fail to initialize correctly.
Go back to OBS > Settings > Audio and temporarily change the Desktop Audio device to another option. Apply the change, then switch it back to the correct device.
This can force OBS to reconnect to the audio device.
2.5 Check Advanced Audio Properties
OBS gives you additional controls for each audio source.
In the Audio Mixer, click the three-dot menu next to Desktop Audio and choose Advanced Audio Properties. Check that the source is configured correctly and assigned to the appropriate recording track.
If you’re using multiple audio tracks, make sure Desktop Audio is included on the track that you listen to during playback.
2.6 Check Recording Audio Tracks
Sometimes OBS actually captures desktop audio, but you don’t hear it because you’re playing back a different audio track.
Go to Settings > Output > Recording and review the selected audio tracks. Then open Advanced Audio Properties and check which tracks are assigned to Desktop Audio.
2.7 Check Windows Volume Mixer
Open the Windows Volume Mixer to ensure the sound-producing app and OBS are not muted, too quiet, or assigned to the wrong output device.
2.8 Restart OBS
Restart OBS after connecting or switching audio devices, and if the issue persists, restart your computer to refresh the audio connections and services.
2.9 Update Your Audio Drivers
An outdated or corrupted audio driver may prevent OBS from capturing system sound correctly.
On Windows, open Device Manager and locate your audio device under Sound, video and game controllers. Check whether a driver update is available.
2.10 Disable Conflicting Audio Software
Temporarily close virtual audio devices and other sound-related programs to check whether they are interfering with OBS’s desktop audio capture.
2.11 Check OBS Permissions and Compatibility
Update OBS to the latest version and try running it as an administrator on Windows to resolve potential permission or compatibility issues, then make a short test recording.
2.12 Make a Short Test Recording
Make a short test recording with desktop audio before starting a lengthy session to ensure both video and sound are captured properly.
3. Try a More Reliable and Easy-to-Use Screen Recorder – Swyshare Recordit
If you’ve tried several OBS fixes but still find desktop audio recording unnecessarily complicated, it may be time to consider a simpler screen recording application.
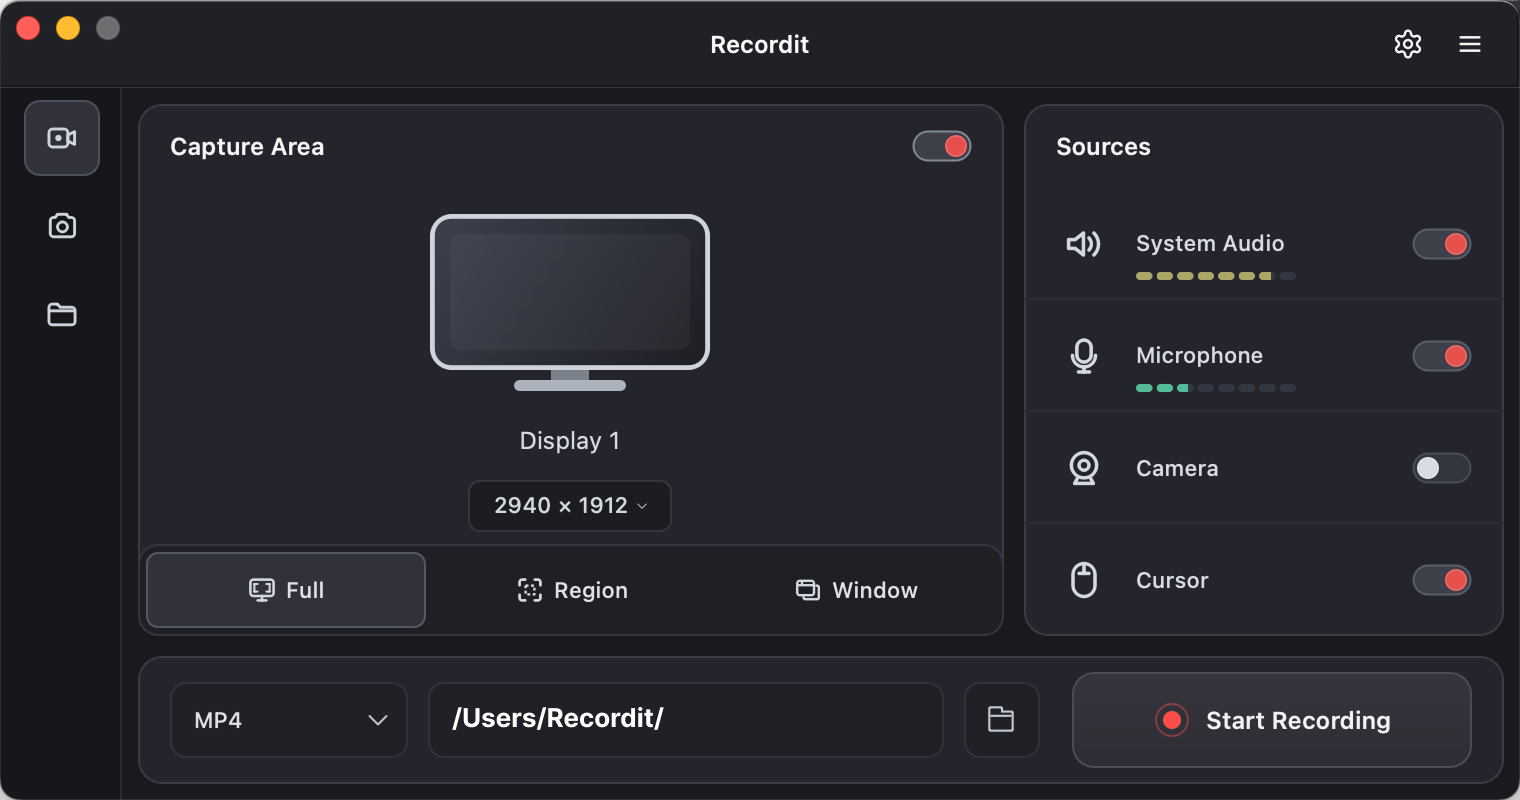
Swyshare Recordit is designed for users who want an easier way to record their computer screen without dealing with the extensive configuration options found in OBS.
Key features of Recordit:
- Capture your full screen, a window, or a selected area.
- Record system audio, microphone sound, or both.
- Add a webcam overlay to your screen recordings.
- Record videos in resolutions up to 4K.
- Trim recordings and add effects, watermarks, or annotations.
- Set recordings to start and stop automatically.
- Compatible with both Windows and macOS.
4. Conclusion
In conclusion, OBS desktop audio issues can often be fixed by checking your audio devices, mixer settings, and recording tracks. However, if you want a simpler solution, Swyshare Recordit is a reliable and easy-to-use alternative. With its straightforward recording features, Recordit makes capturing your screen and audio much more convenient.