How to Mirror iPhone to Mac?

Mirroring your iPhone to a Mac is a powerful way to view, control, and share your mobile screen on a larger display. Whether you’re giving a presentation, demonstrating an app, recording tutorials, or simply enjoying media on a bigger screen, iPhone mirroring can significantly improve your workflow and viewing experience.
With the growing integration between Apple devices, especially through features in macOS and iOS, mirroring your iPhone to your Mac has become easier and more seamless than ever.
In this guide, you’ll learn how to mirror your iPhone to your Mac, how to manage notifications during mirroring, how to stop the mirroring process, and even how to record your mirrored iPhone screen using a simple tool.
1. How to Mirror iPhone to Mac?
There are several ways to mirror your iPhone to a Mac, depending on your preferences and setup.
Method 1: Use AirPlay (Wireless Mirroring)
Apple’s AirPlay feature allows you to wirelessly mirror your iPhone screen to your Mac.
Steps:
- Check that both devices are connected to the same wireless network.
- On your Mac, enable AirPlay Receiver (available in newer macOS versions).
- Swipe to open Control Center and tap “Screen Mirroring”.
- Select your Mac from the list of available devices and enter the AirPlay code if prompted.
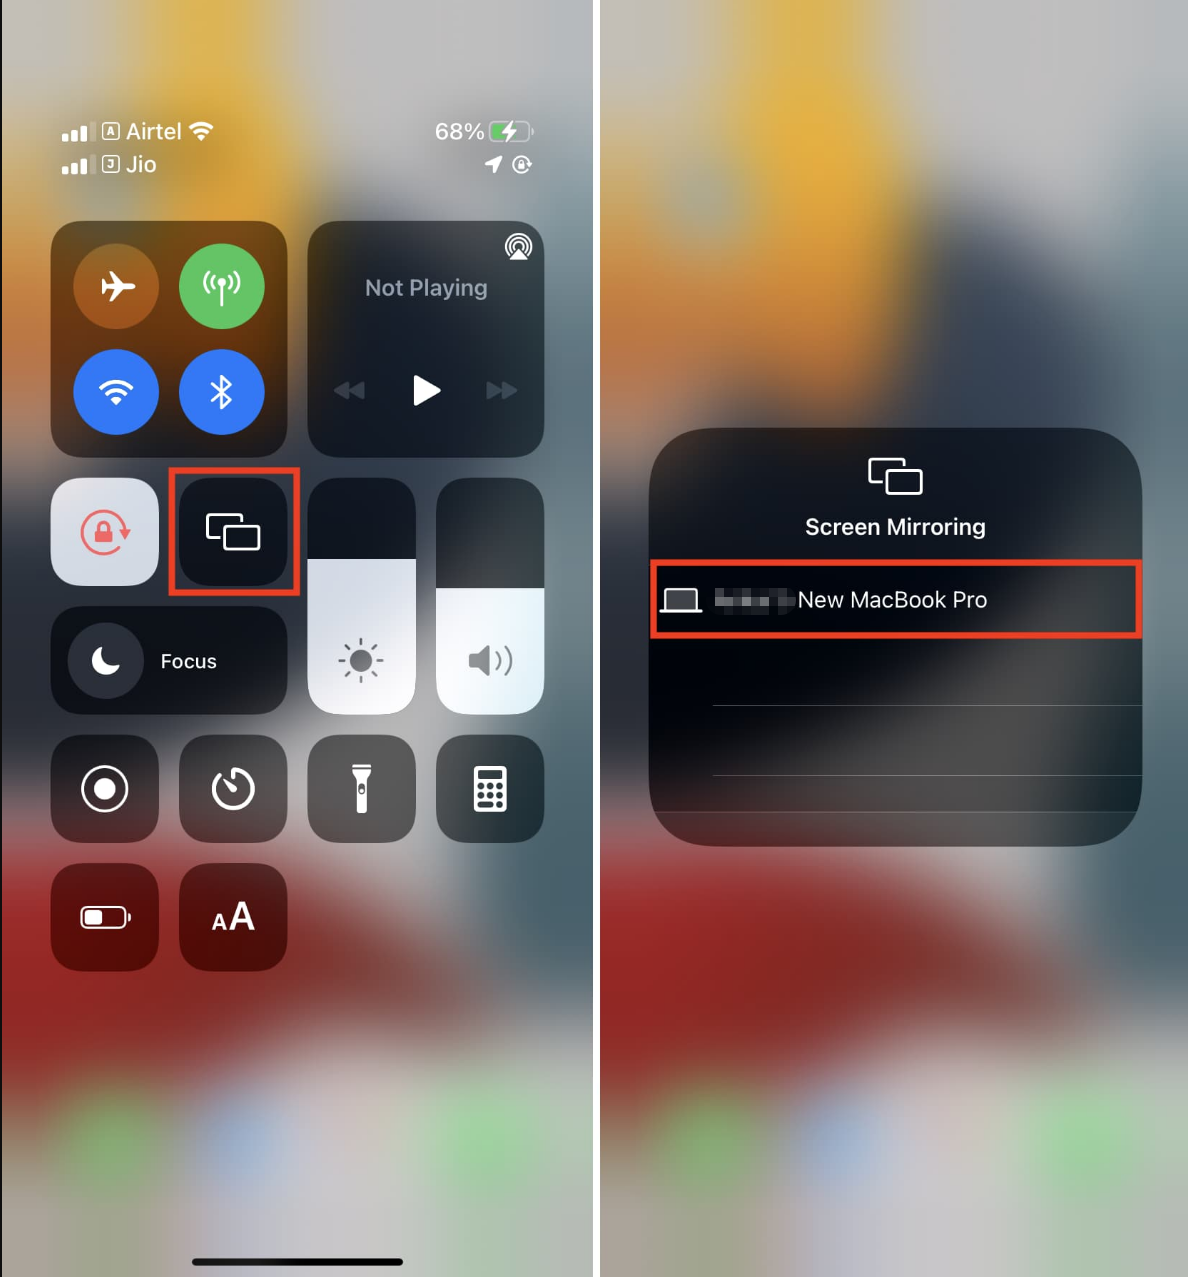
Once connected, your iPhone screen will instantly appear on your Mac.
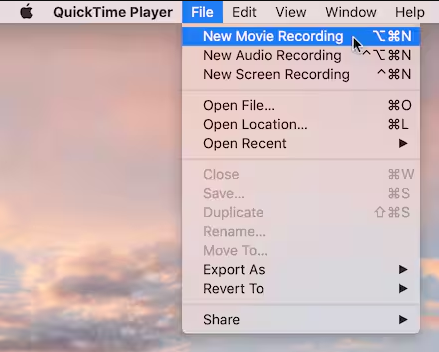
Method 2: Use QuickTime Player (Wired Method)
If you prefer a stable and lag-free connection, you can use a USB cable with QuickTime Player.
Steps:
- Establish a connection between your iPhone and Mac using a Lightning cable.
- Open QuickTime Player on your Mac and then click “File” and choose “New Movie Recording”.
- Click the dropdown arrow next to the record button, then select your iPhone as the camera source.
Method 3: Use Third-Party Apps
There are also third-party tools that offer additional features like recording, annotations, and wireless control.
These apps are useful if you need:
- Higher customization
- Recording options
- Cross-platform compatibility
2. How to Turn Off Notifications from iPhone Mirroring on Mac?
When mirroring your iPhone to your Mac, notifications from your iPhone may appear on your Mac screen, which can be distracting—especially during presentations or recordings.
Here are a few ways to manage or disable them:
Option 1: Enable Do Not Disturb
- On your iPhone or Mac, open Control Center
- Turn on “Do Not Disturb” or Focus mode
- Choose a duration or schedule
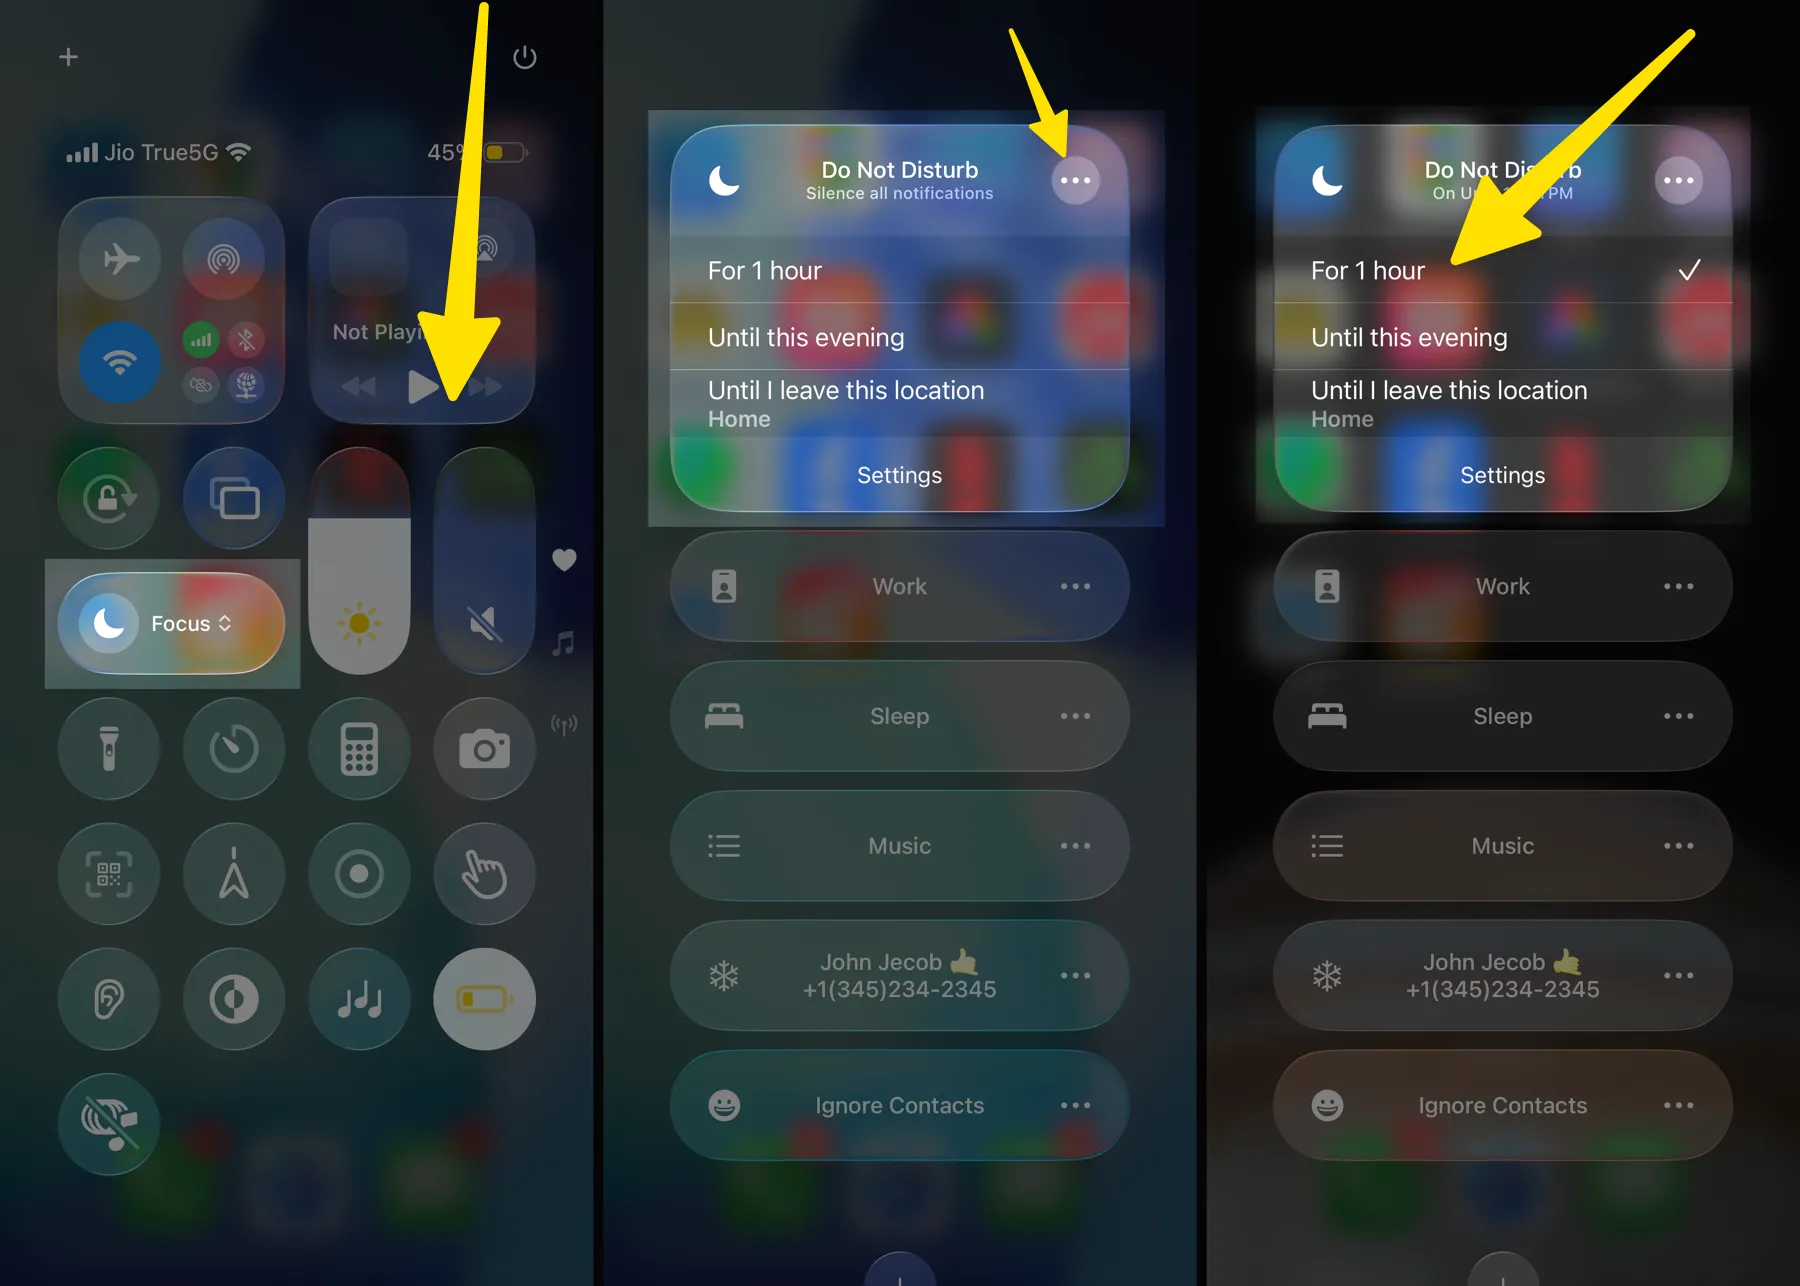
This will silence notifications during mirroring.
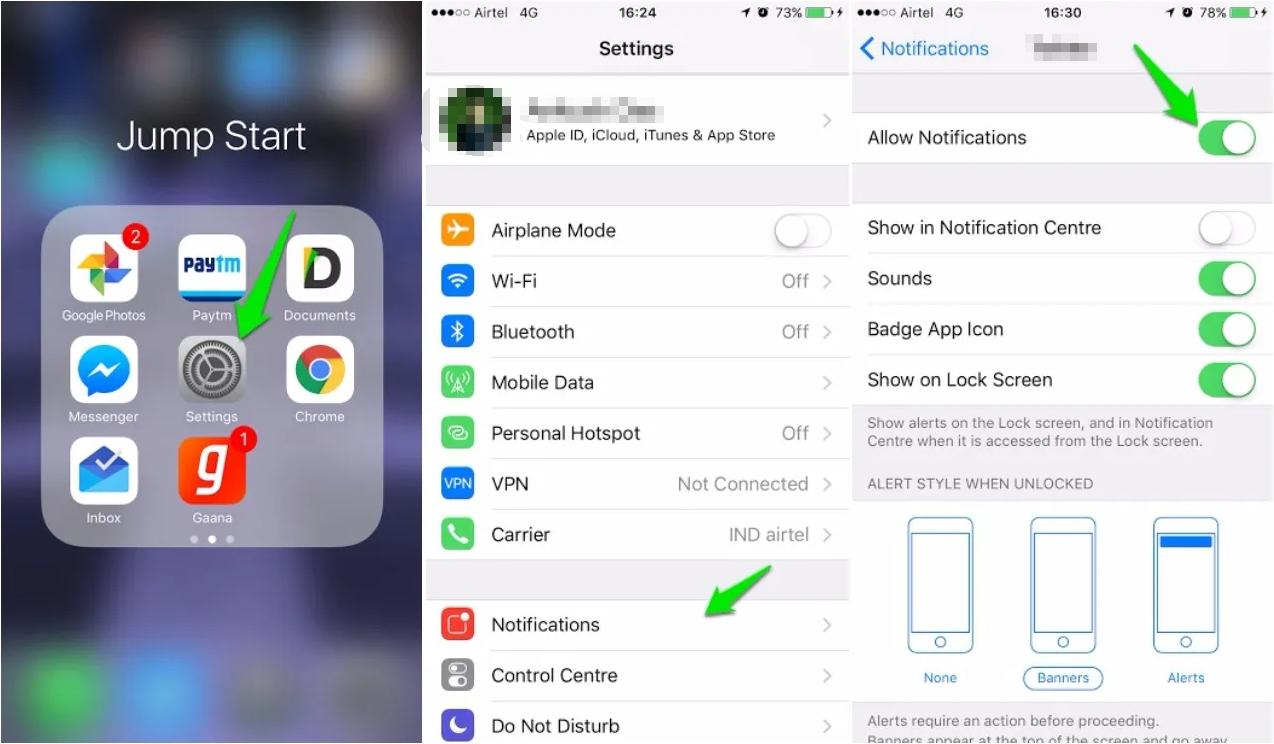
Option 2: Disable Notifications for Specific Apps
- On your iPhone, go to Settings
- Tap “Notifications”
- Select the app you want to mute
- Turn off “Allow Notifications”
Option 3: Adjust Mac Notification Settings
- Open System Settings on your Mac
- Go to Notifications
- Customize which apps can send alerts
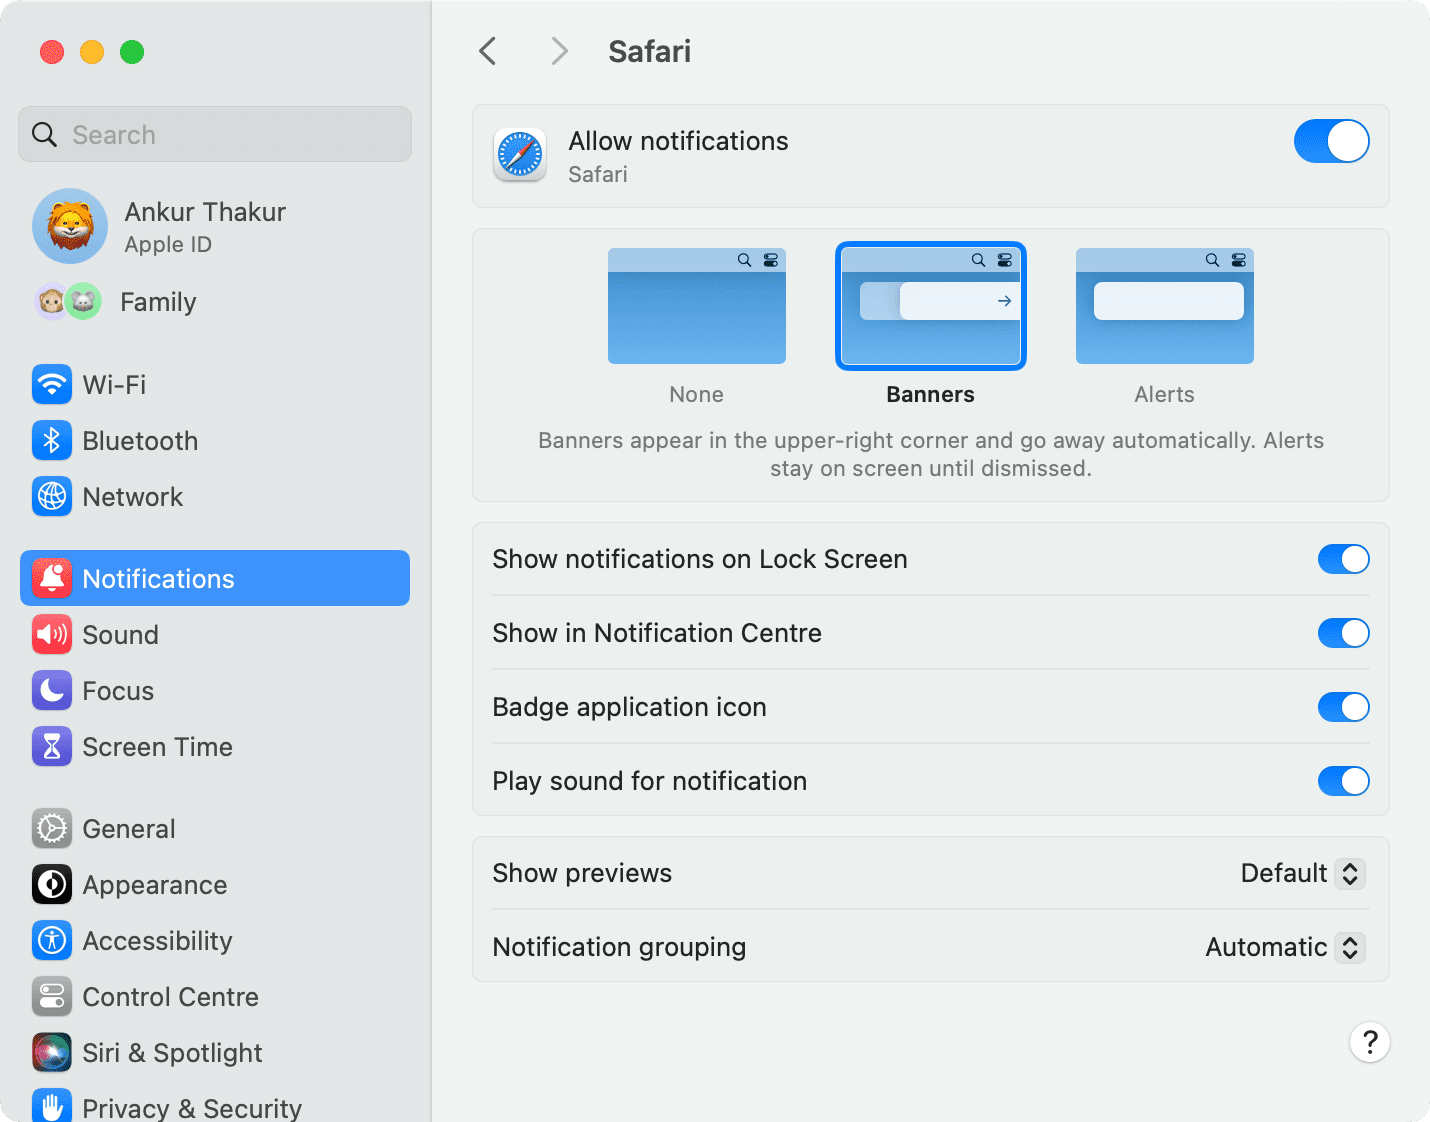
This ensures a cleaner and distraction-free mirroring experience
3. How to Stop iPhone Mirroring on Mac?
Stopping iPhone mirroring is quick and straightforward.
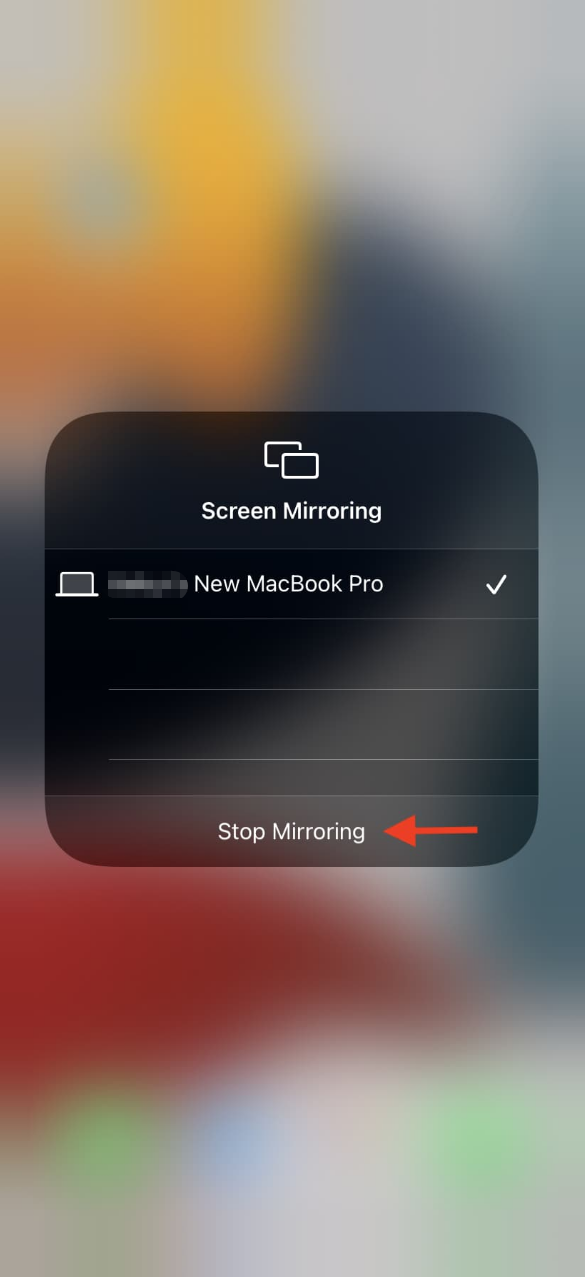
Option 1: From iPhone
- Open Control Center
- Tap “Screen Mirroring”
- Tap “Stop Mirroring”
Option 2: From Mac
- Close the mirroring window or disconnect the AirPlay session

Option 3: Disconnect Cable (QuickTime Method)
- Simply unplug your iPhone from your Mac
Once disconnected, your iPhone screen will no longer appear on your Mac.
4. Bonus Tip: Easily Record iPhone Screen on Mac with Swyshare Recordit
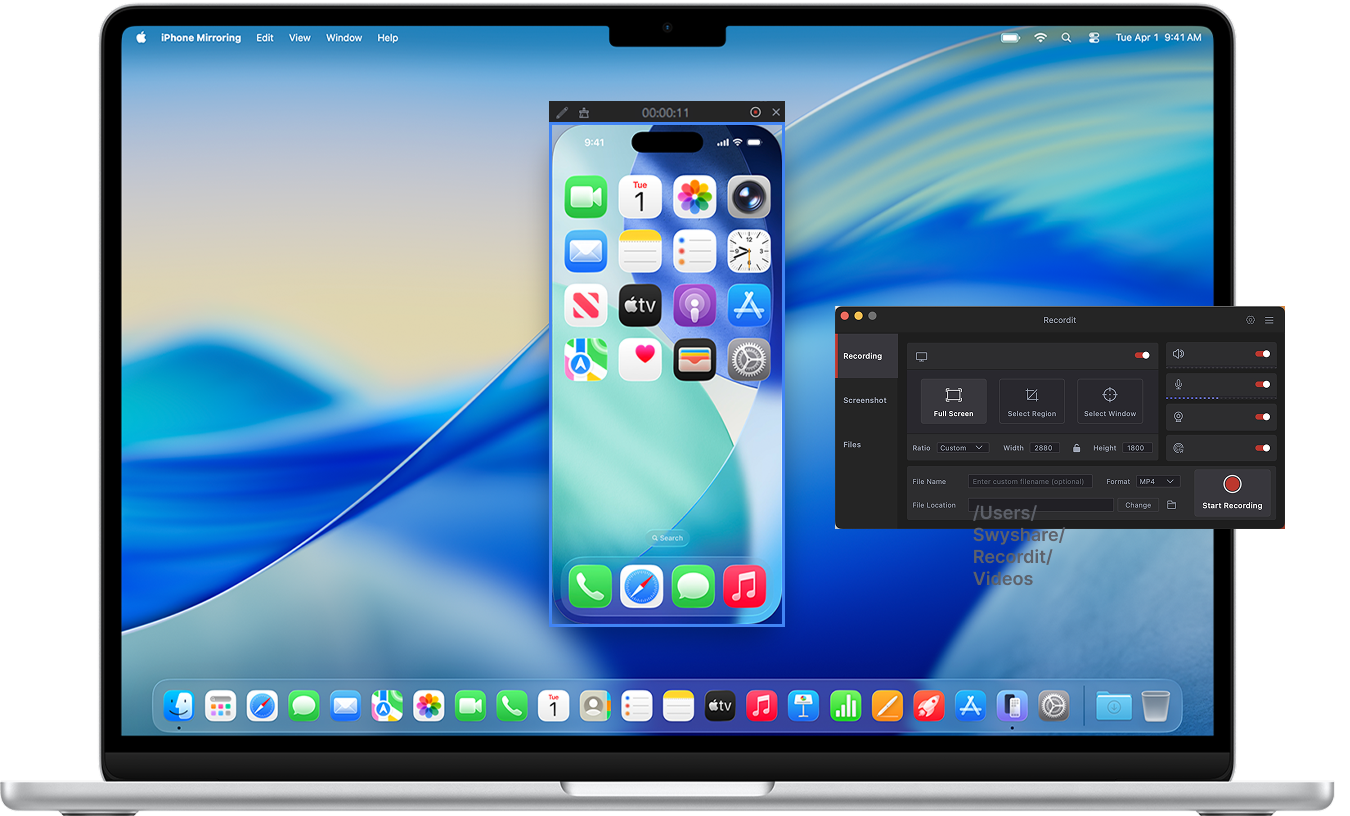
If you want to not only mirror but also record your iPhone screen on your Mac, using a dedicated tool like Swyshare Recordit is a great option.
Why use Recordit?
- Record your iPhone screen (mirrored to Mac) along with webcam overlay.
- Record internal sound and voice narration simultaneously.
- Capture full screen, a specific iPphone mirroring window, or a custom area.
- Record screen in high quality (up to 4K) and export in populat formats.
- Built-in basic editing tools tp edit screen when or after recording.
- Set automatic recording times or capture recent screen activity.
- Clean design makes it easy to start recording your iPhone screen on Mac in just a few clicks.
Steps to record mirrored iPhone screen:
- Mirror your iPhone to your Mac using AirPlay or QuickTime.
- Launch Recordit on your Mac, select the recording area (your mirrored iPhone screen)
- Enable audio or webcam if needed and then click “Start Recording”.
- Stop recording when finished and find the recorded mirrored iPhone screen activity in Recordit’s “Files” tab.
5. Conclusion
Mirroring your iPhone to a Mac is a simple yet powerful way to enhance productivity, presentations, and content creation. Whether you choose wireless AirPlay, a stable wired connection via QuickTime Player, or third-party tools, there’s a method for every need and setup.
However, if you want to take things a step further and record your mirrored iPhone screen effortlessly, Swyshare Recordit is highly recommended. It combines simplicity with powerful recording features, making it ideal for both beginners and professionals.
With the right setup and tools, you can easily mirror, manage, and record your iPhone screen on your Mac – creating high-quality content with minimal effort.