How to Recover Crashed OBS Recording?

OBS Studio is a popular free and open-source program used to record screens, capture gameplay, create tutorials, stream live content, and produce videos. Its extensive customization options make OBS a popular choice among gamers, content creators, educators, and professionals. However, OBS can still crash unexpectedly while recording.
A sudden OBS crash can be frustrating, especially when you have spent a long time recording important content. In some cases, the recording may appear to have disappeared, while in others, you may find a video file that is incomplete or cannot be opened. Fortunately, an OBS crash does not always mean your recording is permanently lost. Depending on the recording format and the circumstances of the crash, you may be able to recover the video or repair the damaged file.
This article explains why OBS recording crashes happen and provides quick steps to recover a crashed recording.

1. Why Do OBS Recording Crashes Occur?
OBS recording crashes can happen for various technical reasons. Some of the most common causes include:
- High CPU or GPU usage: Recording high-resolution video while running demanding games or applications can overload your computer.
- Insufficient disk space: Long or high-quality recordings can use a large amount of storage. If your drive becomes full, OBS may stop recording or crash.
- Outdated drivers: Incompatible or outdated graphics drivers can cause instability during recording.
- Overly demanding settings: Excessively high recording settings can strain your hardware and affect OBS performance.
- Software conflicts: Conflicting background applications can sometimes affect OBS recording performance.
- Unexpected system interruptions: Power failures, system freezes, or forced shutdowns can interrupt a recording before OBS properly finishes saving it.
Understanding the cause can make it easier to recover your OBS recording and avoid future issues.
2. How to Recover a Crashed OBS Recording?
If OBS crashes while recording, try the following quick recovery methods.
2.1 Check Your OBS Recording Folder
Open OBS Studio and go to File > Show Recordings. Look for a file created around the time of the crash.
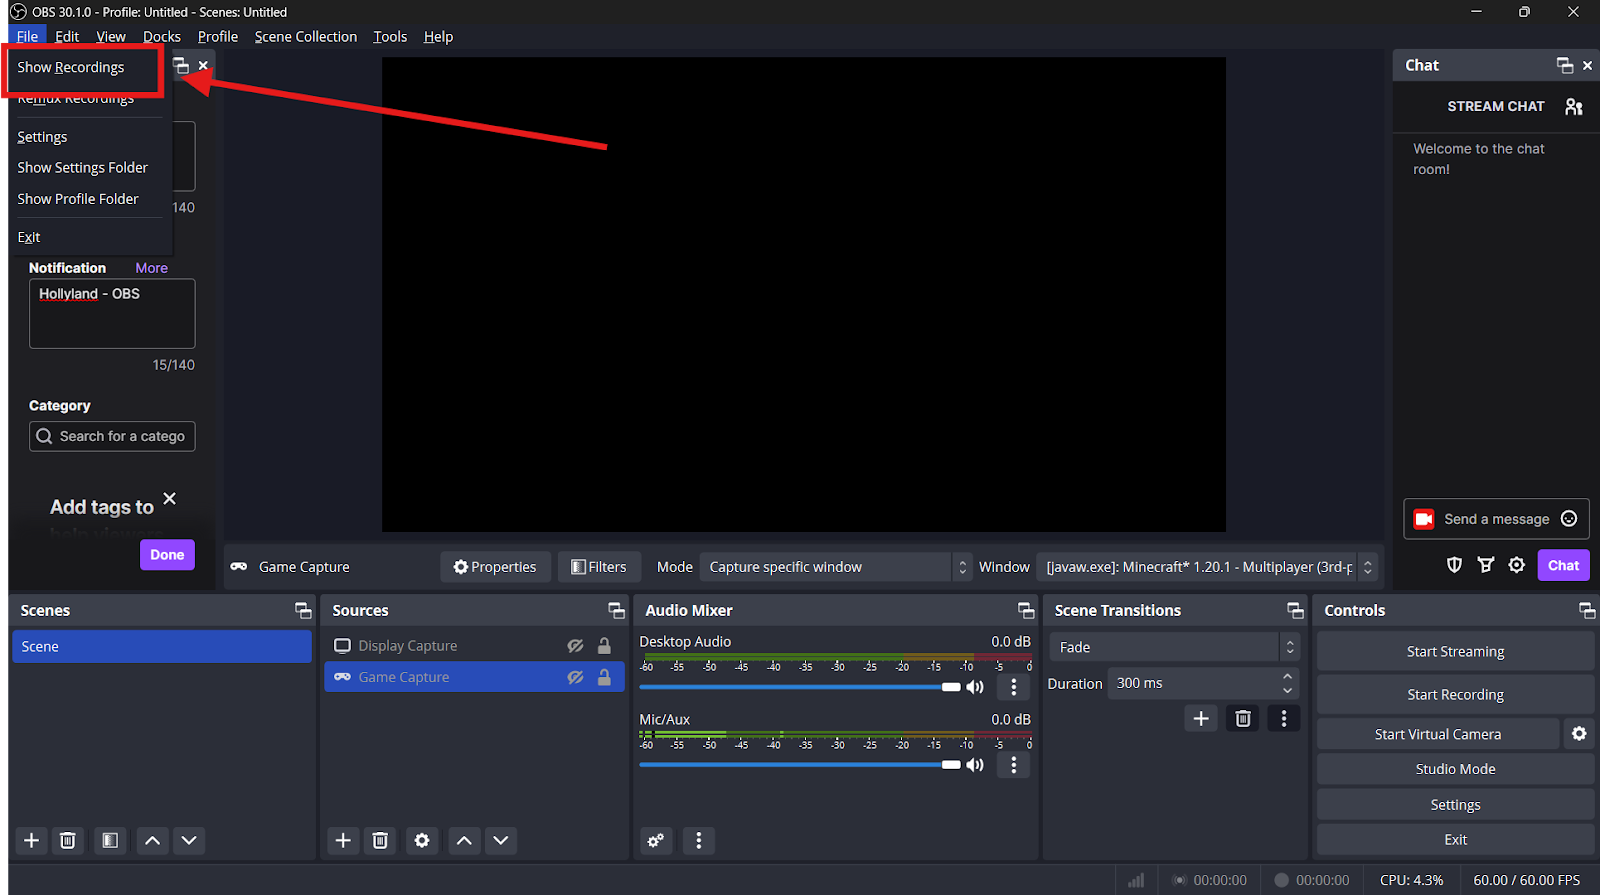
Check the file size. If you find a large file, your recording may still contain most of the captured footage. Before attempting any recovery or repair, make a backup copy of the original file.
2.2 Try Opening the Video
Open the recording with your usual video player. If it does not work, try another player such as VLC Media Player.
If your video plays normally, secure it with a backup. If it refuses to open, hold onto the file—it may still be possible to recover it.
2.3 Recover an MKV Recording
If you recorded in MKV format, you may have a better chance of recovering the footage after a crash. MKV is generally more resistant to unexpected interruptions than MP4.
If the file opens correctly, you can convert it to MP4 using OBS. Go to File > Remux Recordings, select the MKV file, and choose where to save the new MP4 version.
For safer recordings, use MKV and convert it to MP4 after recording.
2.4 Repair a Damaged MP4
If OBS crashes during an MP4 recording, the file may not be finalized correctly and may not open properly.
Make a backup of the damaged file first. Then try different media players. If the file still won’t play, try using a reputable video repair tool designed for corrupted MP4 files.
Recovery is not guaranteed, especially if some of the video data was never successfully written to your storage device.
2.5 Check Your Storage Space
If the recording is incomplete, check whether your computer ran out of disk space. Move old files to another drive or cloud storage if necessary.
To avoid future issues, make sure you have enough free storage before starting a long recording.
3. Bonus Tip: Try a More Reliable Screen Recorder — Swyshare Recordit Instead of OBS
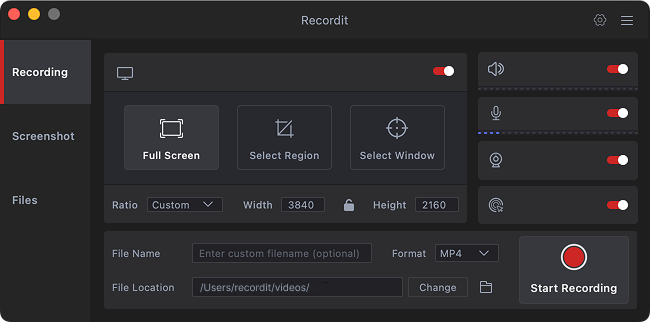
If you regularly experience OBS crashes or find OBS too complicated, you may want to try Swyshare Recordit as an alternative screen recorder.
Swyshare Recordit is a dedicated screen recording tool designed to provide a more straightforward way to capture your computer screen. Unlike OBS, which is designed for livestreaming and advanced recording, Recordit provides a simpler and more accessible screen recording experience.
Some of Recordit’s key features include:
- Flexible screen recording: Record the full screen, a window, or a selected area.
- Webcam & sound: Record your webcam/system or mic audio.
- Scheduled recording: Automatically start recordings at set times.
- Instant Replay: Save recent screen activity.
- Multiple formats: Export recordings in formats such as MP4, GIF, and MP3.
- Built-in editor: Trim and customize recordings with features like backgrounds and watermarks.
4. Conclusion
An OBS recording crash can be frustrating, but your video may not be lost. Check the OBS recording folder first. If you recorded in MKV, try opening the file or using OBS’s Remux Recordings feature to convert it to MP4. For damaged MP4 files, try different media players or a reputable video repair tool, and always back up the original file before recovery.
To prevent future crashes, keep enough free storage, update OBS and your graphics drivers, close unnecessary apps, and use settings your computer can handle.
If you want a simpler recording experience without OBS’s complex livestreaming and broadcasting features, consider Swyshare Recordit. With its easy workflow and useful recording tools, Recordit is a convenient alternative that can help you focus on creating content rather than troubleshooting crashes.