How to Import Recordings from iPhone to Computer?

Recording videos, capturing important moments, and saving audio notes on an iPhone are convenient ways to preserve valuable content. However, as your recording collection grows, your iPhone storage can quickly become full. Transferring recordings to a computer is a practical way to free up space, back up important files, and make it easier to organize or edit your recordings on a larger screen.
Fortunately, there are several ways to import recordings from an iPhone to a computer, whether you use Windows or Mac. In this guide, we’ll explore several effective methods to help you move your iPhone recordings to your computer.
1. How to Import Recordings from iPhone to Computer?
Depending on the type of recording you want to transfer and the computer you’re using, you can choose from the following methods.
Method 1. Transfer Recordings Using a USB Cable
Using a USB cable is one of the simplest ways to transfer recordings from an iPhone to a Windows PC or Mac. This method is particularly useful for moving large video files without relying on an internet connection.
Steps to Transfer iPhone Recordings to Windows PC:
- Connect your iPhone to your Windows computer using a compatible USB cable.
- Unlock your iPhone and tap Trust This Computer if prompted.
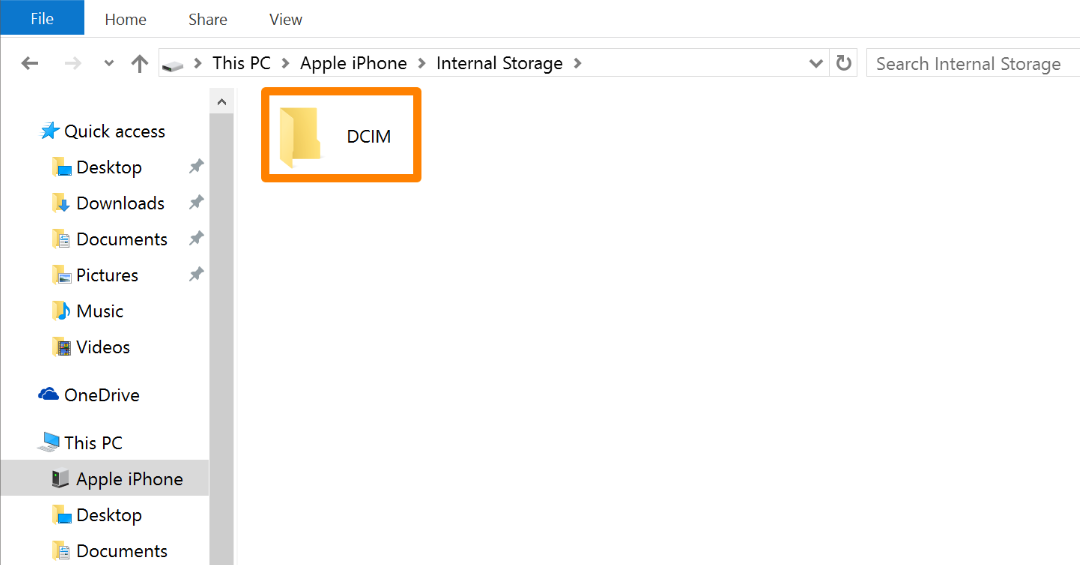
- Open File Explorer, select your iPhone under This PC, and navigate to the DCIM folder to find your videos.
- Select the recordings you want to transfer, then copy and paste them into a folder on your computer.
Steps to Transfer iPhone Recordings to Mac:
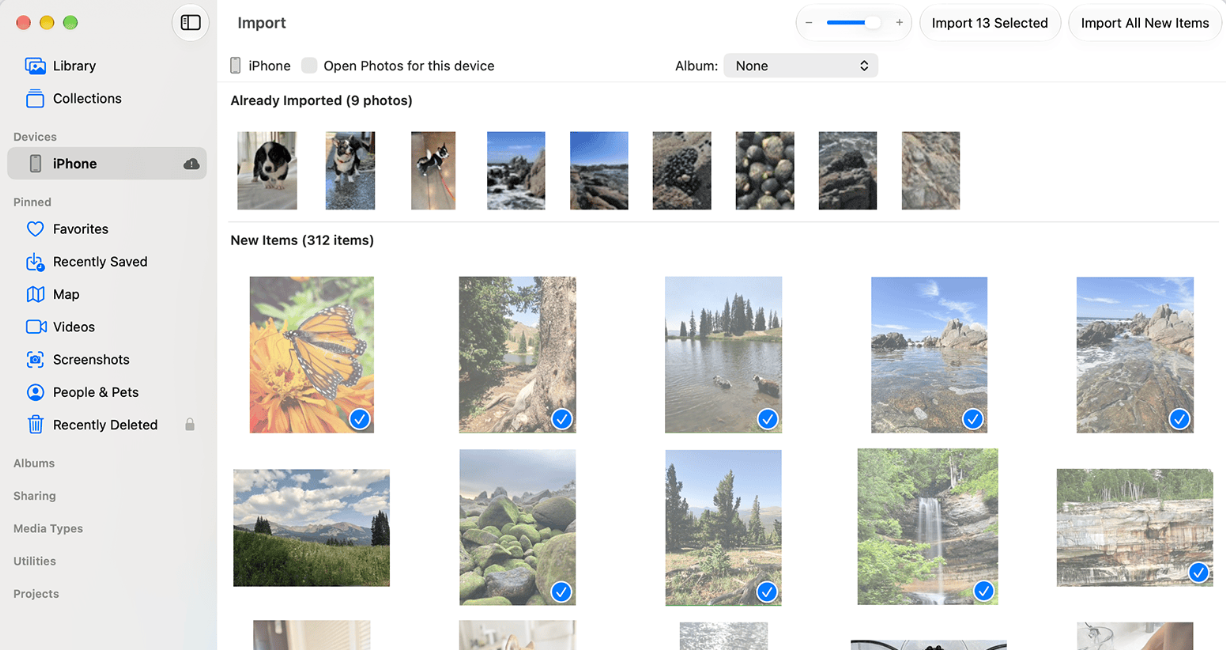
- Connect your iPhone to your Mac using a USB cable, open Photos, select your iPhone, choose the videos you want to transfer, and click Import Selected or Import All New Items.
Method 2. Import Voice Memos Using AirDrop or iCloud
If you mainly want to transfer audio recordings created with the Voice Memos app, Apple provides convenient wireless options. AirDrop is suitable for quickly sending individual recordings to a nearby Mac, while iCloud can synchronize your recordings across supported Apple devices.
Steps to Transfer Voice Memos Using AirDrop:
- Open the Voice Memos app on your iPhone.
- Find and select the recording you want to transfer.
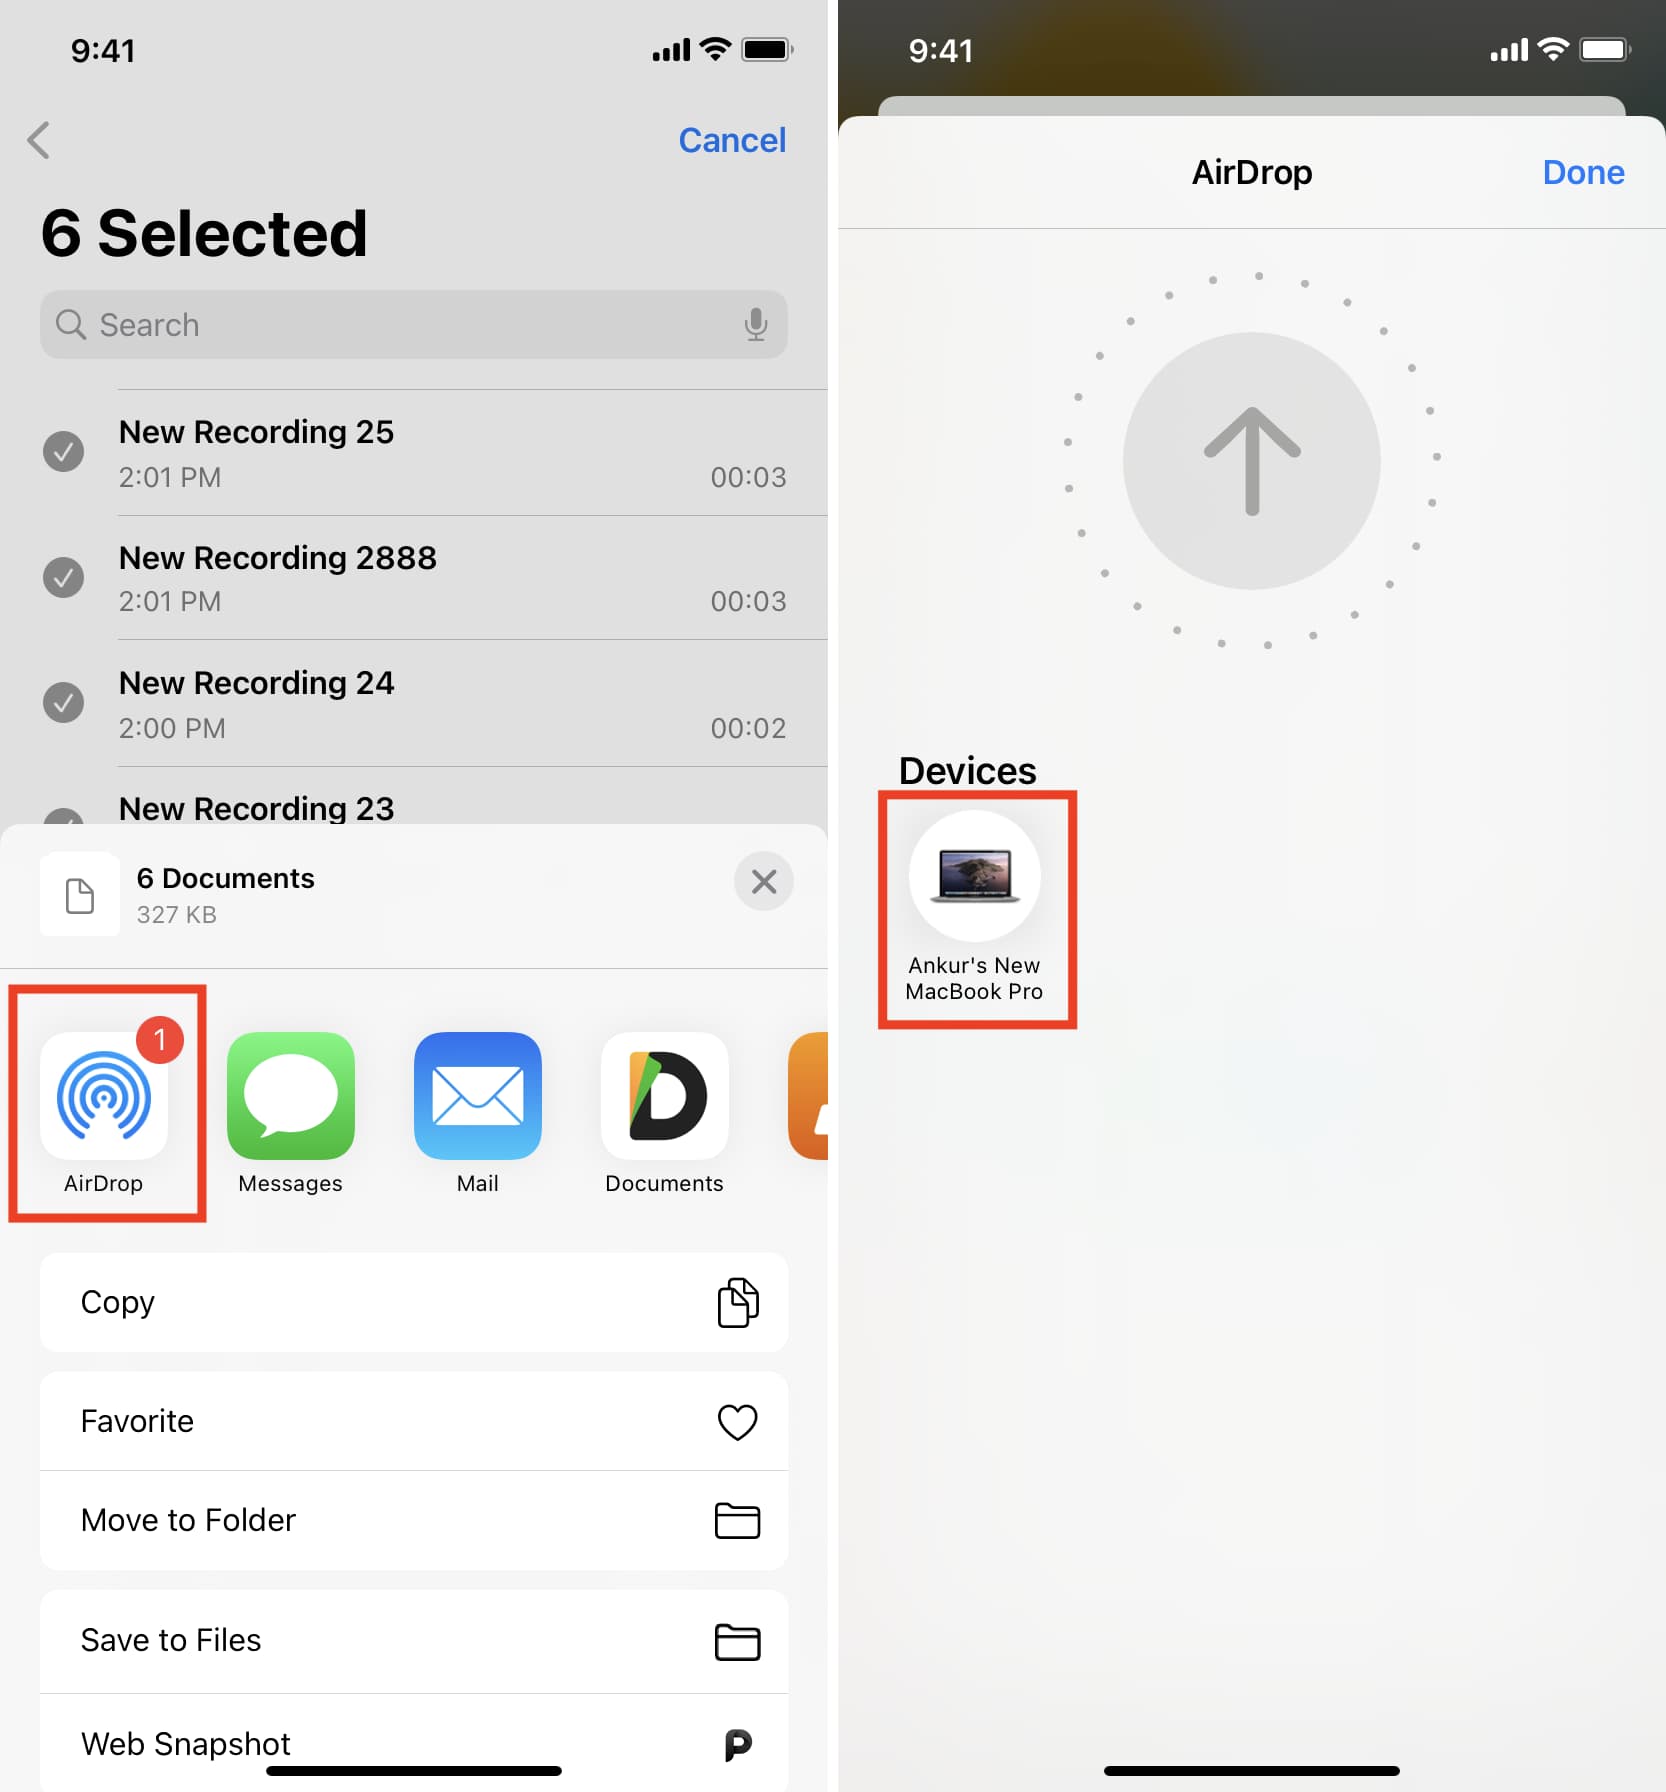
- Tap the three-dot menu and select Share.
- Choose AirDrop from the available sharing options, then select your Mac from the device list and accept the transfer if prompted.
- Find the transferred audio file in your Mac’s Downloads folder.
Steps to Sync Voice Memos Using iCloud:
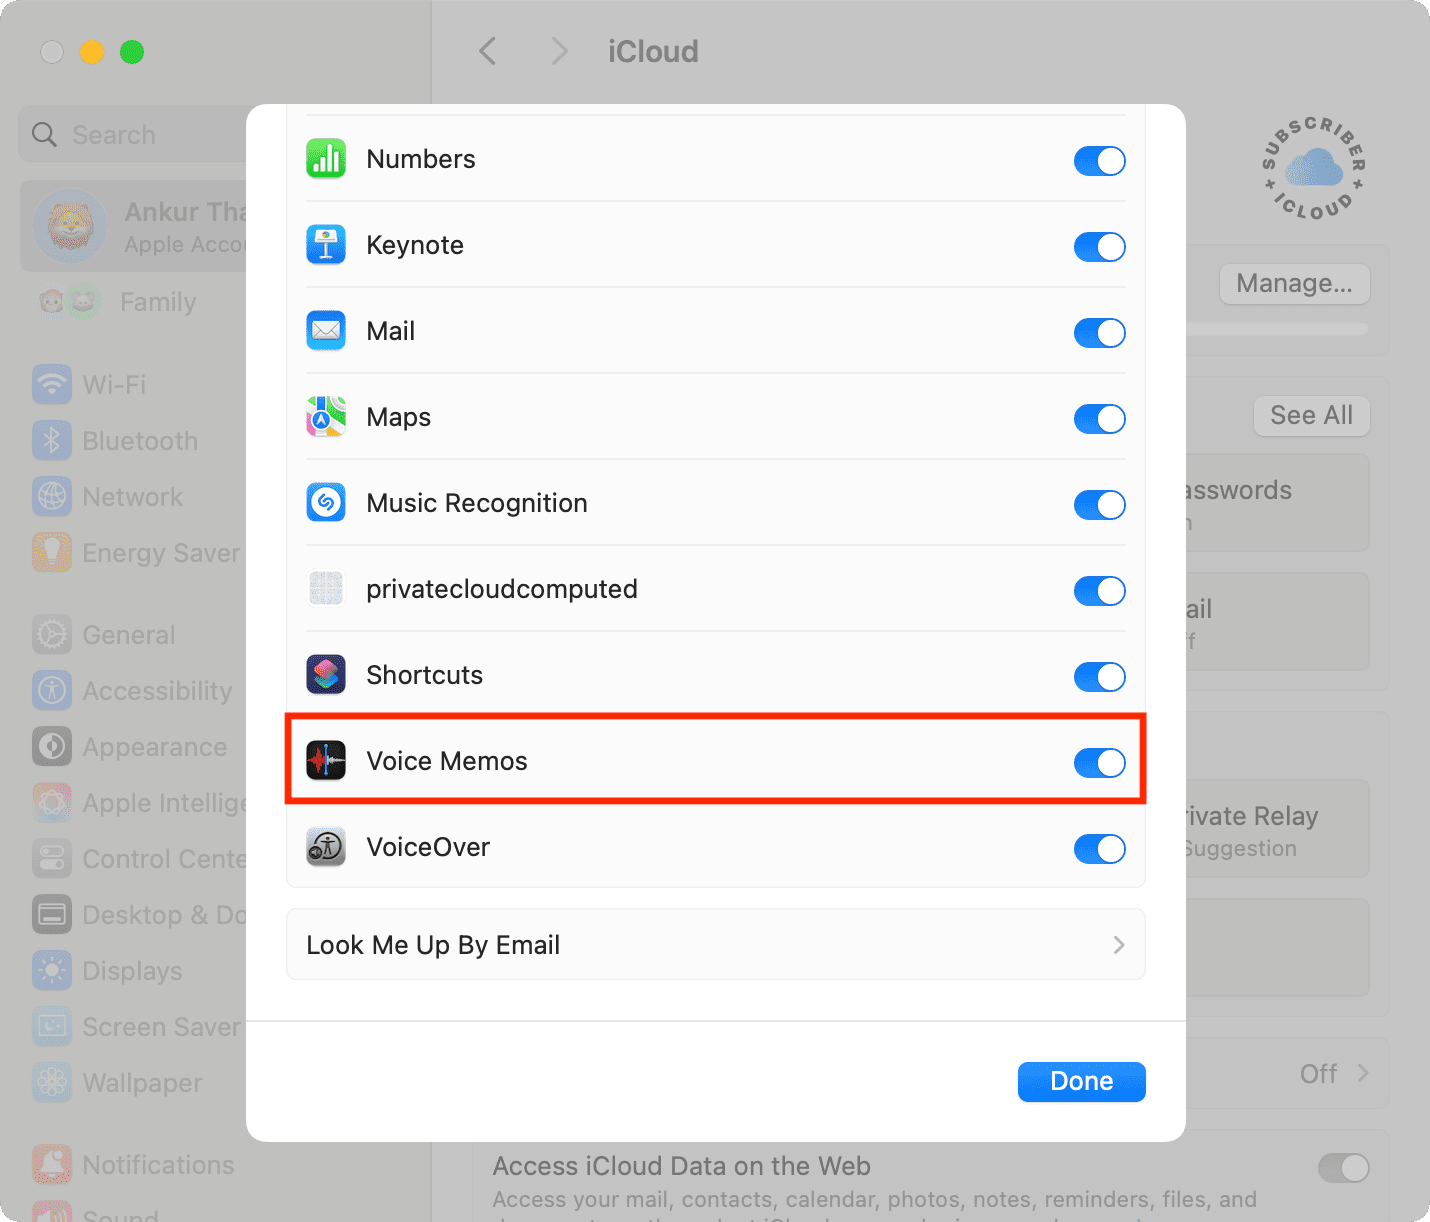
- On your iPhone, open Settings, tap [Your Name] > iCloud, and turn on Voice Memos.
- On your Mac, sign in with the same Apple Account, launch Voice Memos, and let your recordings sync automatically.
- Select the recordings you need and export or save them to your preferred folder if you want separate local copies.
Method 3. Transfer Recordings Using iCloud Drive
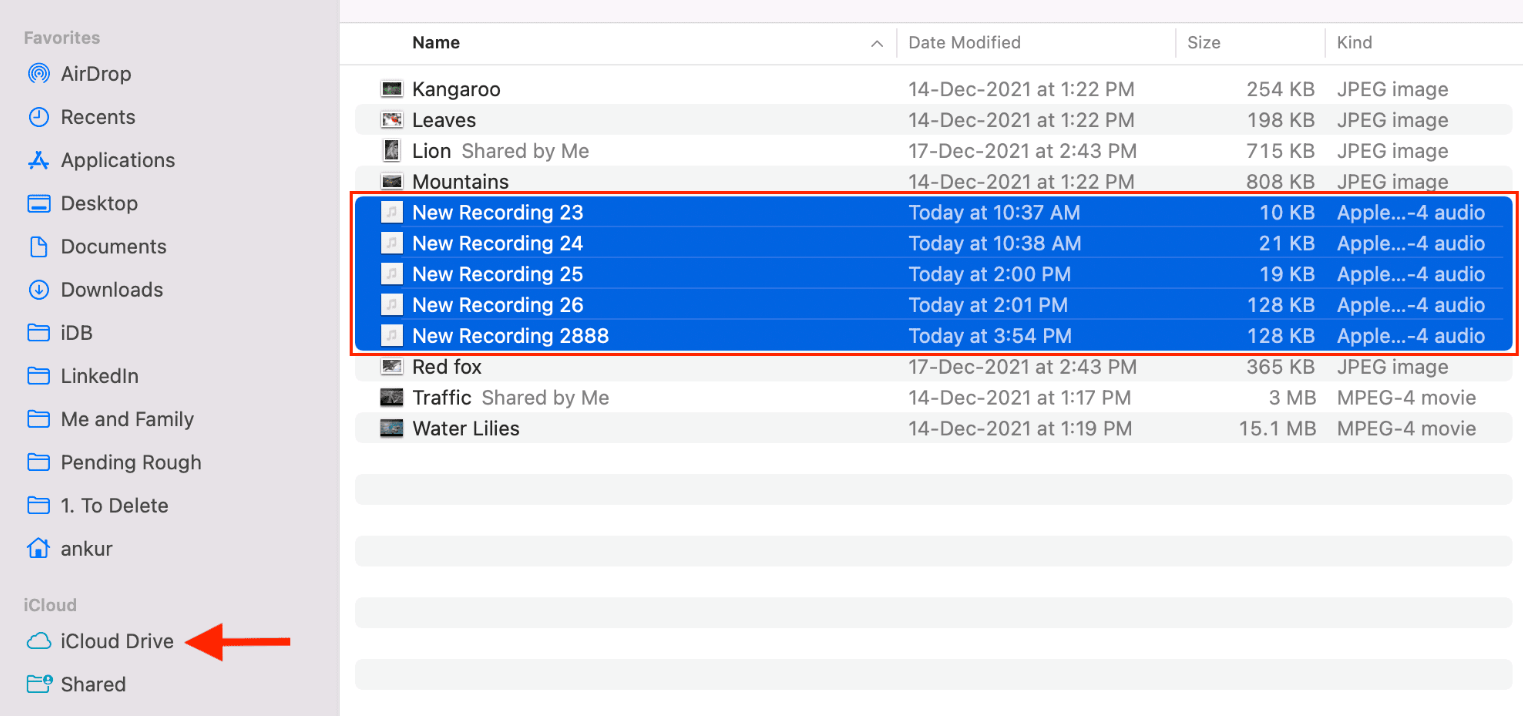
You can also use iCloud Drive to transfer audio and video recordings from your iPhone to your computer. Unlike automatic Voice Memos synchronization, this method allows you to manually upload selected files and access them through a browser or the iCloud Drive folder.
Steps to Transfer Recordings Using iCloud Drive:
- Open the Voice Memos app or Photos app on your iPhone.
- Select the recording or video, tap Share, and choose Save to Files.
- Select iCloud Drive as the destination and save the file.
- On your computer, open iCloud.com and sign in with the same Apple Account.
- Open iCloud Drive, locate the recording, and click Download to save it to your computer.
Method 4. Import Recordings Using the Windows Photos App
Windows users can also use the built-in Photos application to import videos and photos directly from an iPhone. This is a convenient option if you prefer a graphical interface instead of manually browsing folders.
Steps to Import iPhone Videos Using Windows Photos:
- Connect your iPhone to your PC via USB, unlock it, tap Trust if prompted, and open the Photos app.
- Click Import, select your iPhone, and wait for Windows to detect the available media files.
- Select the recordings you want to import and choose a destination folder.
- Click Import to transfer the selected files.

2. Bonus: Directly Record iPhone Screen on PC with Swyshare Recordit
If you frequently capture tutorials, gameplay, app demonstrations, or online content on your iPhone, transferring existing recordings may not always be the most convenient solution. Instead, you can record your iPhone screen directly on a computer using Swyshare Recordit.
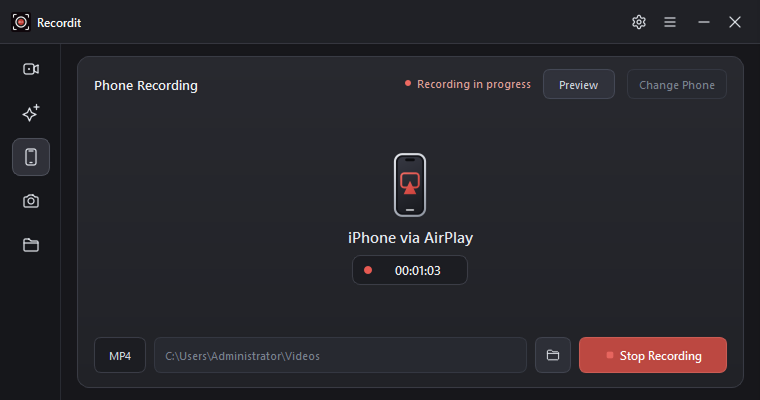
Swyshare Recordit is a screen recording tool designed to capture on-screen activities on your computer. By connecting and mirroring your iPhone screen to your PC, you can record iPhone activities directly on a larger screen without having to rely on your iPhone’s built-in screen recording feature.
Steps to Record iPhone Screen on PC with Swyshare Recordit:
- Download and install Swyshare Recordit on your Windows PC.
- Connect your iPhone to the computer via AirPlay and follow the software’s instructions to mirror or display your iPhone screen on the PC.
- Open the iPhone application or content you want to capture, then start capturing your iPhone screen with Recordit.
- When finished, stop the recording and find the saved video on your computer.
3. Conclusion
Importing recordings from an iPhone to a computer is an effective way to back up important files, manage your media collection, and free up valuable iPhone storage. Whether you prefer using a USB cable, AirDrop, iCloud Drive, or the Windows Photos app, there are several convenient ways to transfer existing recordings to your computer.
However, if you regularly need to capture iPhone screen activities, transferring recordings afterward may not be the most efficient workflow. In this case, Swyshare Recordit is worth considering. It allows you to record your iPhone screen directly on your PC, making it easier to capture tutorials, gameplay, demonstrations, and other on-screen activities. If you want a convenient way to record and manage iPhone screen videos on your computer, give Swyshare Recordit a try!