How to Set Video Recording Limit on Android?

Recording videos on an Android device is easy, but managing long recording sessions can sometimes be challenging. Whether you’re capturing memorable moments, recording tutorials, or saving screen activities, you may want your phone to stop recording automatically after a certain period. A recording limit can help prevent oversized video files, conserve storage space, and avoid unnecessarily long recordings. However, Android devices don’t all offer a built-in option to set a maximum recording duration. In this guide, we’ll explore practical ways to set video recording limits on Android and introduce an advanced tool as an alternative for longer PC-based screen recording sessions.
Part 1. How to Set Video Recording Limit on Android?
Depending on your Android device, camera application, and recording method, you can use different approaches to control how long videos are recorded. Here are some practical methods to try.
Method 1. Check the Default Camera App Settings
Some Android manufacturers provide additional video recording controls in their default Camera apps. Before installing another application, check whether your phone supports a recording duration limit.
Steps:
- Open the Camera app on your Android phone.
- Switch to Video mode and tap the Settings (gear) icon.
- Look for options related to video duration, recording limits, or video settings.
- If a maximum duration option is available, select your preferred recording time.
- Return to the camera and start recording to test the setting.
- Start screen recording and let the application stop automatically when the configured limit is reached.
Method 2. Use a Third-Party Camera App
If your default camera app does not support recording limits, a third-party camera application may provide more flexible recording controls.
One option is Open Camera, a popular Android camera app with configurable video settings.
Steps:
- Open Google Play Store and search for Open Camera.
- Install and launch the application.
- Grant the necessary camera and microphone permissions.
- Open the app’s video settings and review the available recording options.
- Configure the supported video settings according to your needs.
- Start recording and check whether your preferred recording controls are available.
Method 3. Reduce Video Resolution and File Size
Sometimes, the main reason for setting a recording limit is to prevent videos from taking up too much storage. In this case, reducing video quality can help you record longer without filling your phone’s memory too quickly.
Steps:
- Open your Android Camera app, switch to Video mode and open the video settings.
- Find the video resolution and frame rate options.
- Select a lower resolution, such as 1080p or 720p, instead of 4K.
- Choose a lower frame rate if appropriate.
- Start recording and monitor your available storage.
Method 4. Use a Third-Party Screen Recorder
If you want to limit screen recording rather than camera recording, consider using a third-party screen recorder.
Some Android screen recording applications offer additional controls, such as scheduled recording, recording duration settings, or automatic stopping.
Steps:
- Open Google Play Store and search for an Android screen recording application.
- Install an app that supports duration controls.
- Open the application and grant the required permissions.
- Explore its settings to find the recording duration or automatic stop option.
- Set your preferred recording time if supported.
- Start screen recording and let the application stop automatically when the configured limit is reached.
Feature availability varies between applications and Android versions. Always test the settings with a short recording before starting a long session.
Part 2. Bonus: Record Android Screen on PC Without Limits Using Swyshare Recordit
If you frequently record Android screen activities, the built-in recorder may not provide enough flexibility. Recording limits, limited storage, battery consumption, and device overheating can make long recording sessions inconvenient.
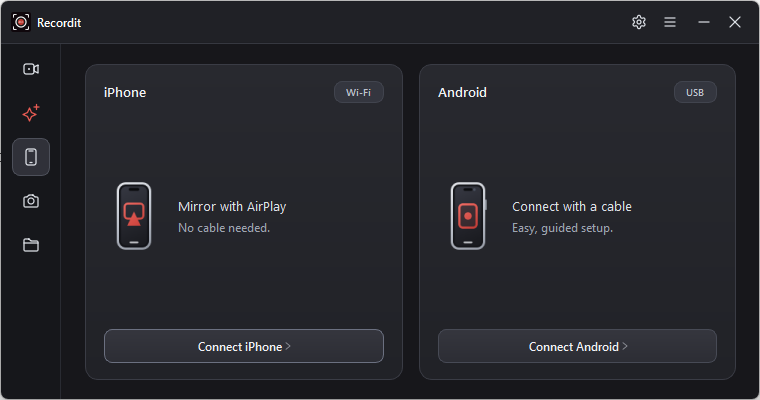
An alternative is to use Swyshare Recordit, a desktop screen recording tool that allows you to capture screen activities directly on your computer. Instead of depending entirely on your Android phone’s recording capabilities, you can use your PC for longer and more manageable recording sessions.
Steps to Record Android Screen on PC with Swyshare Recordit:
- Download and install Recordit on your Windows or Mac device, then launch it.
- Connect your Android device to your PC using a USB, then follow the mirroring software’s instructions to display your phone screen on your computer.
- Click the Record button to capture your Android screen activities displayed on the PC.
- Stop recording when finished and find thre recorded Android screen videos in the “Files” tab.
Part 3. Conclusion
Setting a video recording limit on Android can help you manage recording duration, storage consumption, and device performance. You can start by checking your default camera settings, trying a third-party camera app, reducing video resolution, or using a screen recorder with automatic stopping features.
However, if you regularly need to capture long Android screen sessions, recording directly on your phone may not be the most convenient solution. Swyshare Recordit provides a practical PC-based alternative, allowing you to record mirrored Android screen activities with flexible settings and save videos directly to your computer. If you want more control over your recording workflow without relying on your phone’s built-in recording limits, Recordit is worth considering.